Why thus not have a side by side comparing WIP of those ?
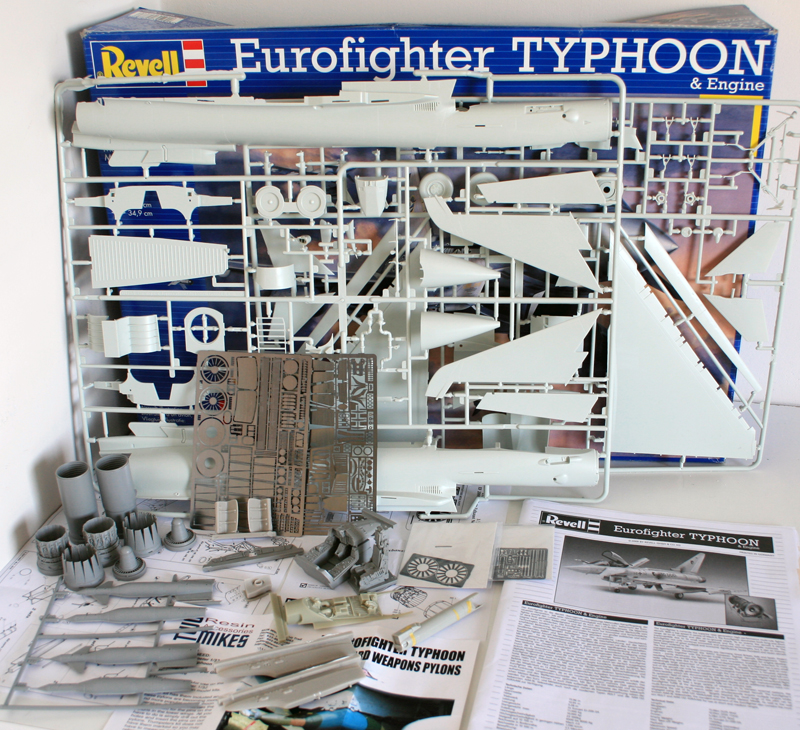
Both will have many aftermarkets:
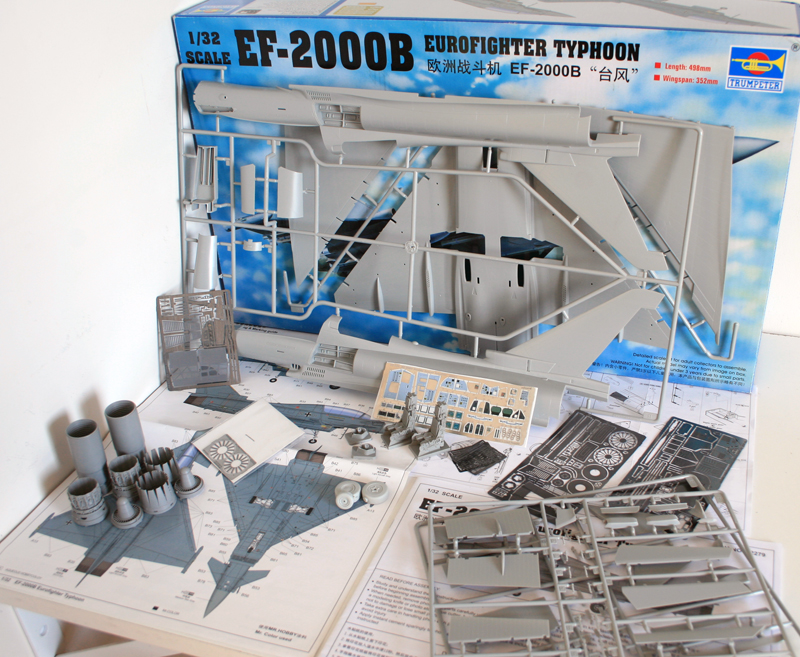
Trumpeter:
Eduard exterior PE, prepainted eduard interior PE, Aires Nozzles, Mastercaster wheels, 2 Aires bang seats. The configuration planned is primer painted Saudi Typhoon flying under the colours of the RAF with minimal AA load.
Revell:
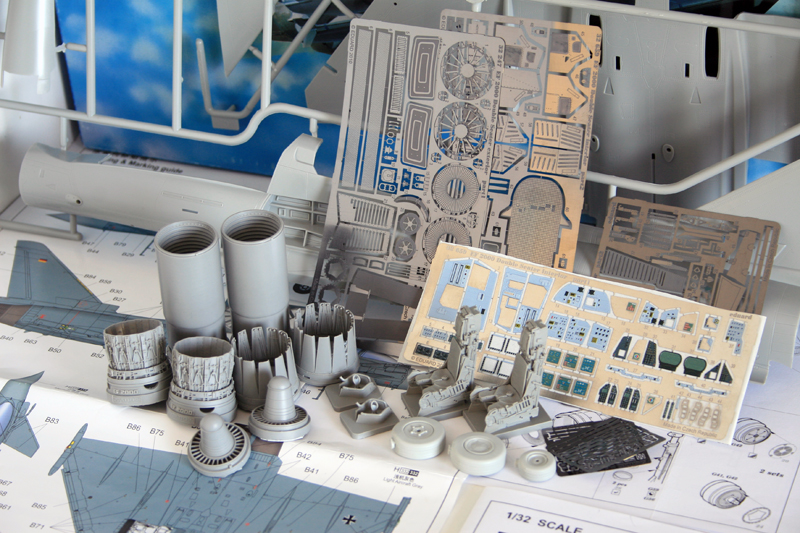
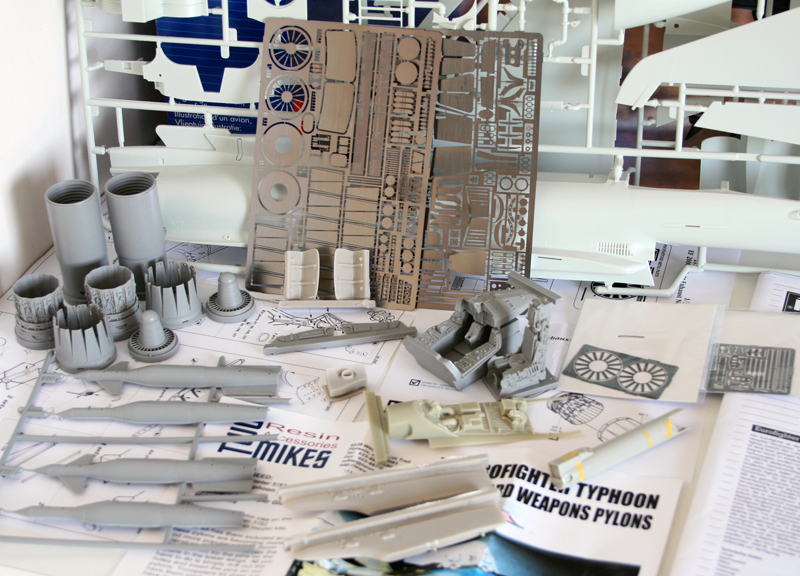
Eduard Big Ed, Aires Nozzles, Aires pit, 2Mikes APU, inner pylons and intake cover.
The aircraft will be RAF, hopefully with 6 LGBs and the centerline flir pod. Still need to find 4 LGB. I stole 2 from a revell tornado kit, I'll probably get Flightpath to the rescue unless I can trade a few more tornado's LGB.
I'm seriously thinking about replacing the gear with white metal SAC but I have trouble finding them stocked in Europe.
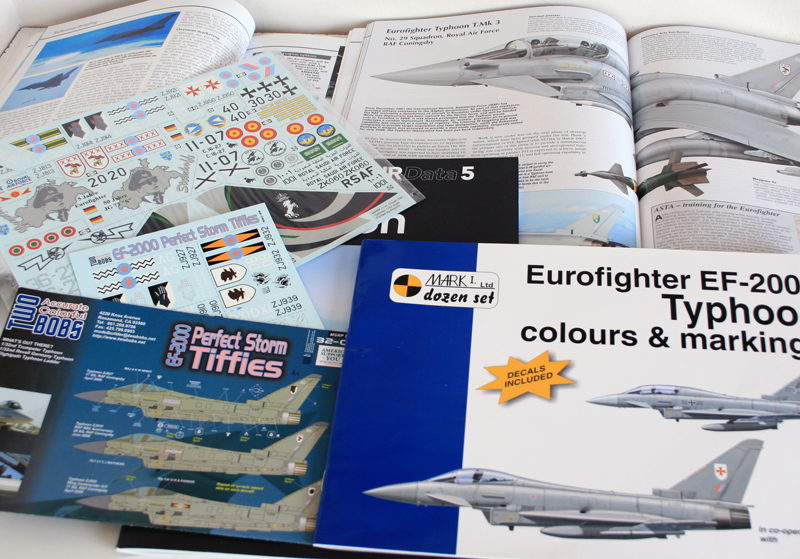
Decals and documentation will be provided by 2bobs & 4+. Andy Evans book's is the real paper reference worth it. The rest will come from the web.
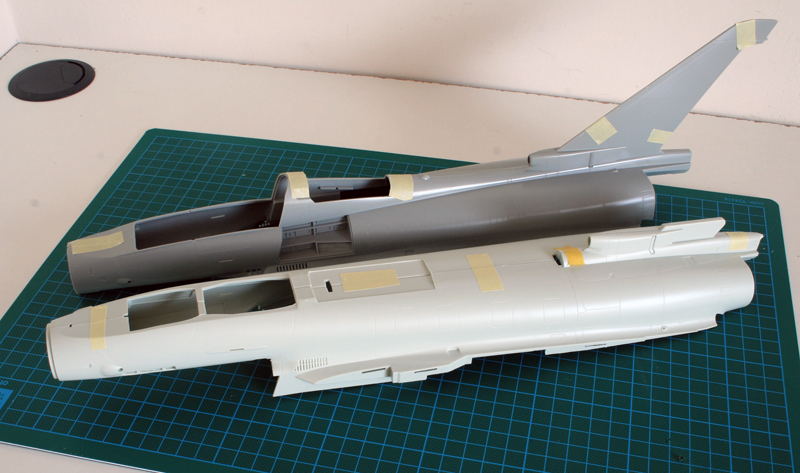
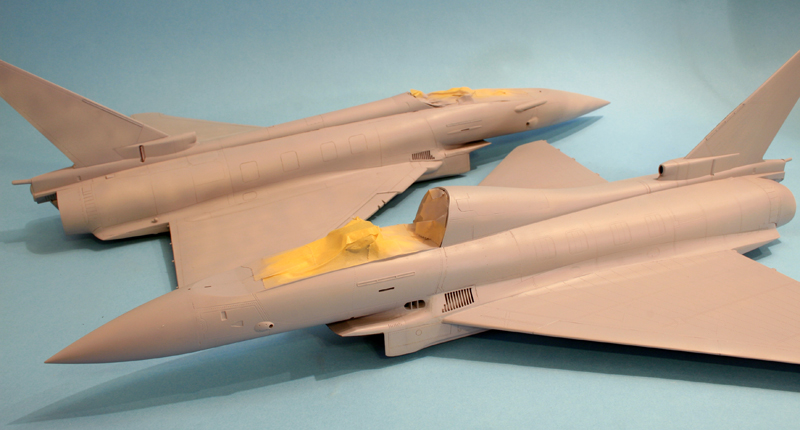
Let's first make a bit of comparison:
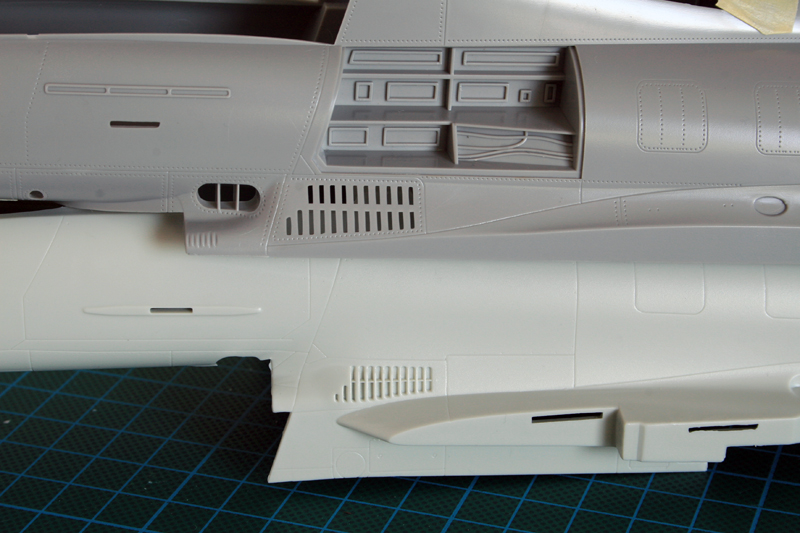
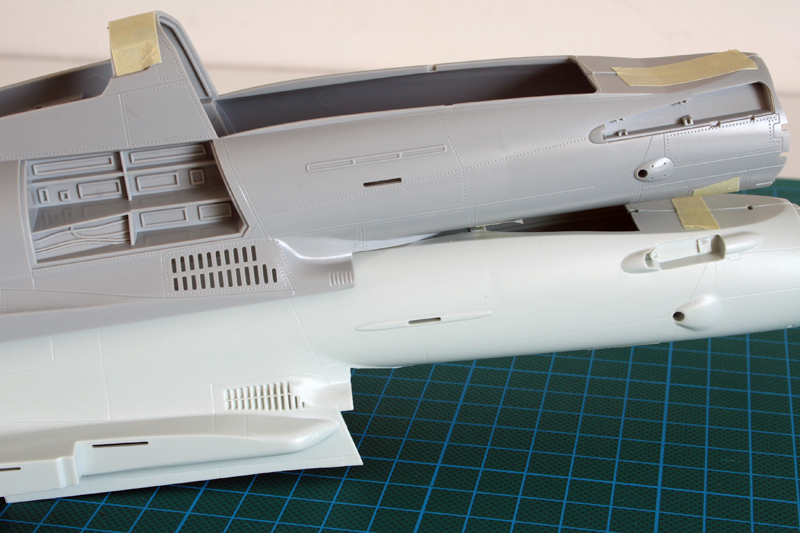
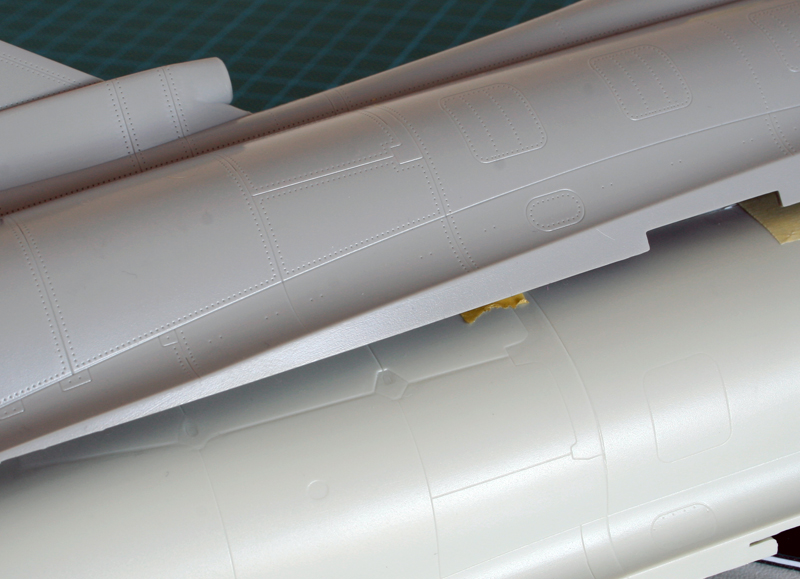
The two models are quite different, Trumpy sports many rivets, Revell has much less surface details, the plastic (IMHO) is better on trumpeter model than revell, but we all know accuracy is better on the revell side. Yet the lack of surface details bothers me a bit and that will be addressed later on.
Both cockpits are tame and aftermarkets will be more than welcome there.
I elected to stay away from the gear bays, and will detail the kit's later on as well.
The big challenges in both cases, will be the intakes. I'll avoid the issue on Revell's thanks to 2Mikes covers and depending on what I can manage, i'll probably leave the trumpeter's intake open.
The model are cut quite different but it seems they'll both be complicated to assemble and putty will certainly be needed on both side, not that I care much :)
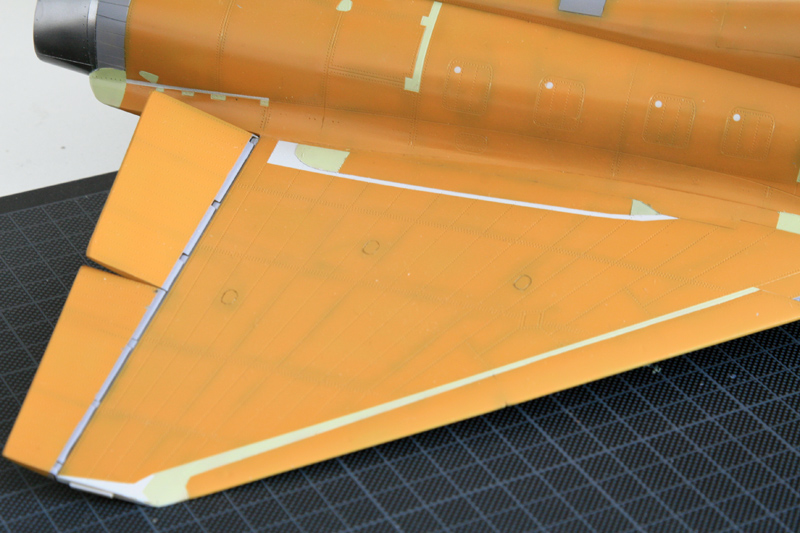
trailing edge flaps and rudder will need some sanding to be thinner.
Gearbays
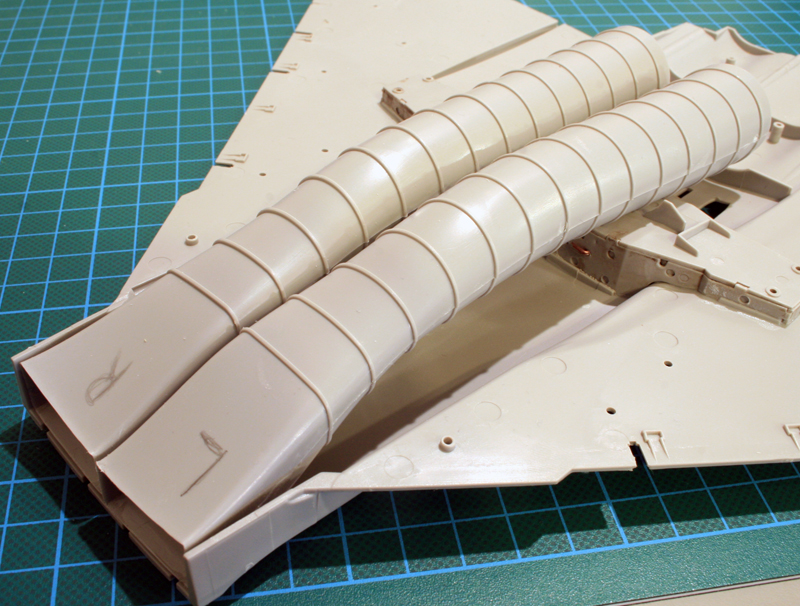
Work started on the gear bays of both kits. Design is completely different with more depth on the revell side. Trumpeter is way flatter and I must say I prefer Revell's way, although there are some areas lacking much details, screaming for detailling.
But nothing can be seen once finished, so I never quite detail that in depth either
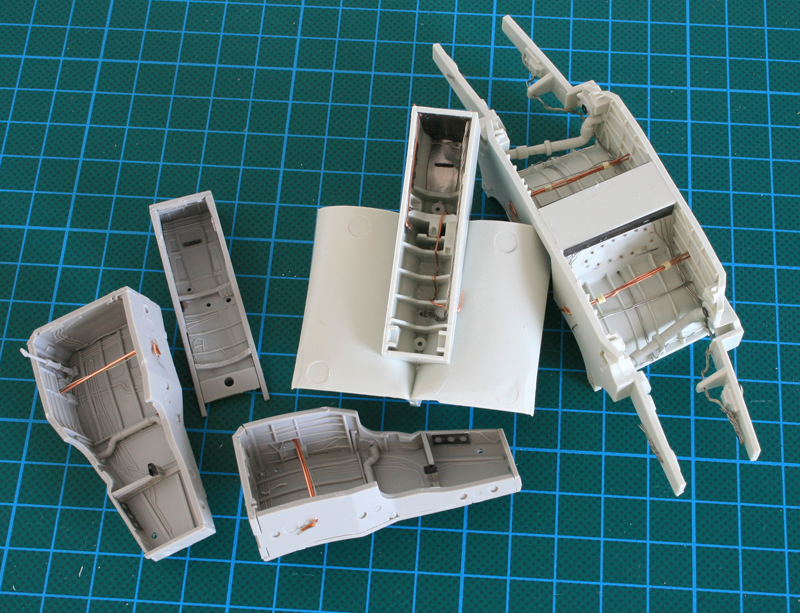
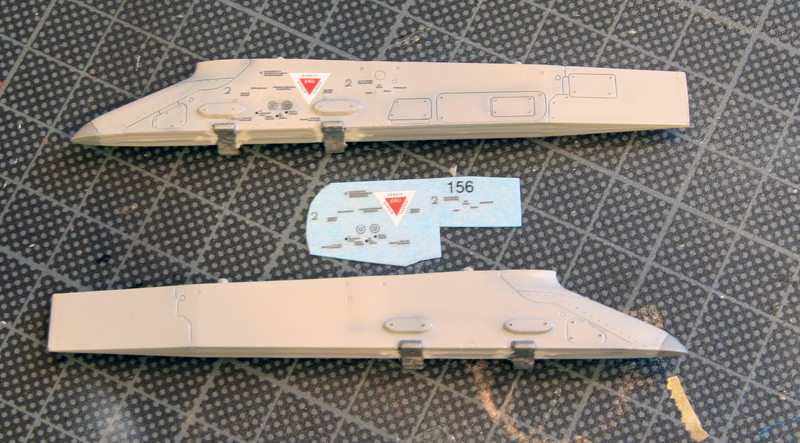
Left trumpeter, right revell's
Closup on revell's detailling. That's an area that can be seen relatively easily on the model, so I added some bolts there.
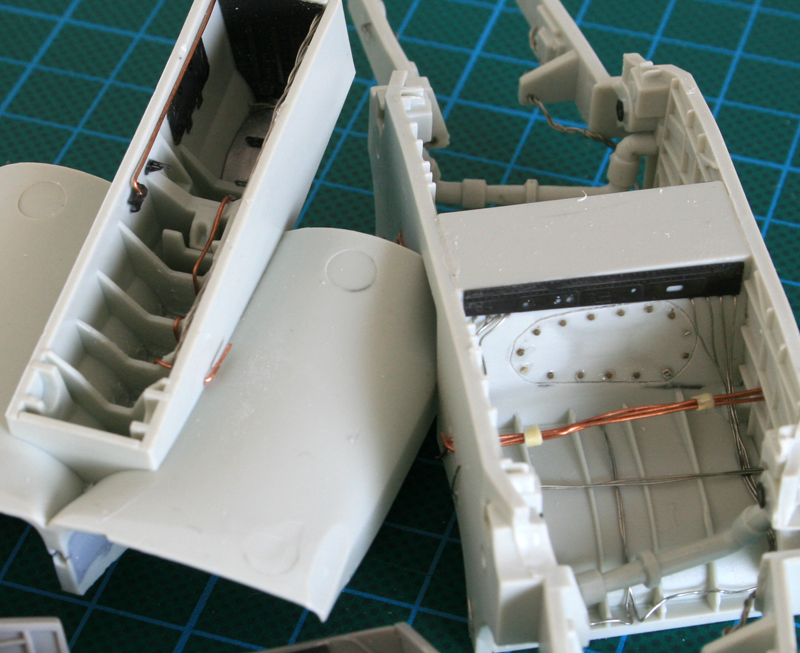
Luckily Eduard Pe add some more details as well. They will all get a coat of H338, which is close enough to the very light grey colour in there.
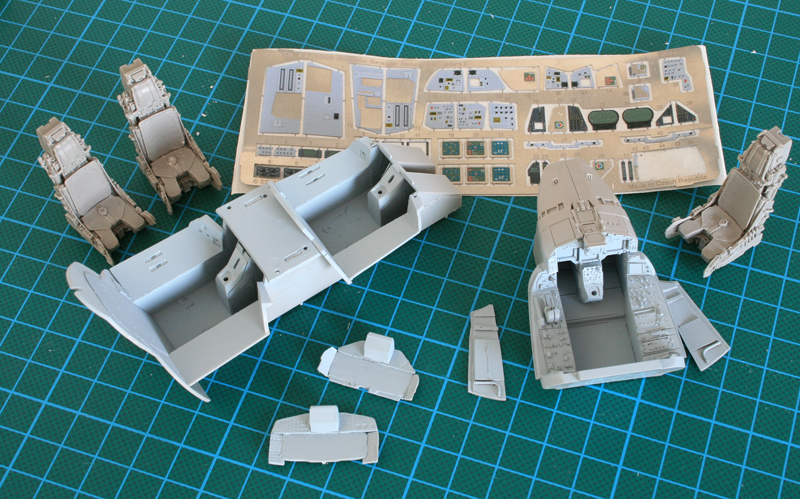
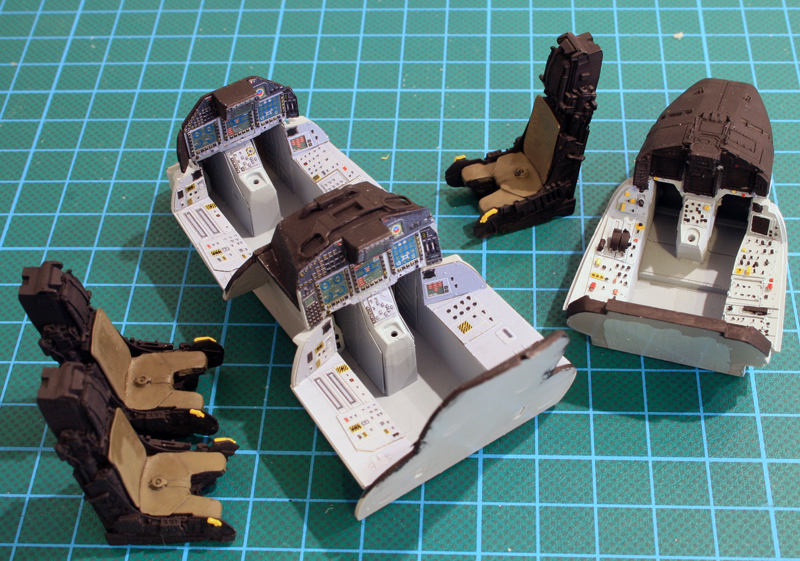
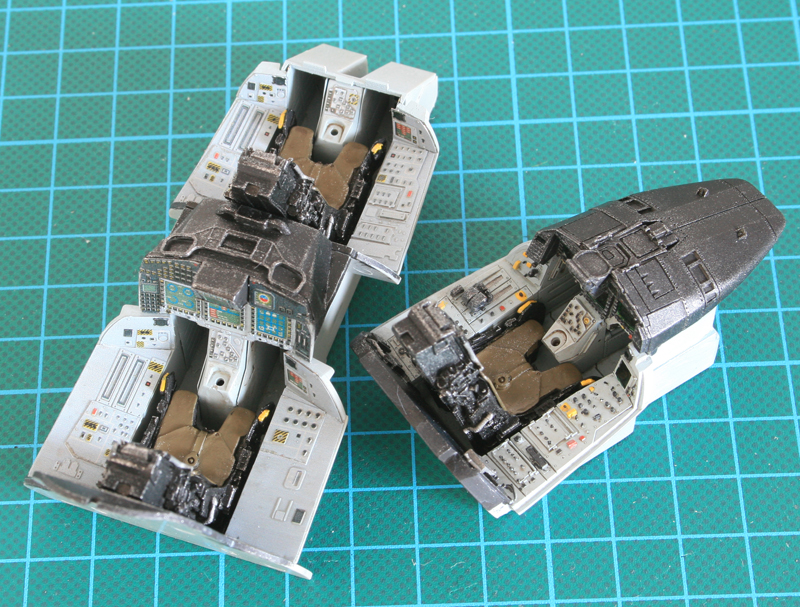
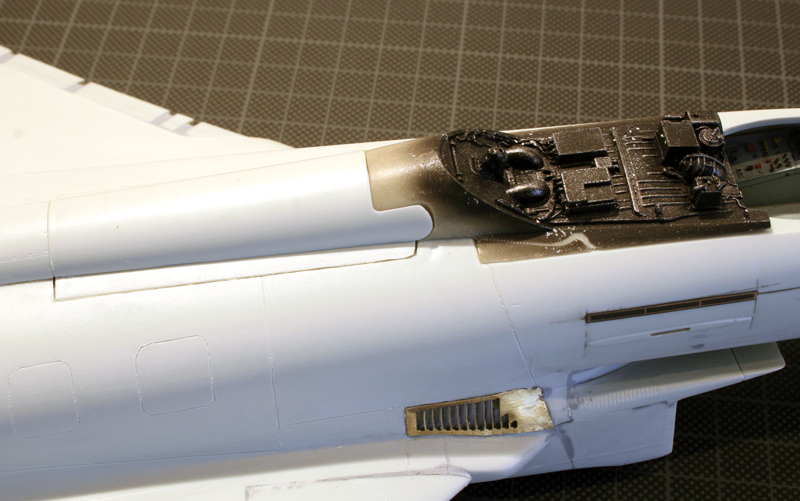
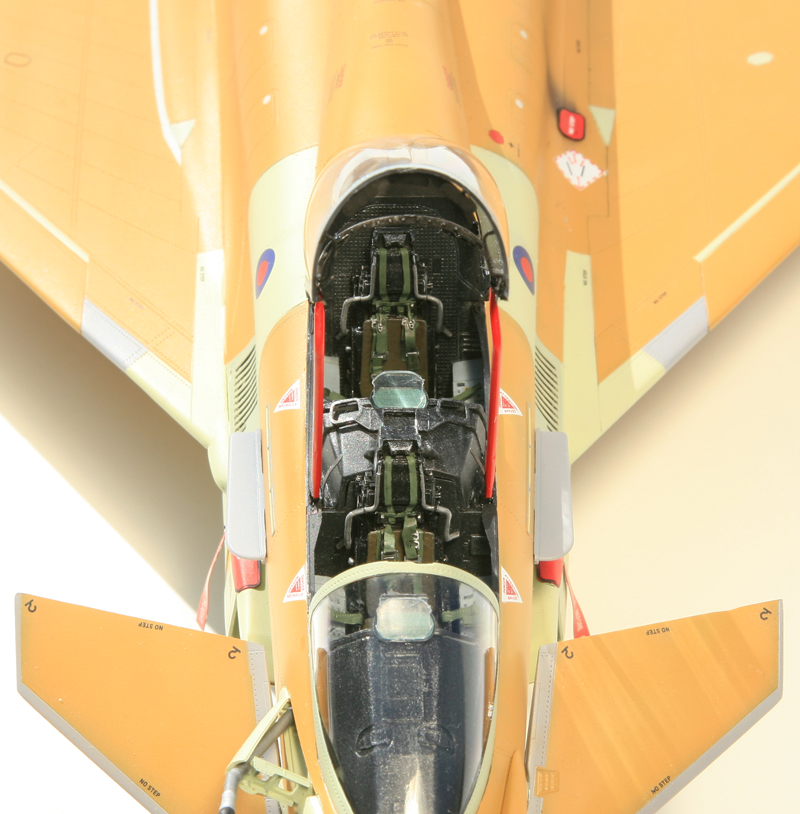
Cockpits
The cockpits are completely different. Aires resin is gorgeous and I wonder how they made those tiny switch bat molded !! level of details IMHO is outstanding. A joy to paint.
On the other hand, I really never was a big fan of the colour PE for cockpit,s it kills the painting process. But I reckon, they are way nicer than the original details + decals planned for the trumpy kit, especially in that scale. So all details were sanded off first.
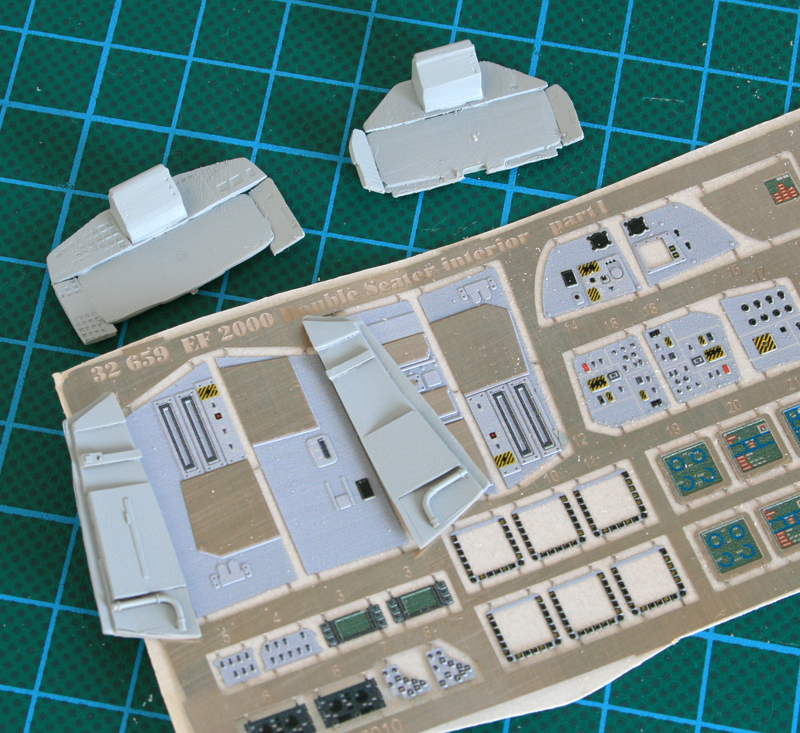
Matching the colours was another challenge. They used a very weird light blue grey for the pit. Although I read that it's supposed to be dark admiralty grey.
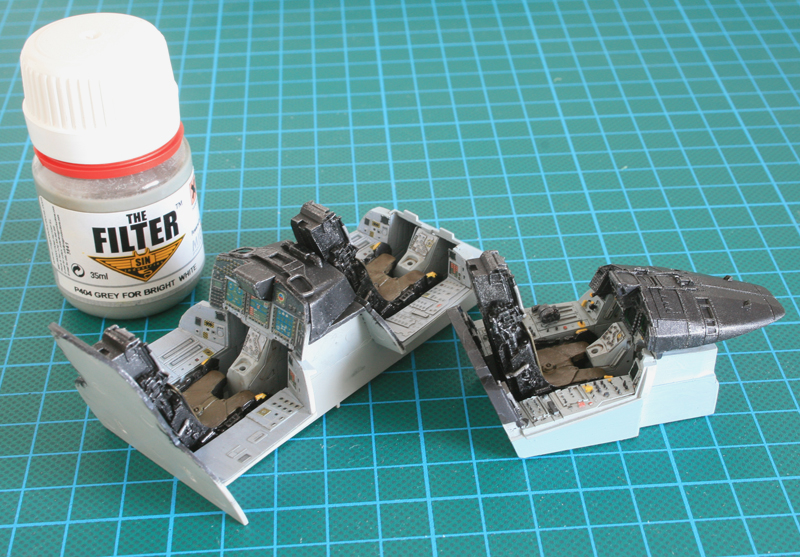
But having the background the right colour and the PE in blue will spoil the effect. So I decided to use a previous mix for my Flanker base colour, added a tiny frop of H317 and both pits.
The match isn't bad at all to my eyes.
Once the PE is in place, I'll probably add a dark grey filter to darken it all and get closer to dark admiralty grey.
Still a bit raw but will be subdued at later stages.
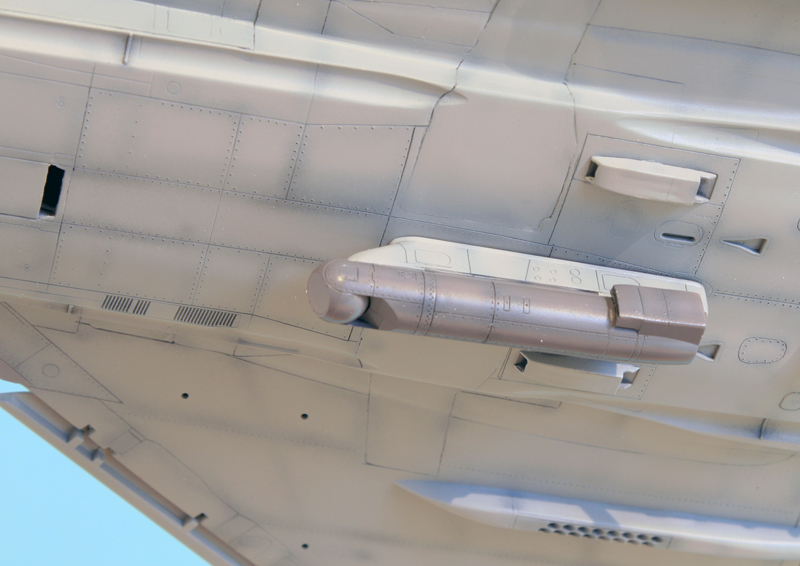
The initial idea is to get rid of the famous Revell's intake problem with Two Mikes intake covers.
But I thought about what I wanted to use as weapon and I'll load it with a sexy load of 6 GBU. And then I though the gear is very tiny, especially the nose gear, I am not sure it could whistand the weight of the flightpath metal & resin bombs.
Beside, such an attractive load is screaming for an in flight display... mmmh
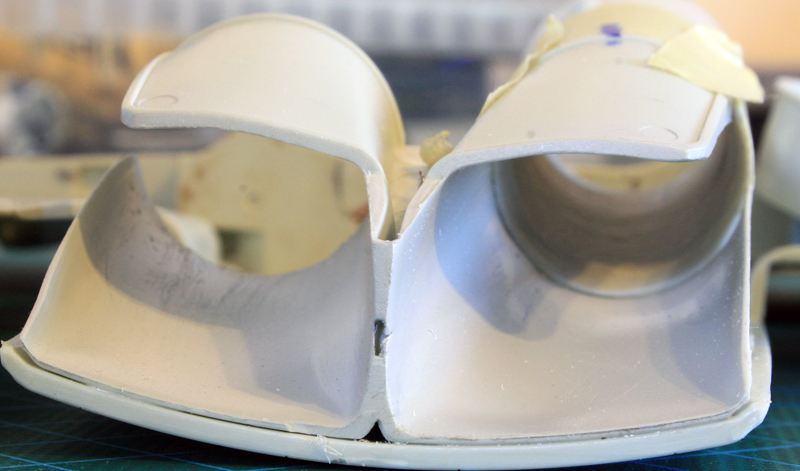
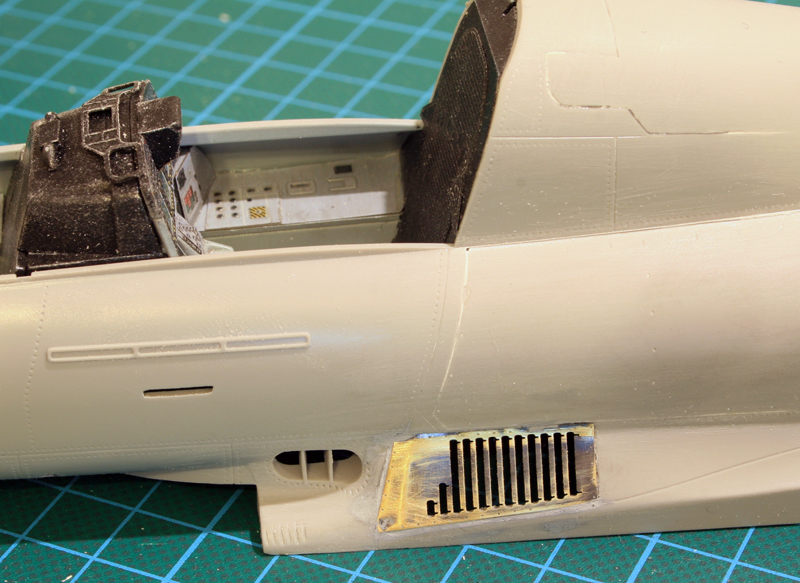
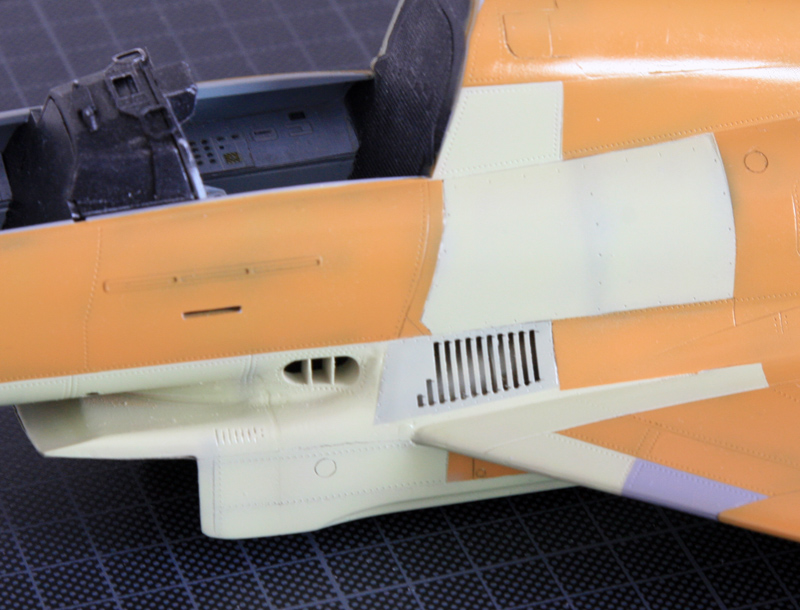
That means no intake cover ... So let's see what we can do about it.
First, the tunel is too short, I won't lenghten it all the way, but I need to at least extend it.
Second the front part side is provided bu the fuselage walls, not good. Especially so when the intakes louvres have been opened and the intake duct visible from outside... So that will have to be worked as well.
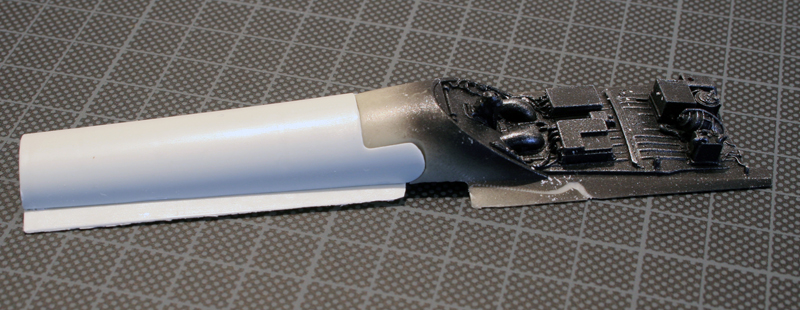
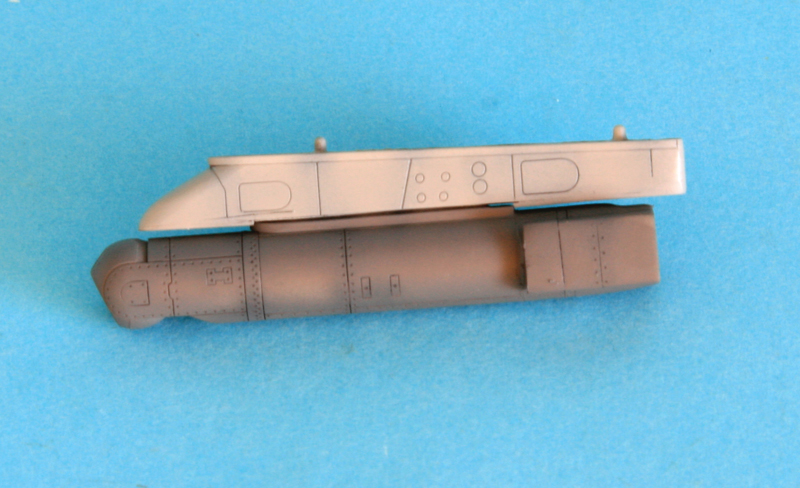
Finally the engine faces are really pitifull and will need to be redone as well. Luckily I can salvage the front part of the revell EJ-200 engine for that.
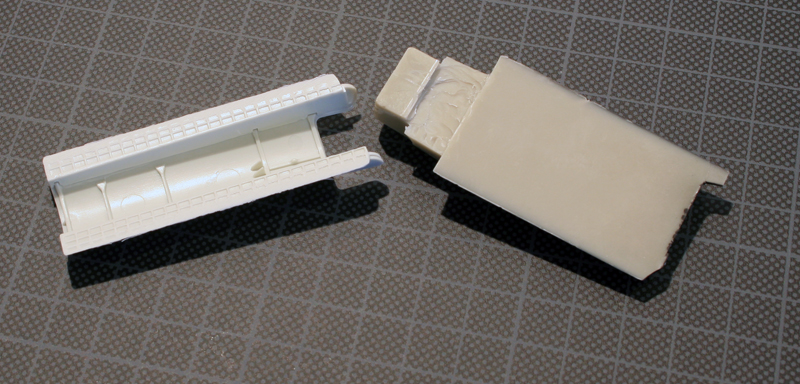
So I went looking for a fitting round intake tunnel and guess what I found one that may just need minor modification to fit. It's alcually wall electrical wiring tubing. the small parts to attach two tubes together, it's larger than the tubing and although the external diameter is spot on, the internal is just a bit too small, but since the walls are quite thick, they can be sanded just where needed :
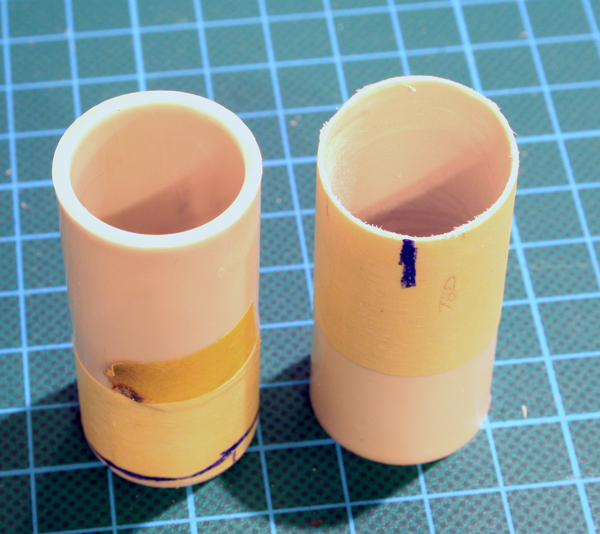
Left is the original part, right is the already modified one.
I simply thinned the inner edges and cut the front so the intake tunnel go up inside the fuselage.
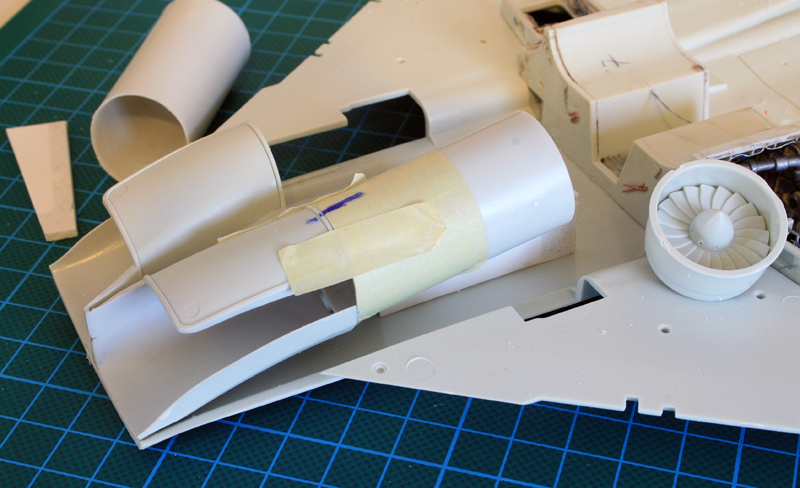
Of course, I will have to use putty in there and sand a bit.
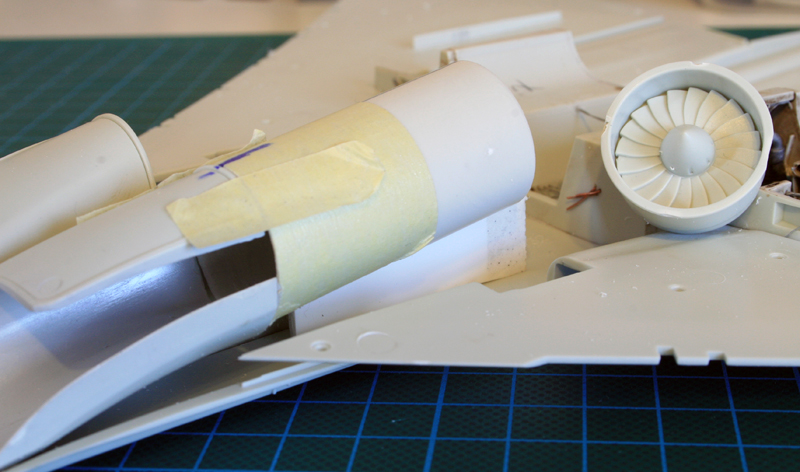
On the right you can see the engine face that I plan to use to close the intake tunnel. Some eduard Pe will be used to make it prettier.
It took me a while to get to this point, and that's a clue to the amount of putty and Sanding i needed
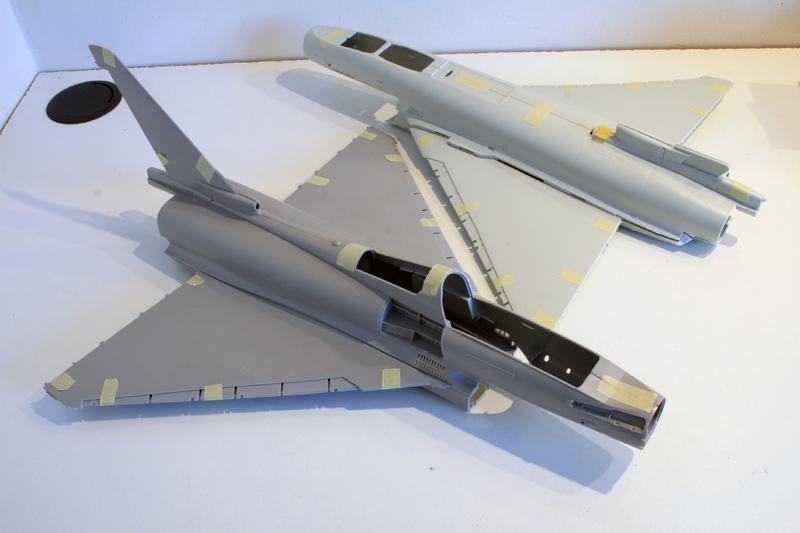
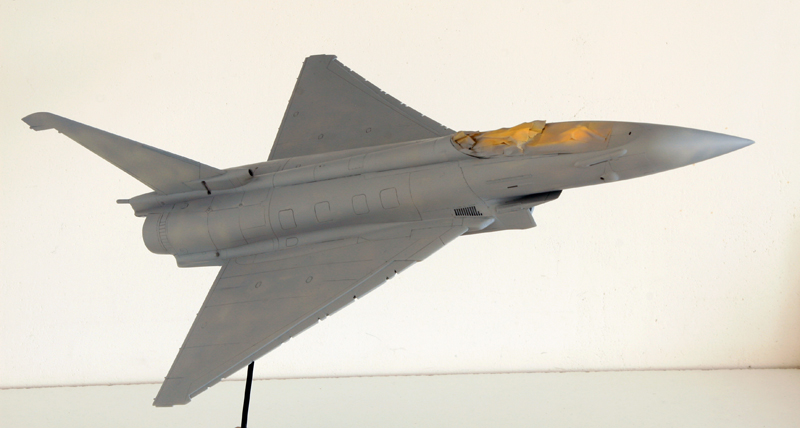
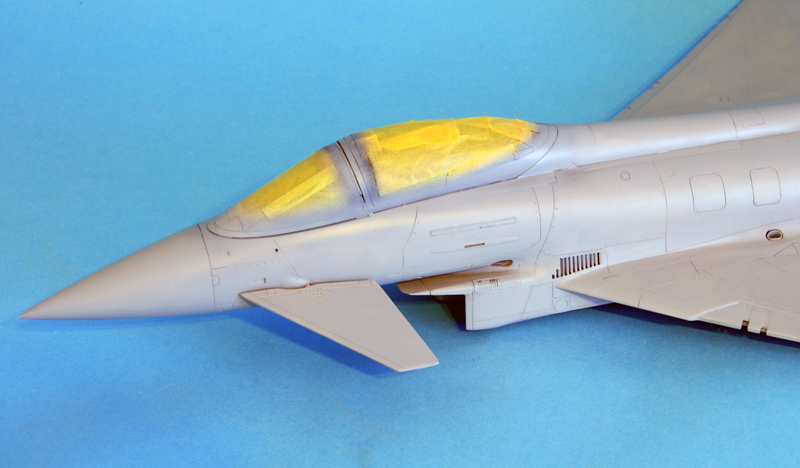
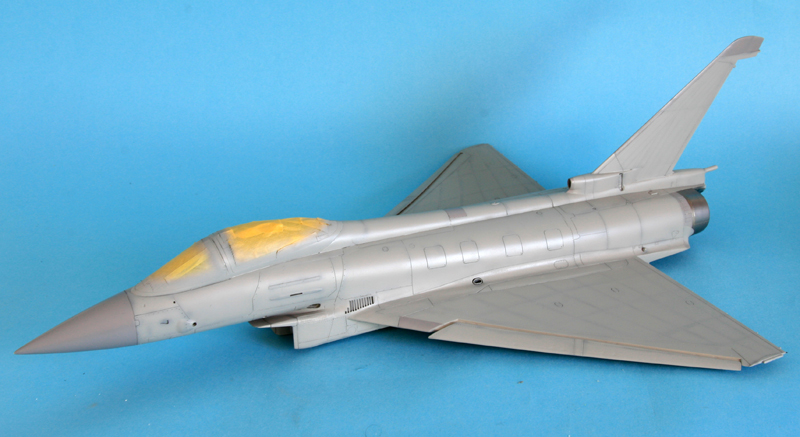
But both models are now primed and going through last fixup before starting to preshade and paint them.
The trumpeter wasn't so hard to get there, although the fit at the wing root and the intake isn't perfect, it's quite doable. Lots of sanding is required on the side of the intake though. I decided to make the vents smooth with the fuselage surface, so that gave me some extra work.
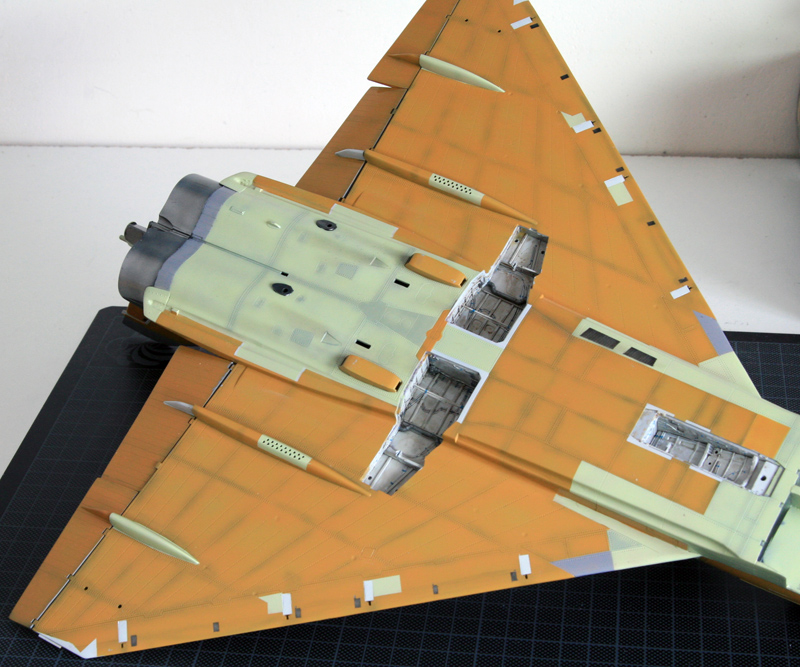
The LEF are a real pain to model in the UP position. Lots of putty & sanding on the upper and lower wings. Not so much problems for the closed airbrakes and the nose. The APU is not at the correct spot and I'll cover it with the eduard protection so it was filled and sanded.
The Revell is another story.
First I planned the internals to receive the support rod for the inflight display.
The fit of the closed airbrake is better if you smooth the inside face. The fit to the Aires resin part needs some putty as well and this needs to be carved to fit the fuselage (the instruction say to sand flat the bulge in the fuselage. But at the time, it sounded more complicated.
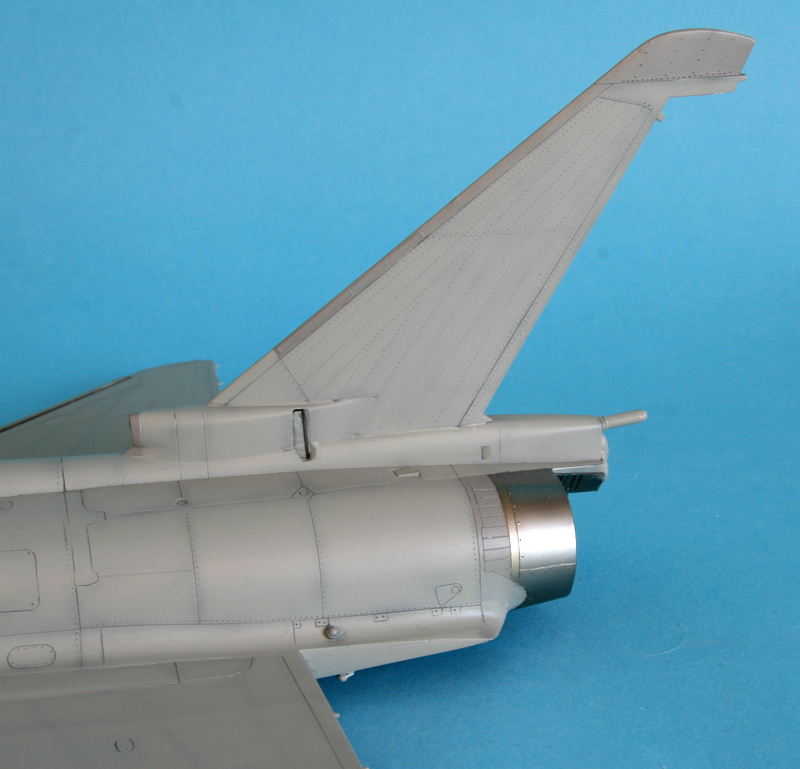
The APU is Two Mike's is really worth it if it has to stay uncovered.
The LEF will be down on this one, but the innards had to be filled and sanded smooth.
Since it's going to be in flight, the gear doors have to be closed. No big deal, except I was happy with the work I did inside before deciding to make it airborne. The nose door was shortened and fits very well closed, the main doors are a bit more tricky to fit but nothing serious.
Hopefully progress will be faster now with the best part ahead and the worse already forgotten :)
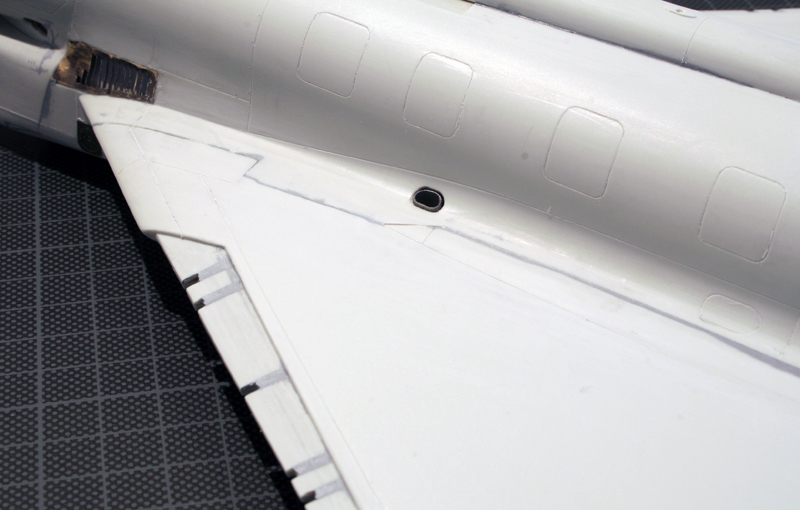
The primed revel model was further engraved and re primed.
Mainly wing details and rivets and small bits there and there on the fuselage.
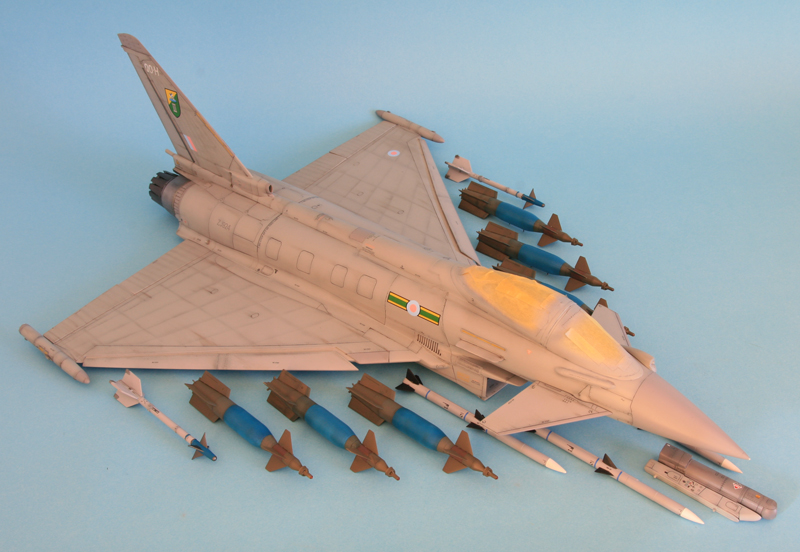
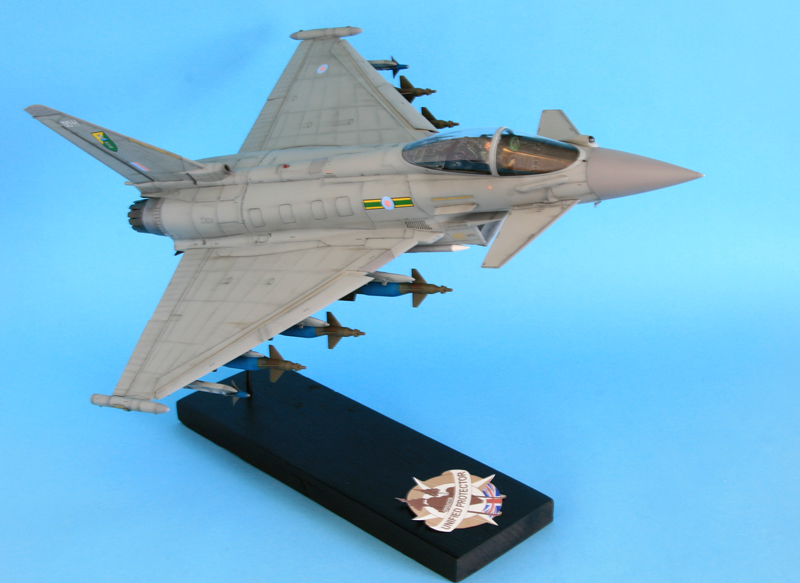
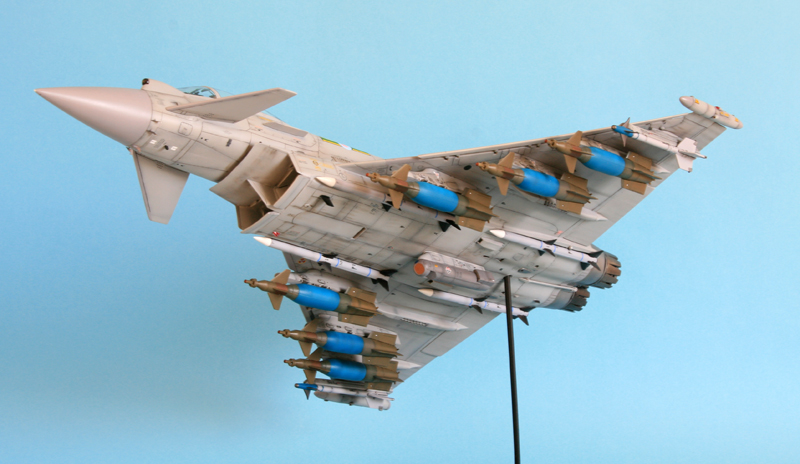
Dry fitting the pole for display, the idea is to show the aircraft in flight proudly showing off the future LGB load (6 of them) and the FLIR pod.
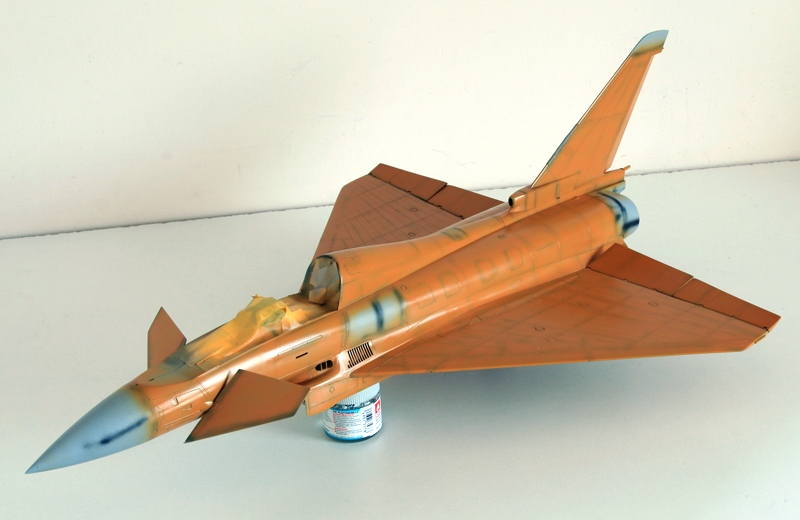
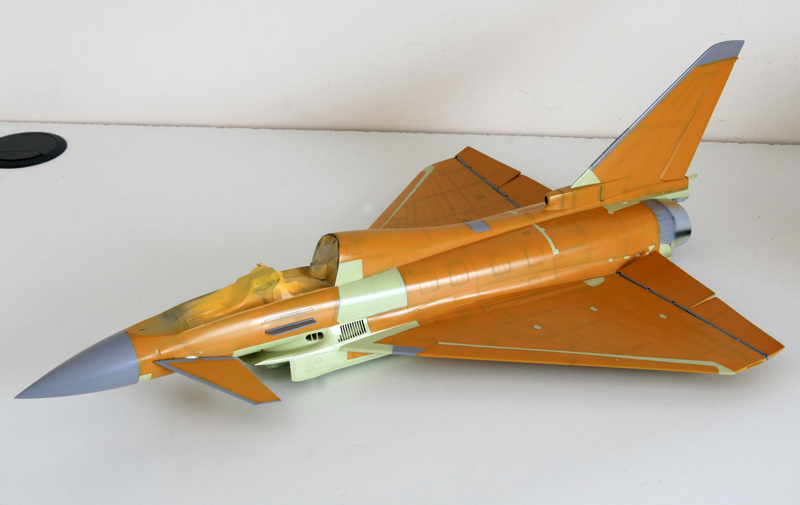
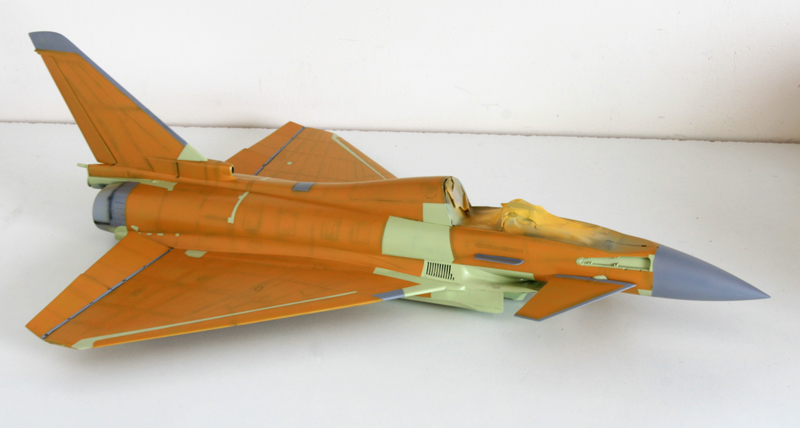
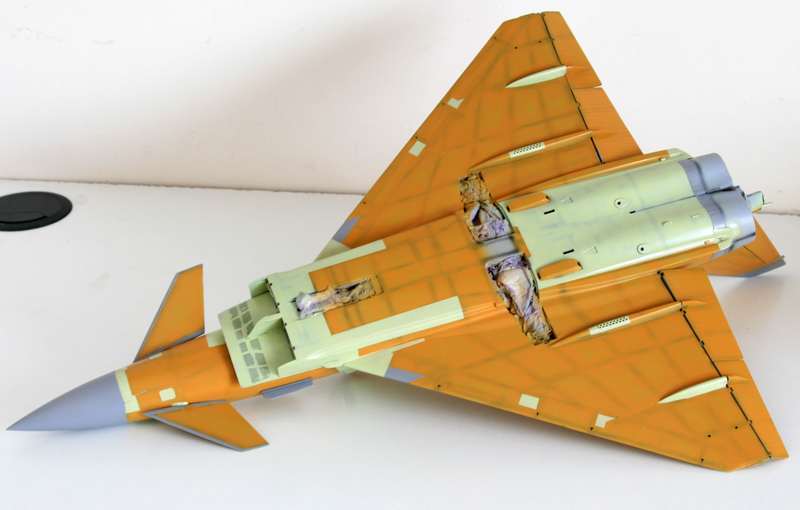
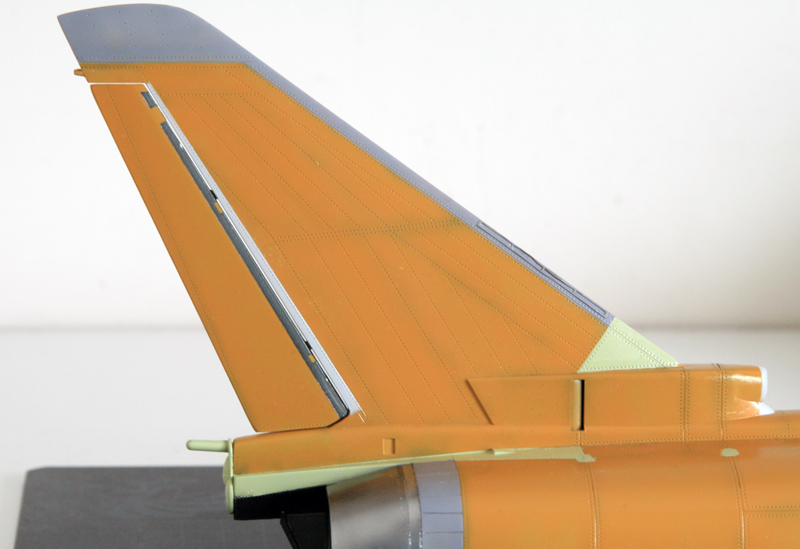
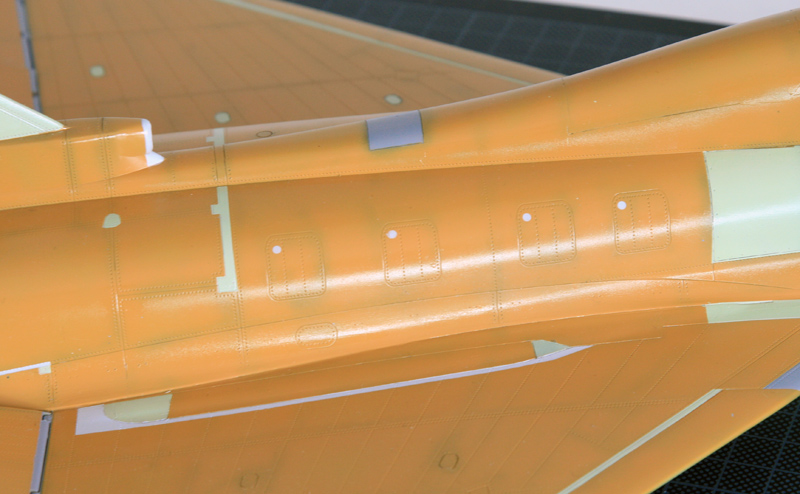
On the other side of the bench, the trumpeter was pre shaded with black and got his first coat of the brown orange primer colour. It's a mix of H44, H24, brown and white. The picture don't do the colour justice, it's close enough to my liking to the airliners pictures I have seen.
I feel I'm going to enjoy painting that one.
So I'll start by finishing the trumpeter model first:
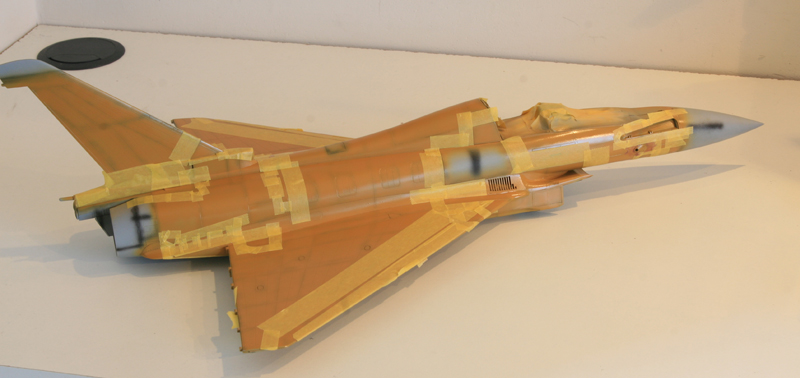
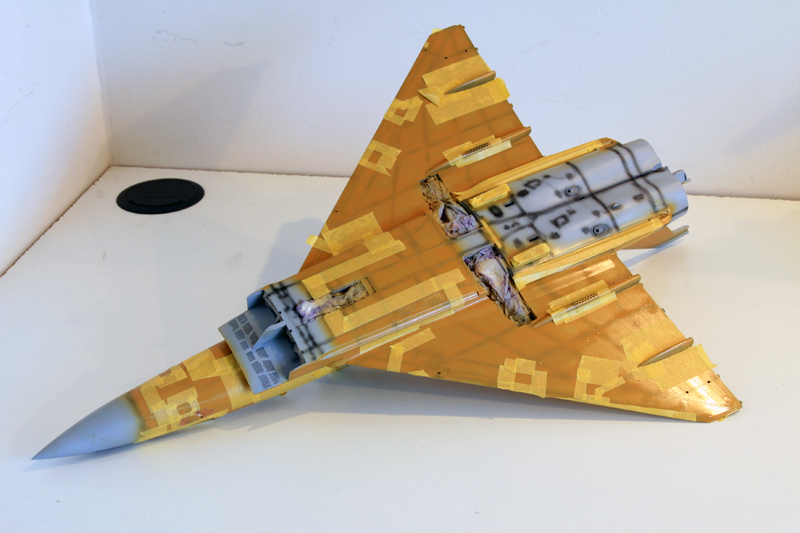
The primer paint scheme is taking up a lot of masking tape:
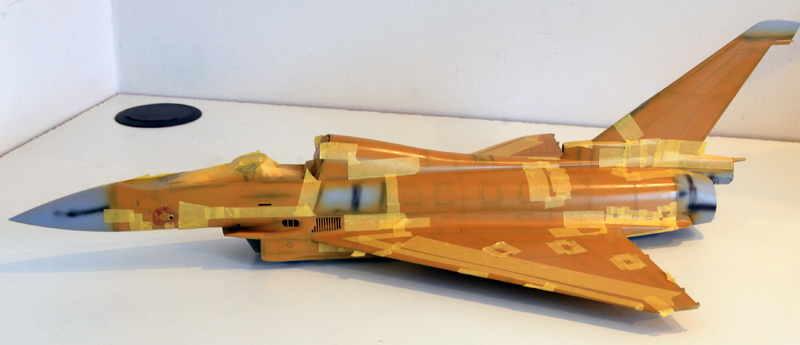
Then I applied first a coat (I messed it up by being too thick and spoiling the pre shading) of H74 Sky colour which I think is a perfect match from what I see on pictures, and then H306 for the 'unpainted' grey.
Some more detail paint on the aircarft in light grey, and some touch ups in the sky colour to darken a bit some panels there and there. I also sprayed alclads for the exhaust parts.
Then some modification from the Trumpeter parts:
I also made a poor attempt at rebuilding the chaff and flare containers on the outer pylons. Those are completely off in the box and they could use decent aftermarkets pylons. The revells are better but not quite as good as the pictures I use for references.
One done, one to go.
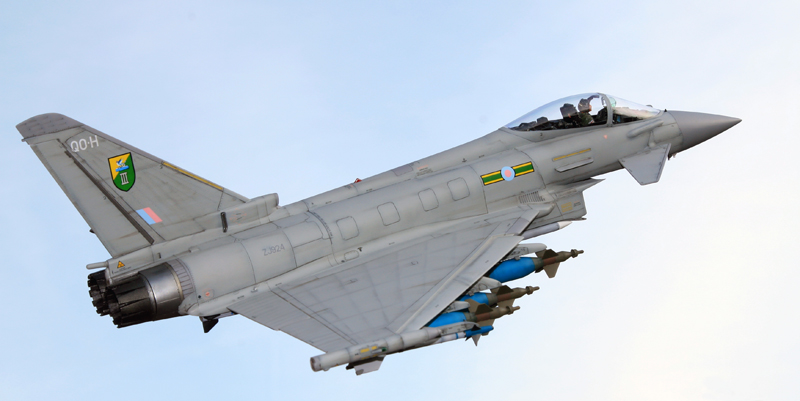
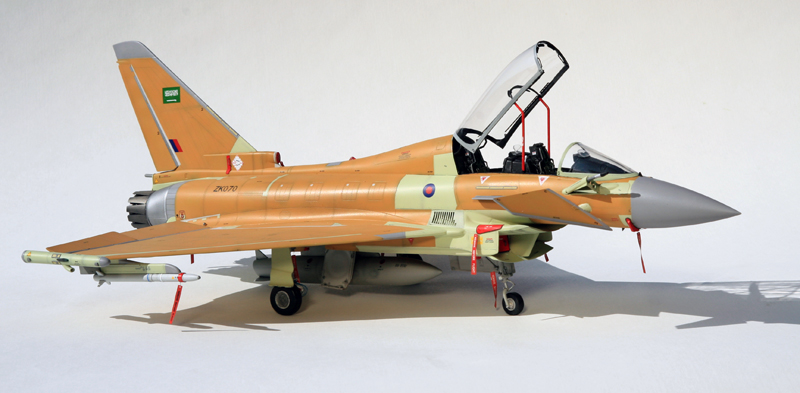
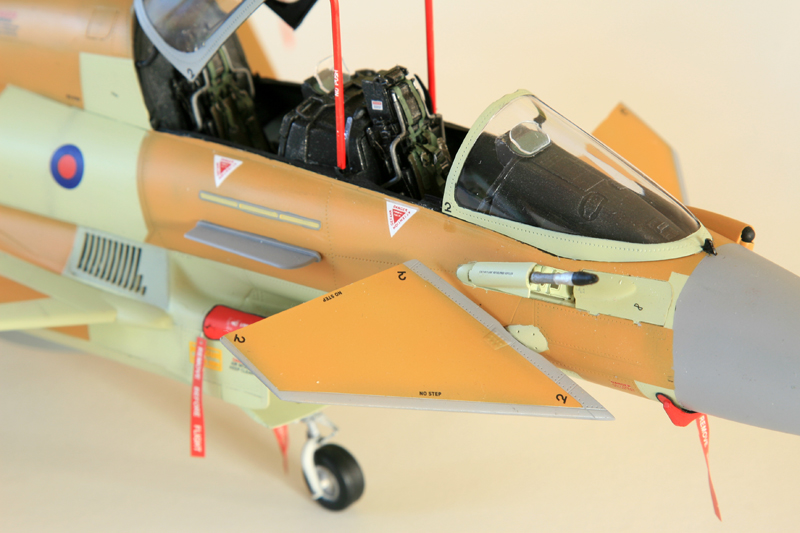
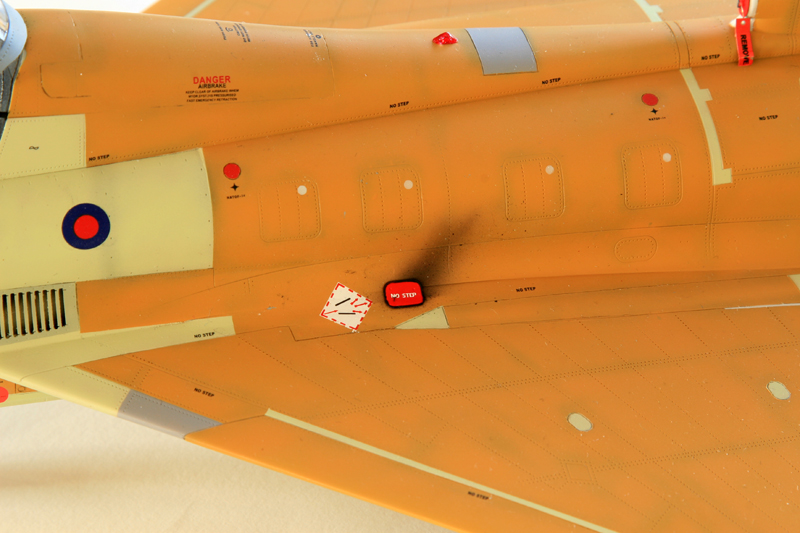
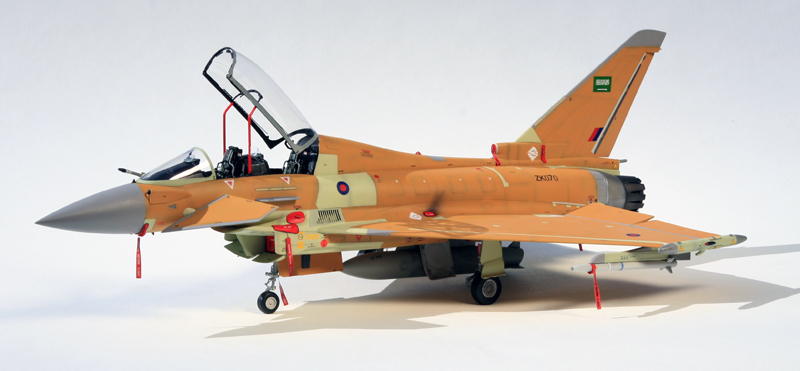
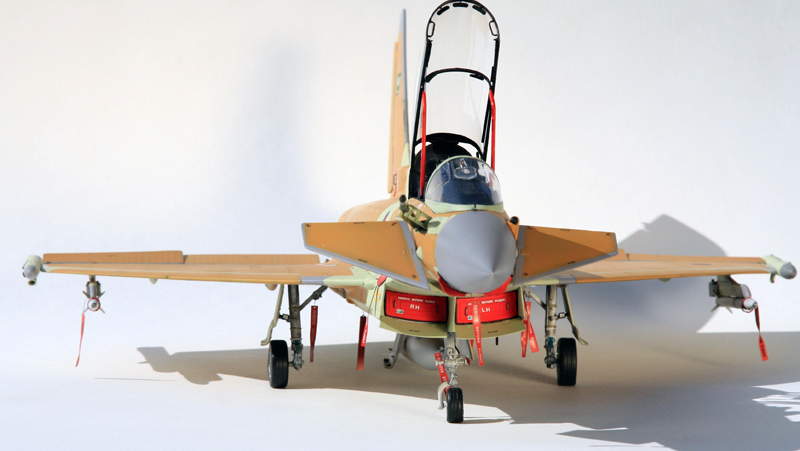
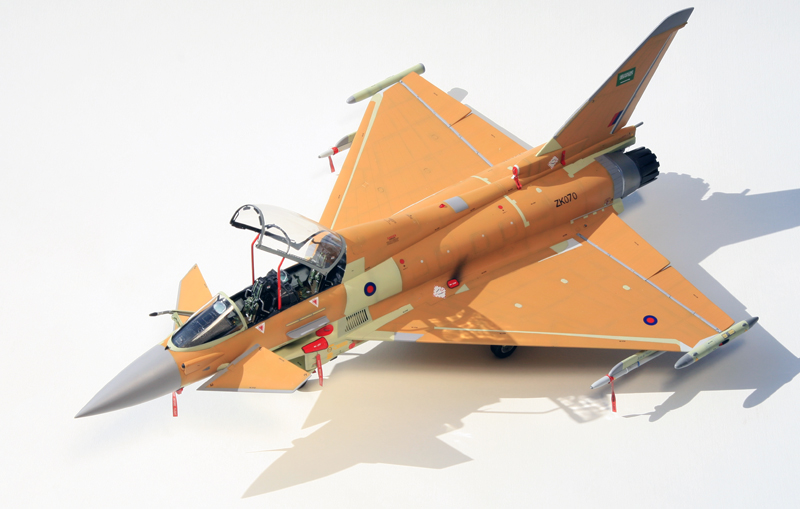
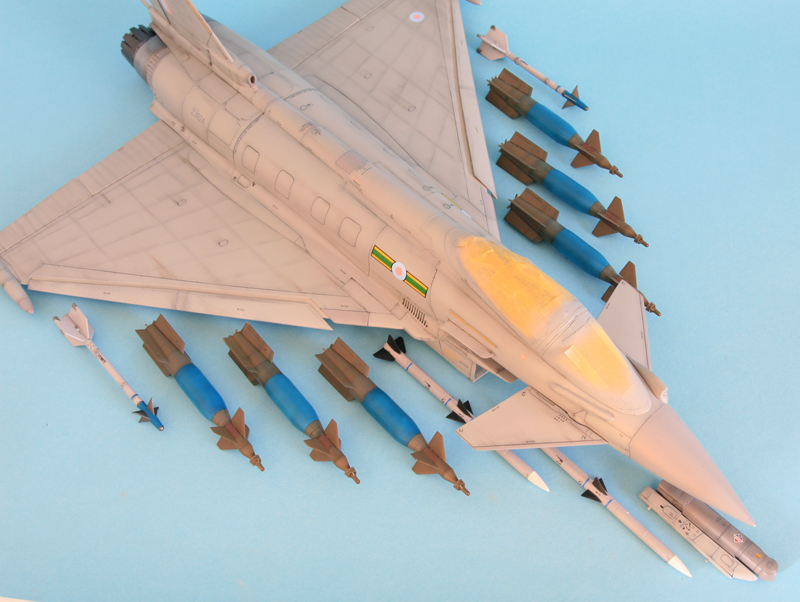
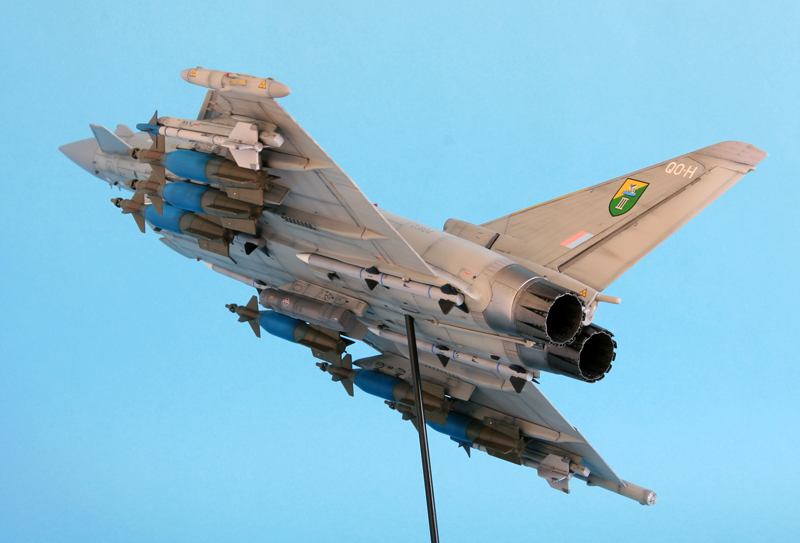
The trumpeter one is declared finished. I chosed ZK070 intended to be delivered to the Royal Saudi Airforce.

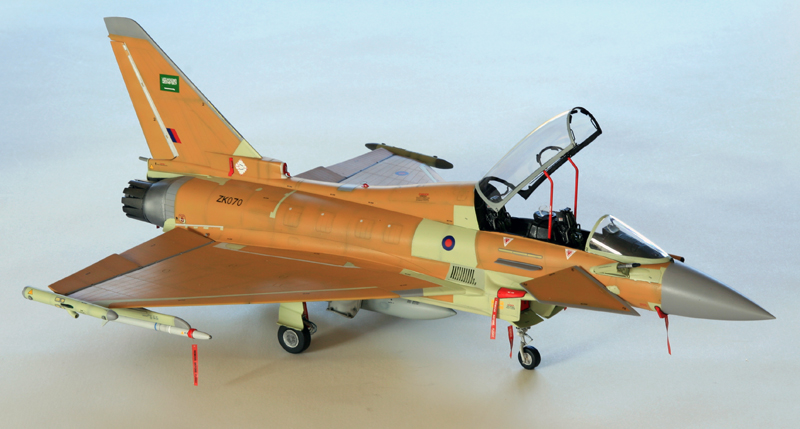
Final stage of the build were concentrated on adding small details RBF flags and covers, adding the missing Trumpeter parts (lights, antennas, etc etc) and of course decalling and final weathering. Decals are from TM and the 4+ sheet coming with the book. the hi vis RAF roundels and flags come from a tornado kit.
Aires seat were added as well (the belt work was a bit too much) and the big canopy was added. It seems there is a piece missing as there is a hole in the top of the fuselage to place the canopy, but no noth in the transparent part to get in there and support the opened canopy better. So I made one on my own. Luckily the two support bars are provided and I decided to use them. Two asraams are loaded as well as the ventral tank.
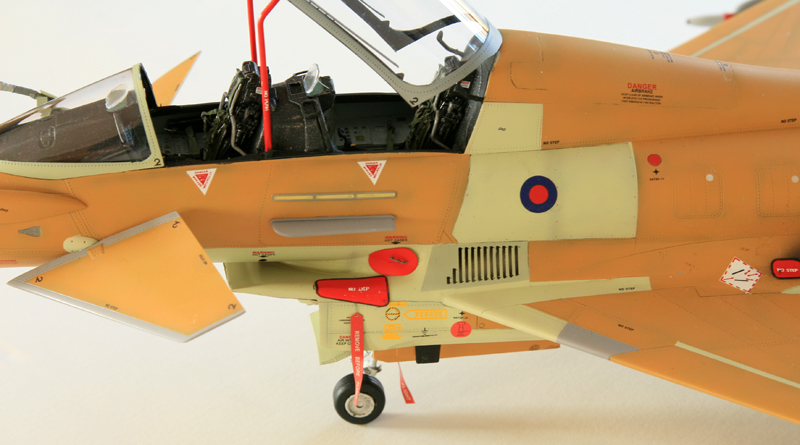
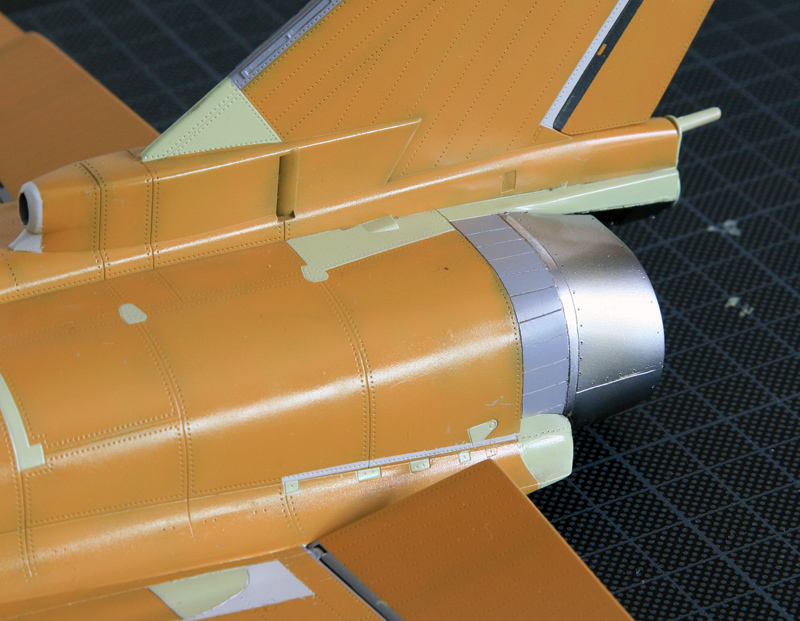
The one on top were made out of plasticard as the eduard was too small as well. That exhaust really needs to be worked on, because trumpeter got it wrong and it's directly noticeable.
The pirate sensor is mounted too low but I realized that too late to correct it.
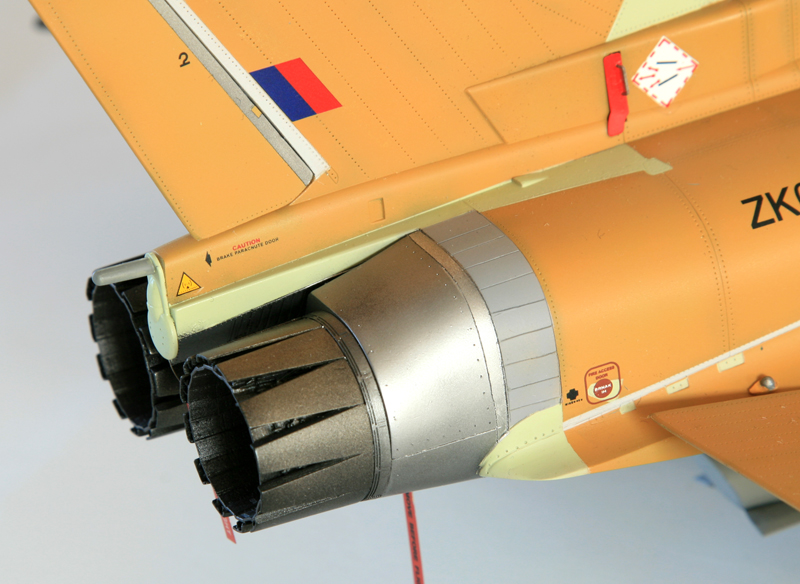
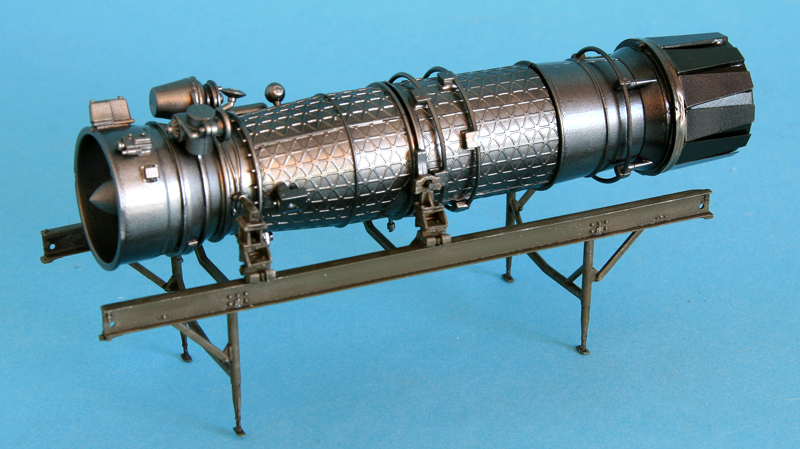
The engines are Aires. Not quite easy to assemble as instructions are pretty sparse. the whole engine was inserted in the holes at later stages of the build. The downward fuselage slope just before the engine is to me the bigest caveat of the trumpeter kit. It's pretty noticeable but I coudn't gather enough courage to even think about fixing this.
I miss some carbon decals too but since I don't have them, I left them out as well. The exhaust on the tail greatly benefit being covered too :)
Instead I glued some transparent light from the stach. I did the same for the bottom light as well.
Here are some more pictures with better light conditions:
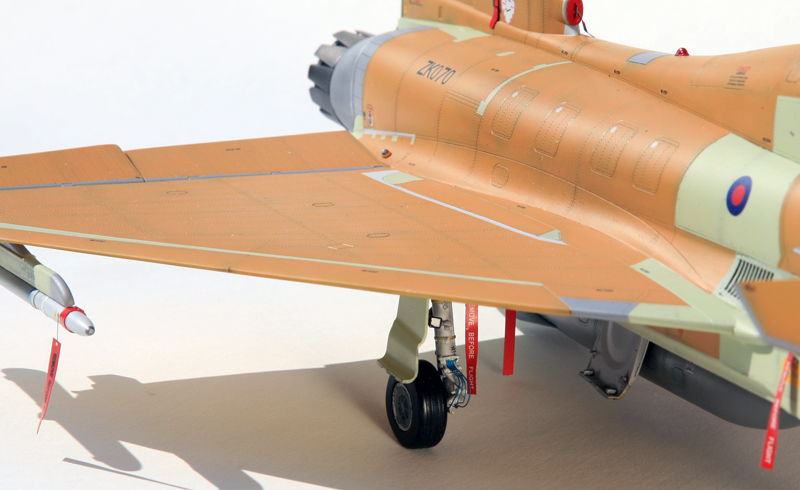
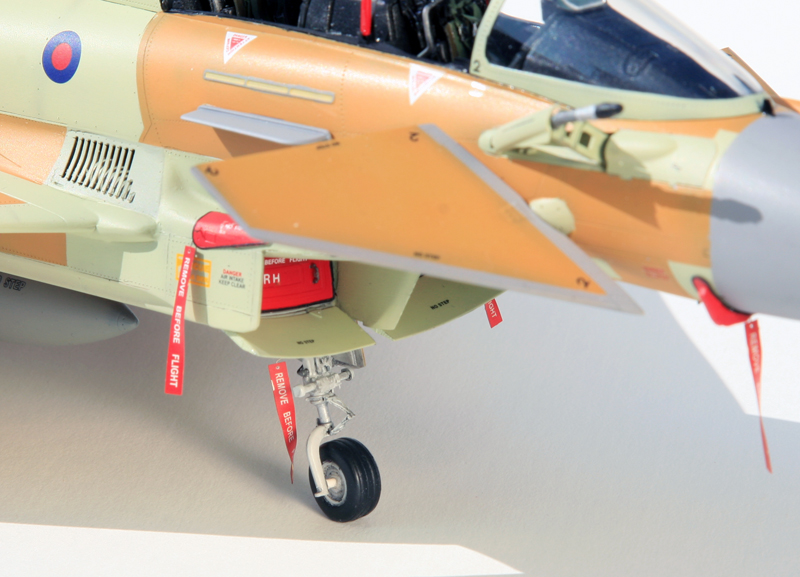
The tires are mastercaster ones, although intended for the revell model they work fine on the trumpeter. The legs are the one included in the kit and although I considered changing them for SAC, I couldn't find any shop with stocks over here, so I decided to use the kit's. The main gears are OK, but the nose gear was totally redone. It was 3mm too long and that was quite visible after installing the tire. it was shorthened quite a bit.
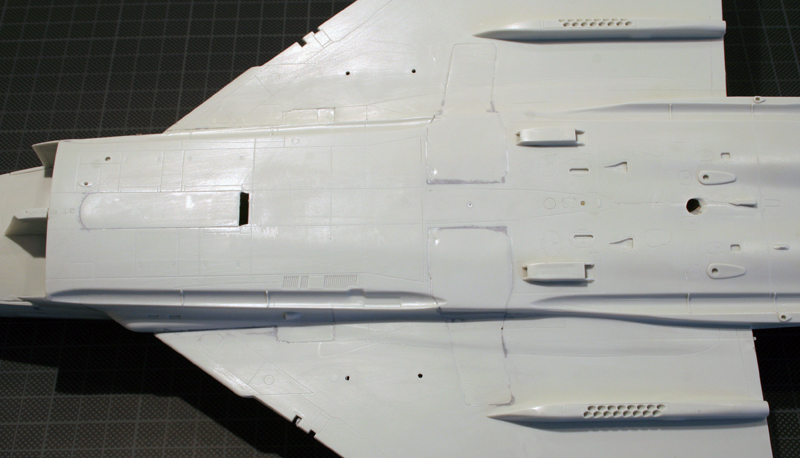
Back to the revell
I left it assembled and primed but the surface detail wasn't satisfactory to me so I spend a great deal of time regraving some lines, adding others and I even added rivet lines dearly lacking IMHO for the EF2000. But all that is invisible work.
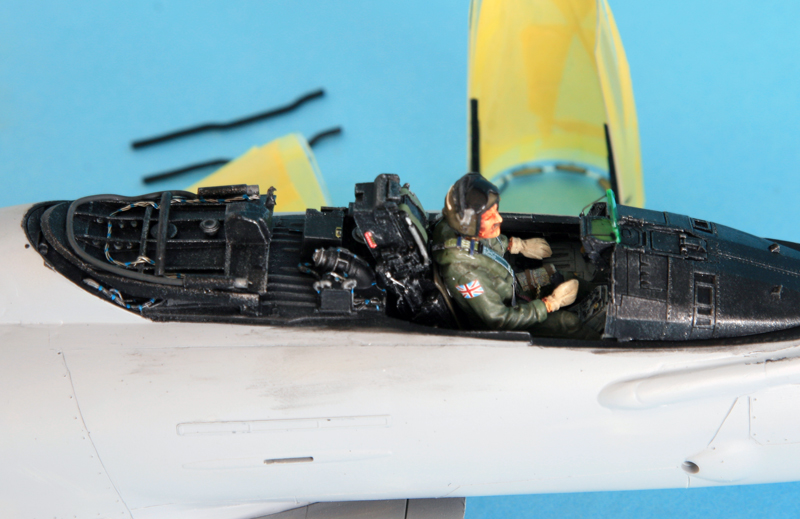
The next big thing would be to prep the cockpit&pilot to close the canopy before painting.
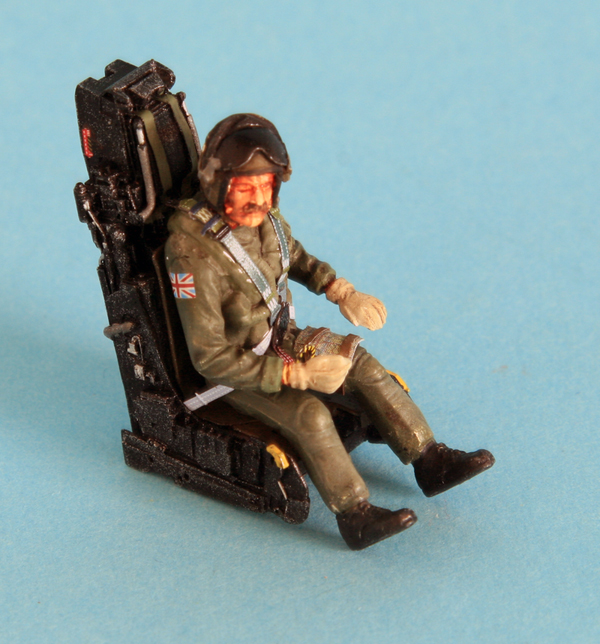
The pilot body was taken from academy F-16 and the head is from the RAF pilot from Mastercasters. Luckily I saw some Typhoon pilot pictures using that helmet. He fits the Aires seat perfect and harness are from eduard color PE. Much easier to install than the aires PE, although less detailed.
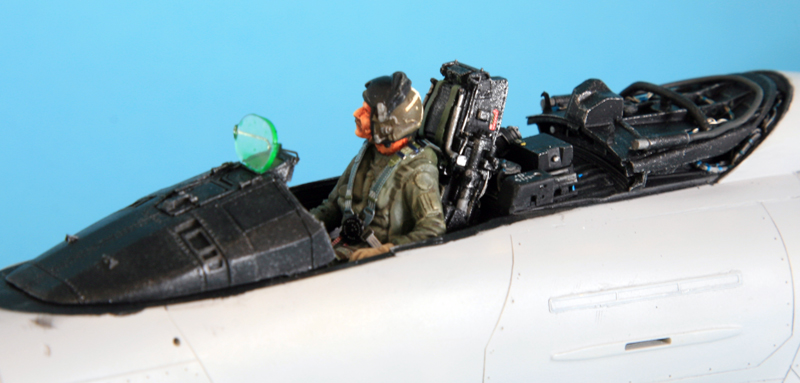
The aft coaming gave me some trouble as it is not supposed to be displayed closed (Aires resin) Nothing too hard to do except finding the correct position before gluing. I decided not to glue it to the canopy and then close it, but rather find the correct position on the aft cockpit and glue it there. The whole was detailled some more with dry transfer and wires. PE was added inside the canopy (handles, rails & mirrors)
The rear end got some alclad treatment:
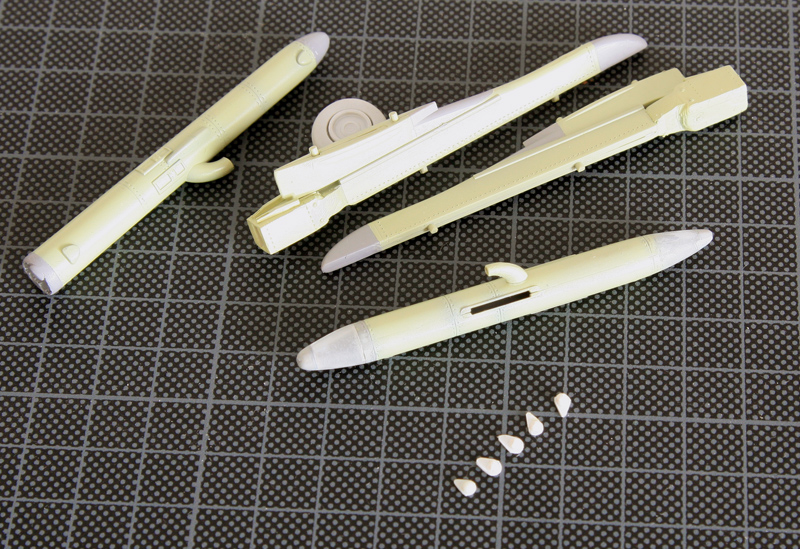
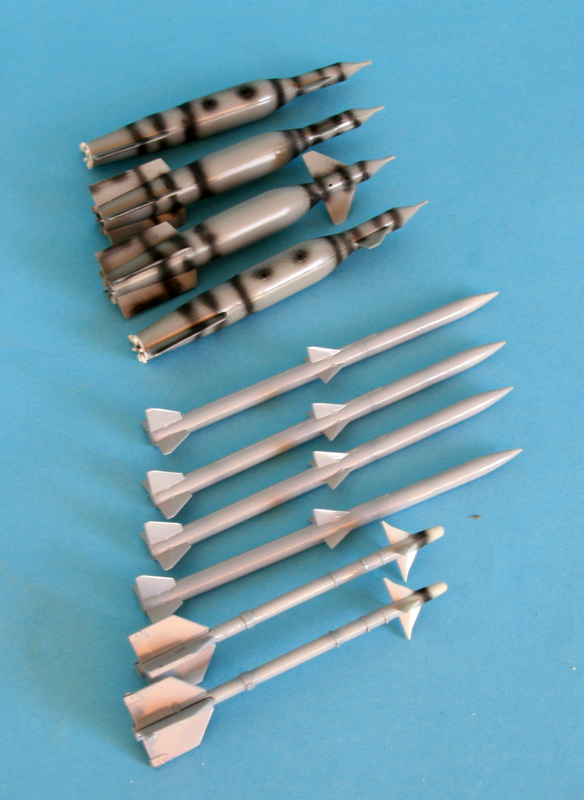
Prepping some weapon at different stages. All will be training rounds. I hesitated leaving one AA outboard station empty and using an Acmi pod ont he other but in the end I decided to use the Revell boxing Sidewinder, with the eduard PE, they are good enough to me.
But look at the size of the trumpeter pylons, that's the same scale and I feel they are way undersized !! I know why I left them all from the Saudi typhoon. They look really bad IMHO and that trumpeter could really use some resin replacement pylons !!

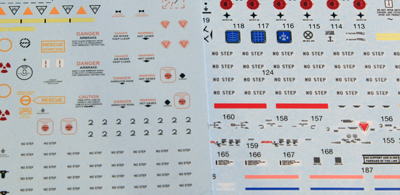
Revell and trumpeter decals, Two bobs RAF typhoons and 4+ sheet that came with their small book.
When I decalled the Saudi one, I used trumpeter stencils and 4+ saudi specific decals, so I have most of the stuff still available for this RAF bird. I initially wanted to make ZJ930 AA from the 17th squadron because it's often seen with 6 training LGBs and the litening pod.
Since these squadron markings are on both 2bobs and 4+ decal sheet I started comparing them for accuracy and I finally choose to go with the 4+ for the following reasons:
1. Two bobs has some accuracy problem on the 29th squadron markings:
lacking the red outline of the RAF roundel.
Since these squadron markings are on both 2bobs and 4+ decal sheet I started comparing them for accuracy and I finally choose to go with the 4+ for the following reasons:
1. Two bobs has some accuracy problem on the 29th squadron markings:
lacking the red outline of the RAF roundel.

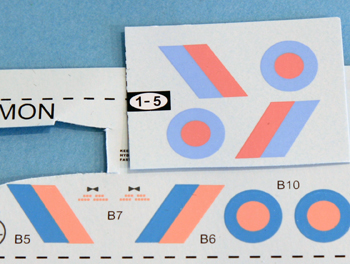
(bottom sheet is 2Bobs, top sheet is 4+)
One thing is sure, the trumpeter roundel colours are off.
At that point, my decision was taken, i'd use the 4+ decal.
But the question remained for the stencils as the 4+ sheet doesn't have them. So I needed to make a choice between the revell or two bobs. I ran a quick comparison again and the size of the NO STEP stencils almost made me decide to go for the twobobs, although these are blacks while they should be dark grey IMHO - something i'll have to live with I guess.
2 bobs doesn't have the pylon stencils though and both the pylons and the decals are not mirrored in the revell box. I just realized that so it's too late to re engrave them correctly I'm afraid. It is worth mentionning that the only good pylons are the Two Mikes !!
I guess I'll have to use the revell ones and make a few extra cuts.
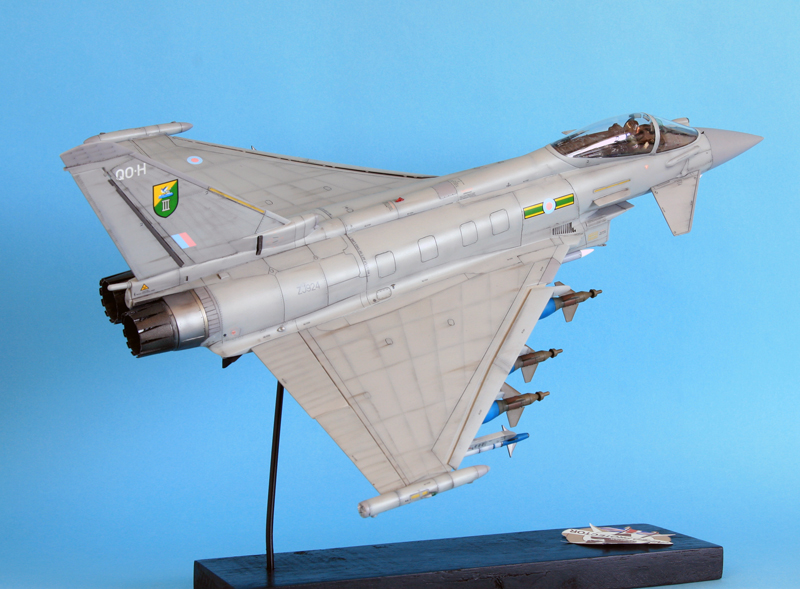
And finally, the modified Litening pod is dry fitted on the belly of the typhoon, which is not going to be ZJ930 from 17th sqn but rather ZJ921 from 3rd squadron. I finally took that decision looking at operation Ellamy documentations and guessing that since those decals are most intimate, will be less seen on typhoon models.
It's now ready for final detailling.
The patch is a personnal variation of an Italian patch for operations in Lybia, I haven't yet found a suitable idea to decor on the base.
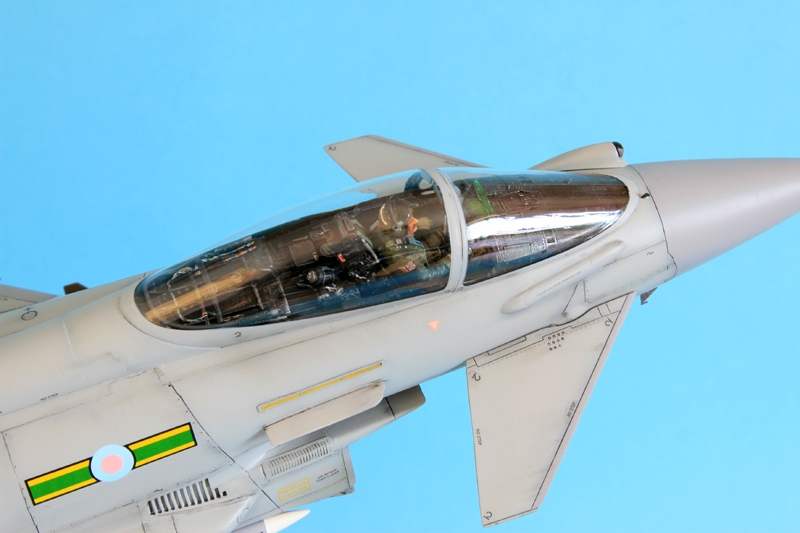
Removing the canopy mask is always a tense moment, all clear on this one and I'm very happy with the canopy shine. It just seems that an important part of the pilot equipment fell down while I was manipulating the model ...
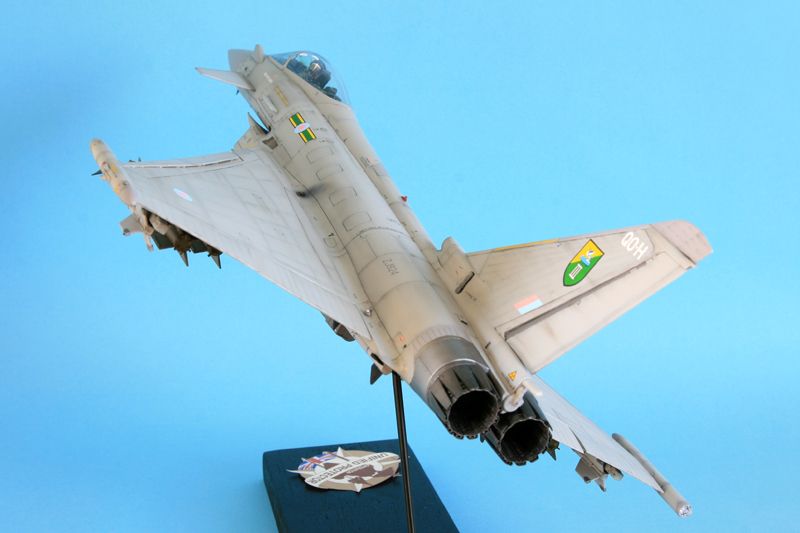
Then a late evening outdoor shot with the stand removed.
Conclusion, which is best?
Let's try to answer the following question: If I were to build another one, which one would I choose? I gave it some thoughts but I couldn't answer that question simply with feelings.
So my attempt to answer the question would be to list as many features as possible and give points for both kits - at the end the total points will probably give a more mathematic result.
As usual with experience, it's pretty personnal so feel free to disagree :)
Here's the result: (click to enlarge)

I purposedly didn't change the points after seeing the result - I sticked to my first idea. I made the final count once I was satisfied that I had all the features covered and I just simply added the price issue at the last moment - I though it would be an interesting issue since there is a large difference there!
The maths kinda confirm my feelings as both point counts are pretty close to each other - even more if you remove the price points.
As for gut feelings, My initial impression was that Revell was better, but Trumpeter was easier to build.
In the end, I love both end result and I'm glad I experienced both builds :)
Models completed June 2012.