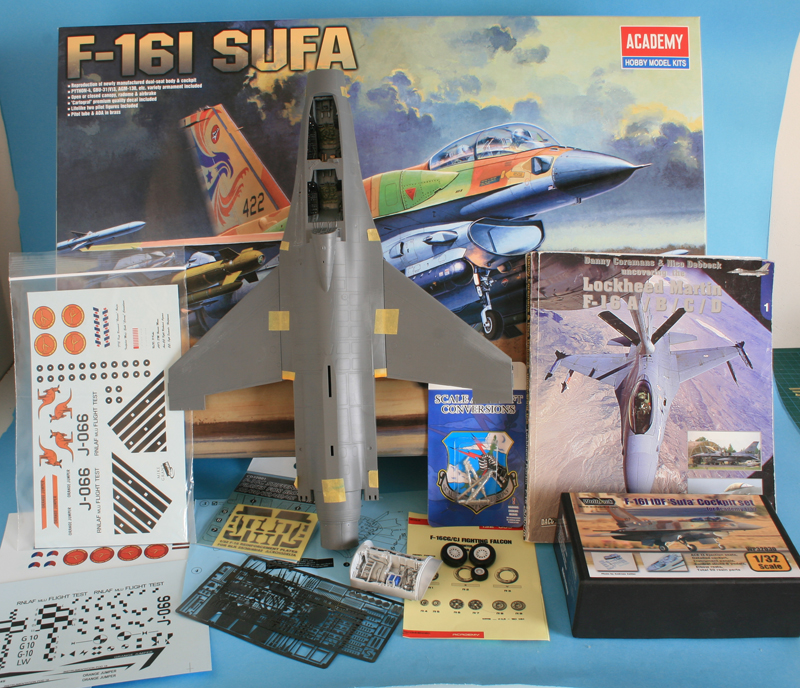
Take an academy 1/32 Sufa.
Add eduard PE, mix with Aires wheelbays, incorporate a Wolpack resin cockpit, decor the whole with Crossdelta stenghtening plates and Wheeliant wheels, some homemade decals and Mike Grant decals as well. Add a pinch of scratch and some PWMC resin bits - the whole using Daco Uncovering cook book and eventually you may end up with the Orange Jumper of the KLU which is the dual seat MLU test bed aircraft where all additions are painted orange :)
The consequence of that is that you will have a lot of plastic for your scrap box because you don't use a lot of parts from the original SUFA kit.
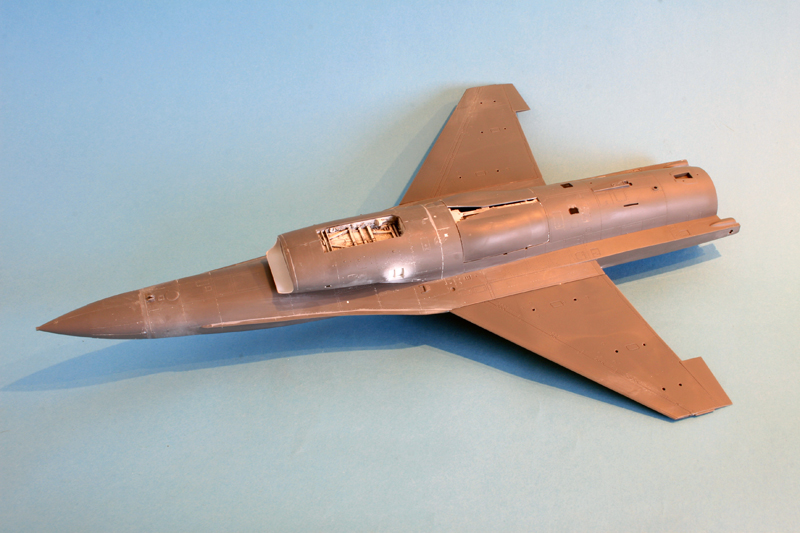
So we start from this:
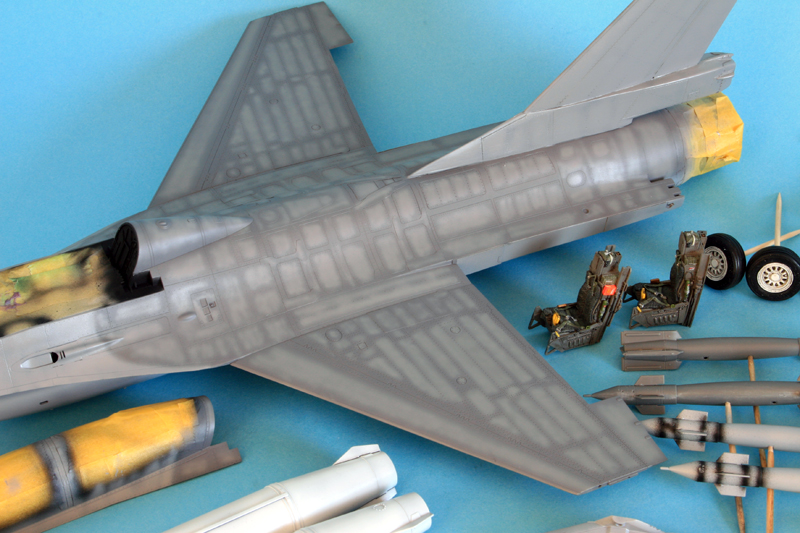
Cockpit, wheelbays and some minor subassemblies are painted and gloss coated.
To overcome the problem here is what I did
1. remove the original nose bay.
2. sand flush (of course I went through the intake there :)
3. assemble the top and bottom funnel of the intake
4. tape the front lip of the intake on the funnel
5. tape the intake outer side
6. insert from behind the resin wheel bay and sand it until it fits
That 's a very important part because if you don't get it right, you'll screw the whole intake position.
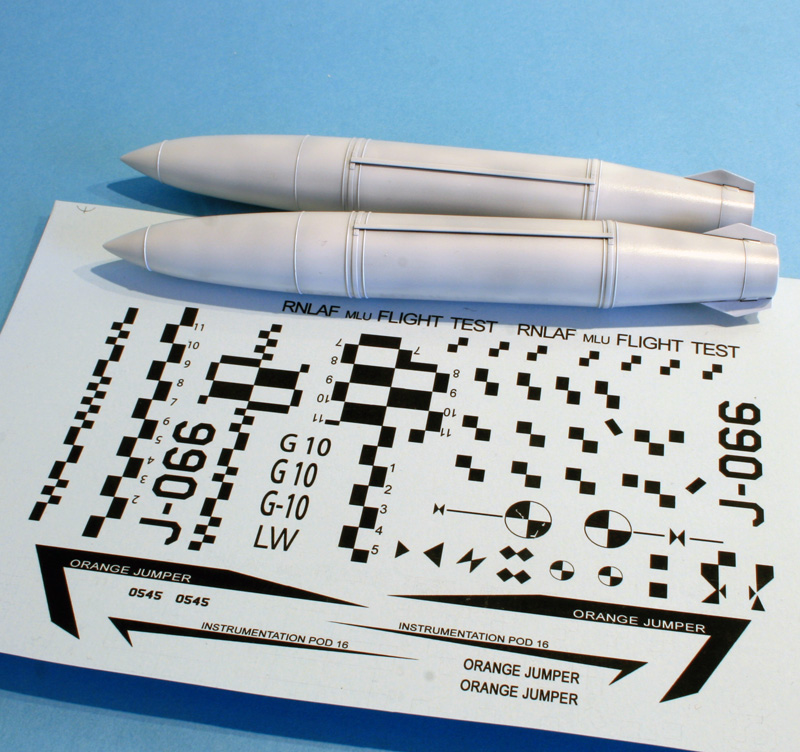
Meanwhile; some progress on the homemade decal sheet and the wing bags
Some structural work to convert the academy sufa to MLU F16B
I'd like to thanks JP from PWMC for providing (twice) the resin tail
I was stupid enough to order the wrong one the first time and he sent the correct one to save my build :) Many thanks to you JP.
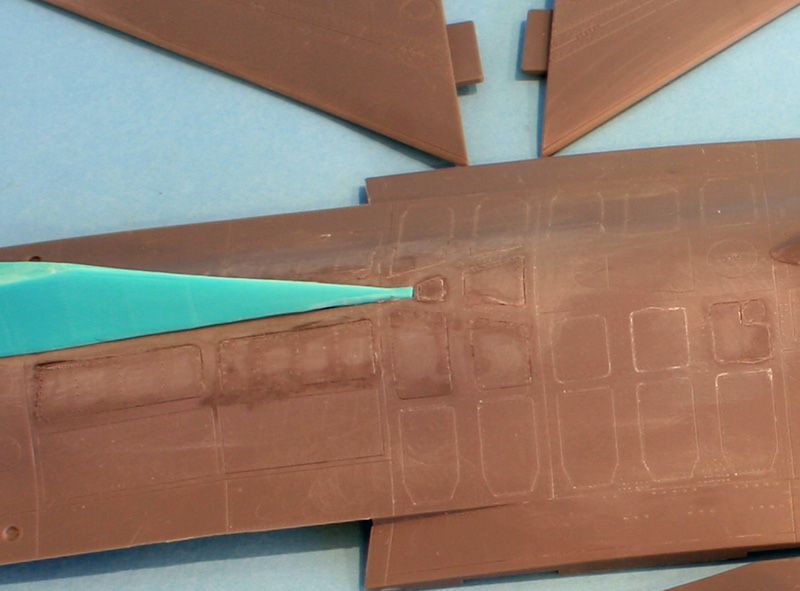
I think I have all the needed changes done. The biggest of them was adapting the fuselage engraving for the thin tail of the MLUs. The rest was easy enough once the differences were spotted.
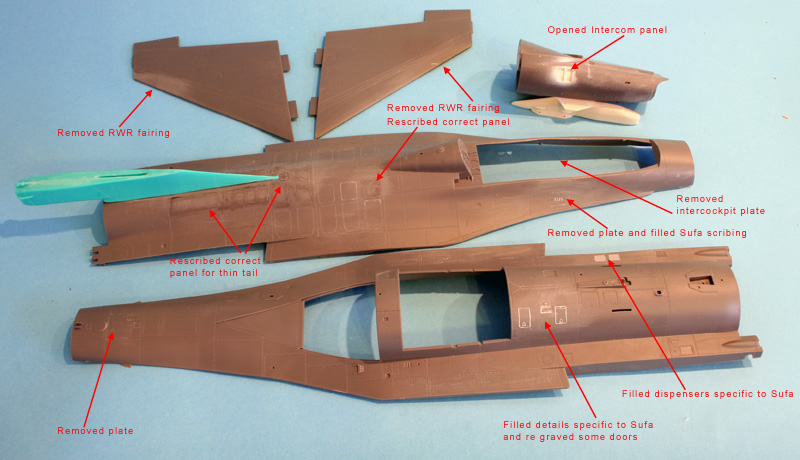
I also removed 8 small bulges near each top and bottom wing by simply sanding them off. They are not marked on the picture. I must say the academy plastic is not the easiest to work with.
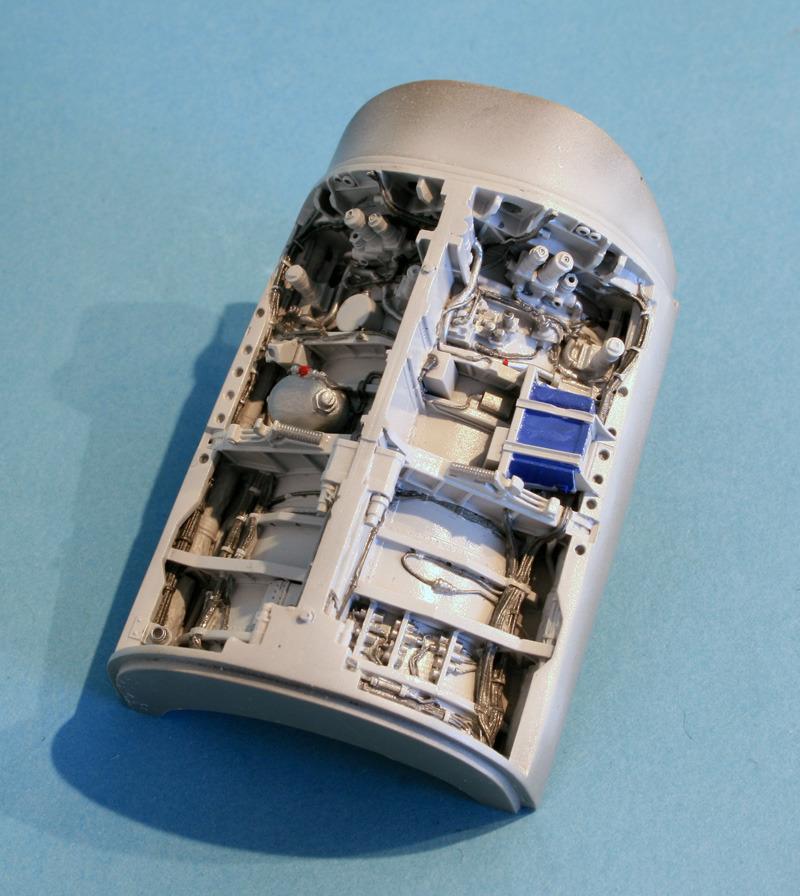
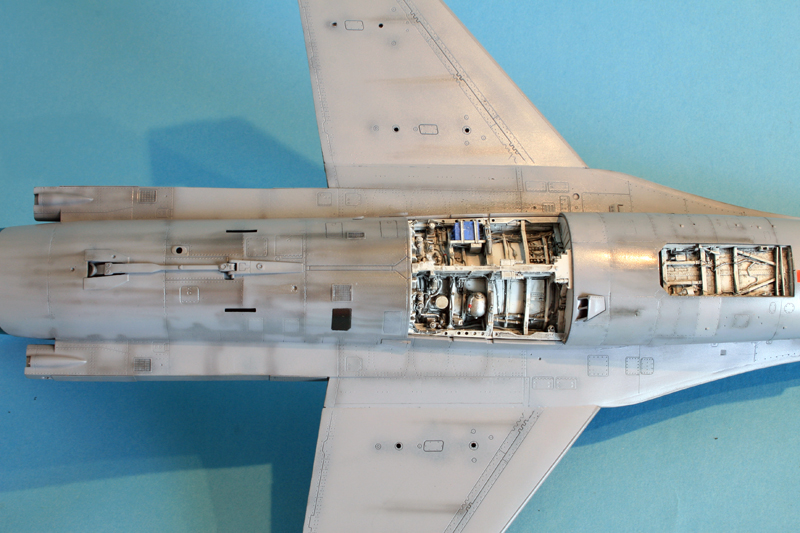
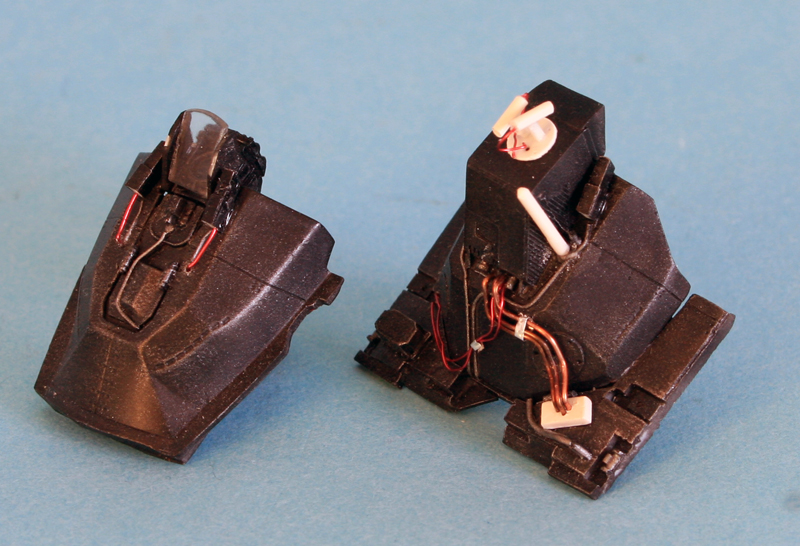
Here's the finished pit
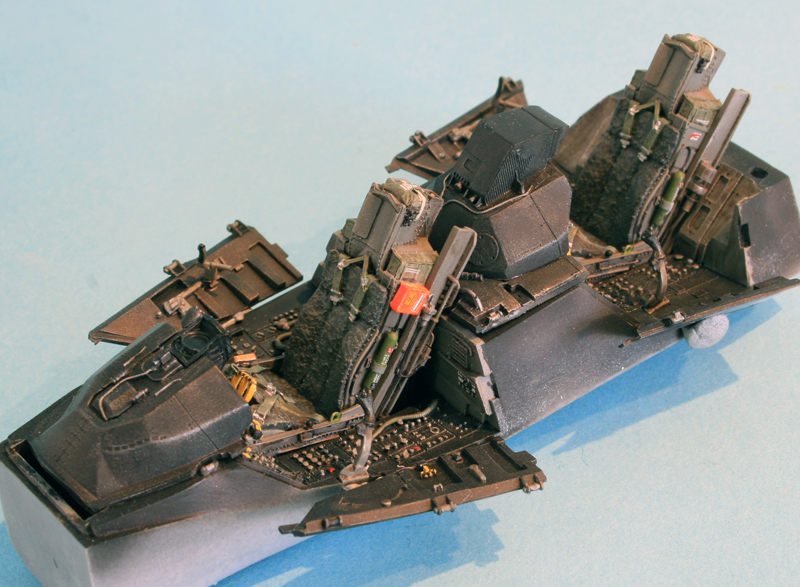
That's the Wolfpack pit slighly modified but close enough to me for the MLU pit.
A pleasure to work with and the fit is great with the academy Sufa, the aligning pins are matching and that helps a lot.
Minimal work was needed inside the fuselage, but care must be taken to correctly clean the resin tub so it fits perfectly.
As you can see on the picture below, I went too far on the bottom but that won't be visible once the seats are in place
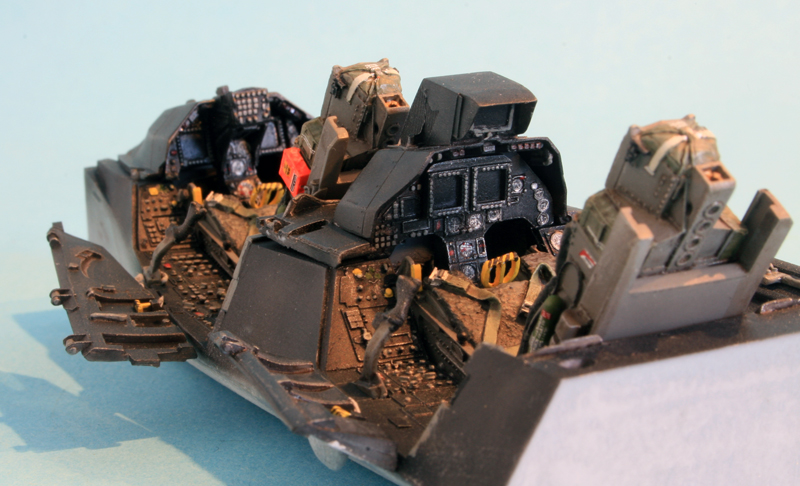
The only thing I could find that's missing from the pit are the two canopy spiders - which at least one of them should be up so I'll have to scratch them.
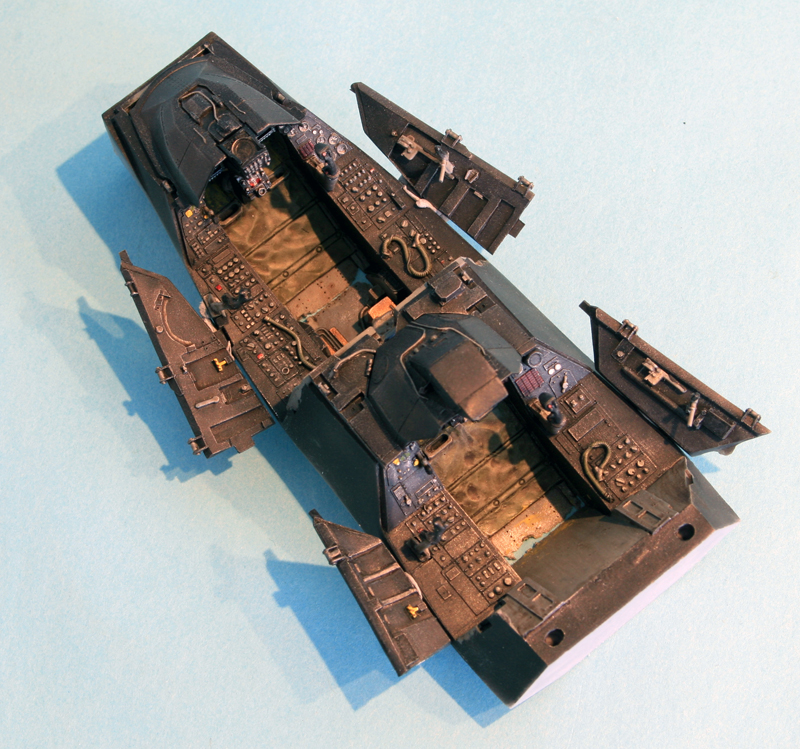
Painting was done the usual way with dark grey (instead of black) light gray, etc etc
Weathering was done with raw umber washes and drybrushes after a gloss coat and was finished with a matt coat.
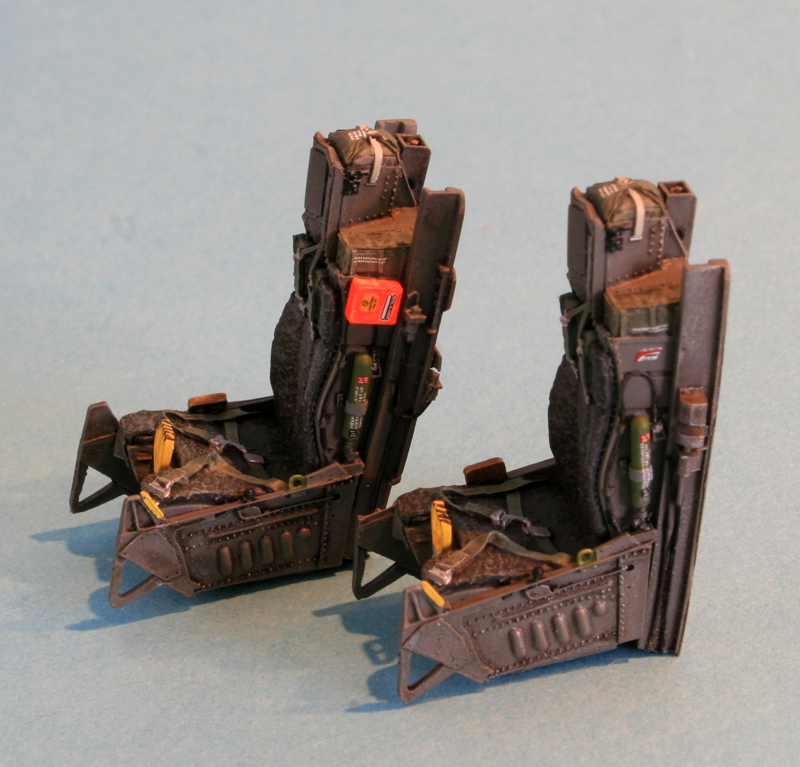
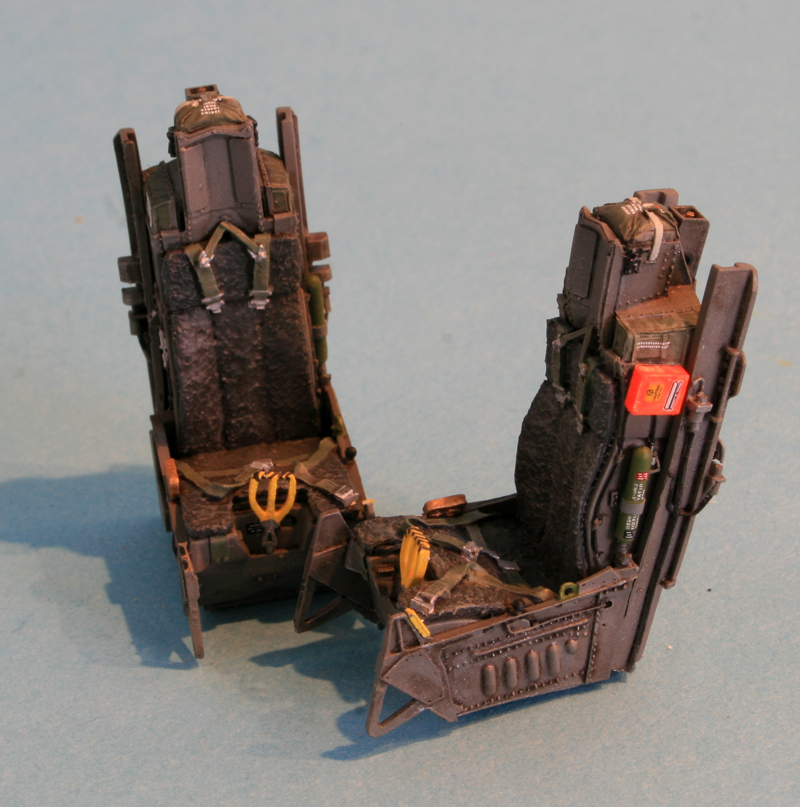
Seats are oustanding and got the same treatment.
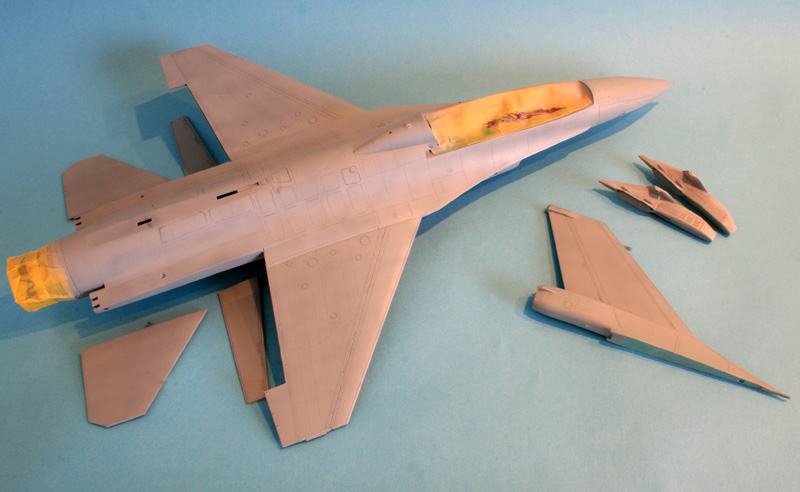
The pit and gear bay are in, the fuselage has been glued, the intake has been placed and glued the wings are on and the nose is set.
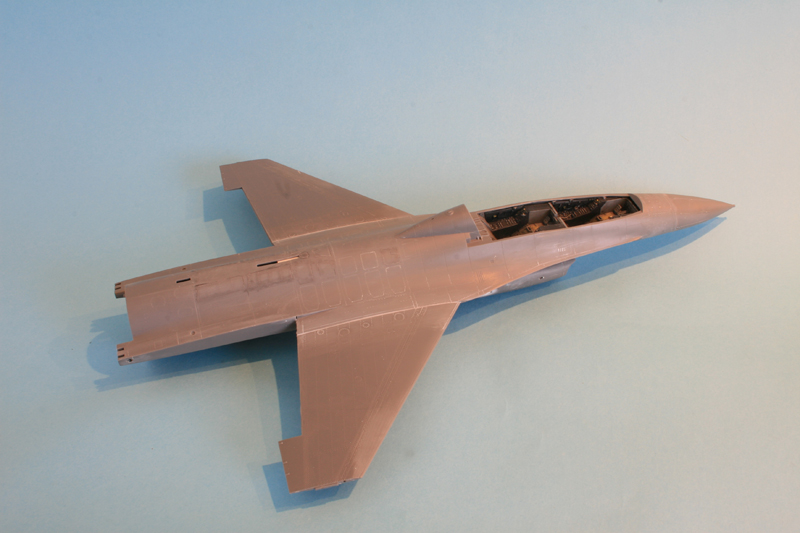
The intake did not give me too much trouble. I decided to play it at the inner junctions instead on having problems on the fuselage.
So I glued first the intake on the fuselage and then only I placed the aft part of the intake duct inside and within the internal gear bay. I had to sand the gear bay a bit to correct an alignement issue, but that was IMHO less of a problem than correcting on the fuselage where it's plainly visible.
Wings are no issue and I simply joined them with tamiya putty directly cleaned with nails removal to avoid sanding. I did the same for the Trailing edge flaps
I placed the gear doors, as they will make perfect masks for painting. I know I have to replace them as they are bulged and I don't need bulged doors
The nose doesn't fit perfectly and delicate to sand because you don't want to loose the relief details there. So I masked them off and sanded as carefully as I could. Thanks for the mastercasters sticks there.
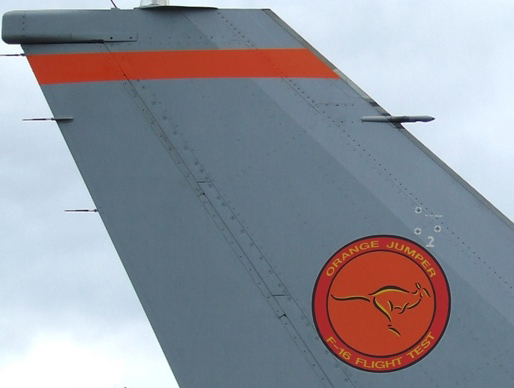
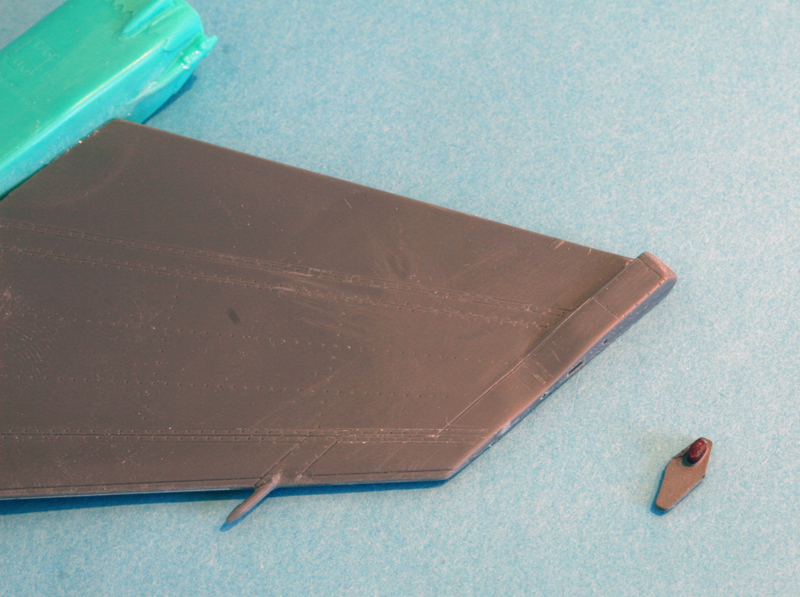
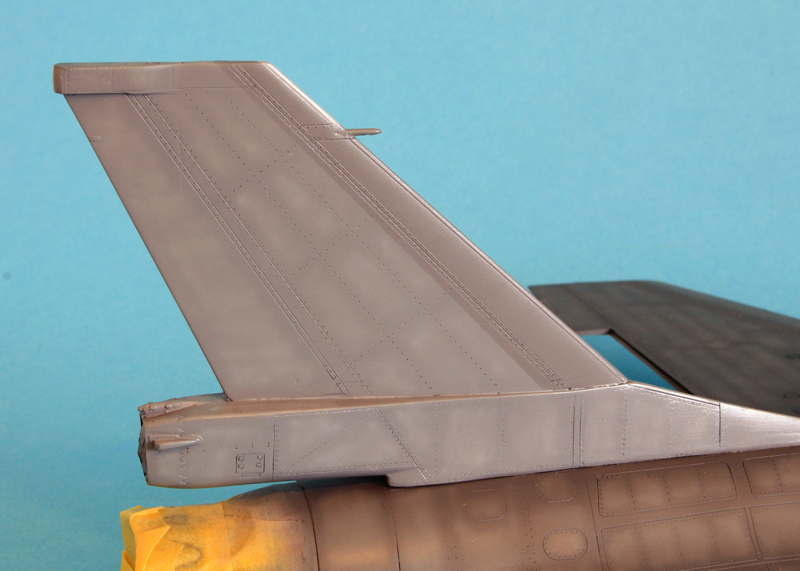
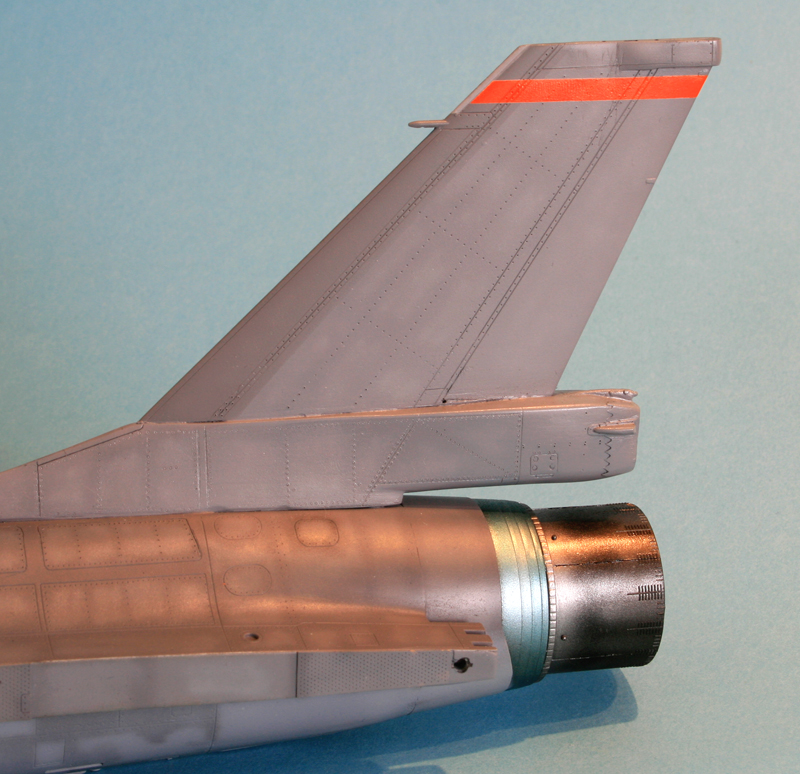
next on was the tail. PWMC provided a MLU tail for the tamiya bird and I modified to fit the academy, no problem. The top of the tail needs to be modified for the Orange jumper
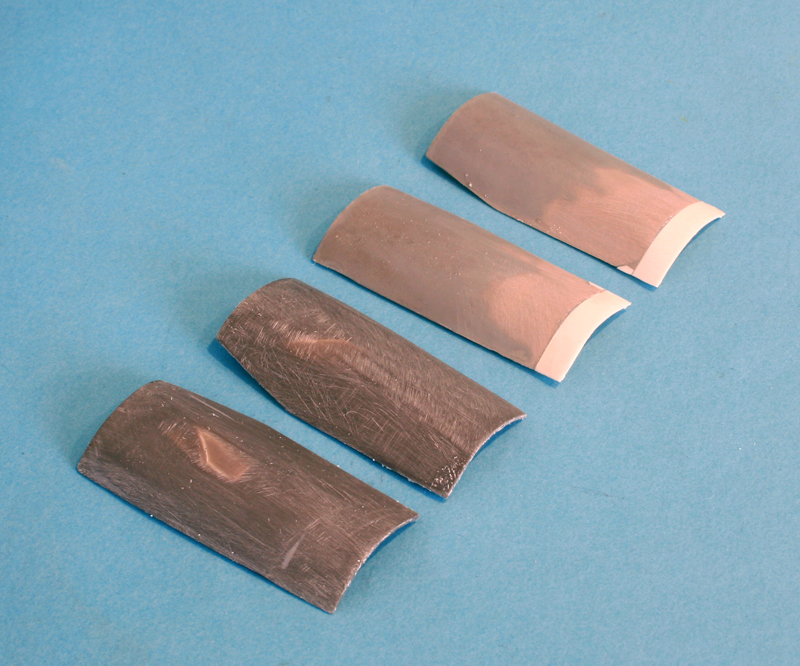
Here's the sufa tail on the left and what I need to have for OJ
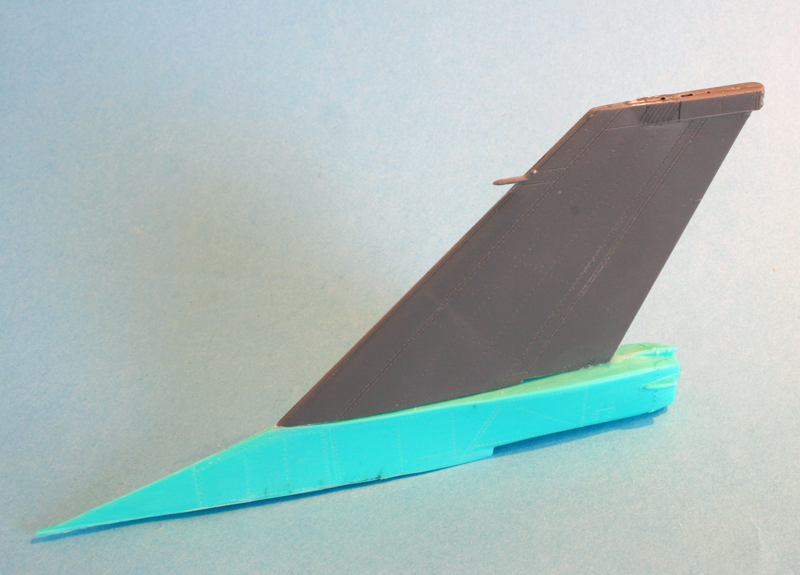
So I first removed the top light plate and then reshaped the tail as I needed. The top light plate will be replaced afterward. I can scratch it or use the old Hasegawa part
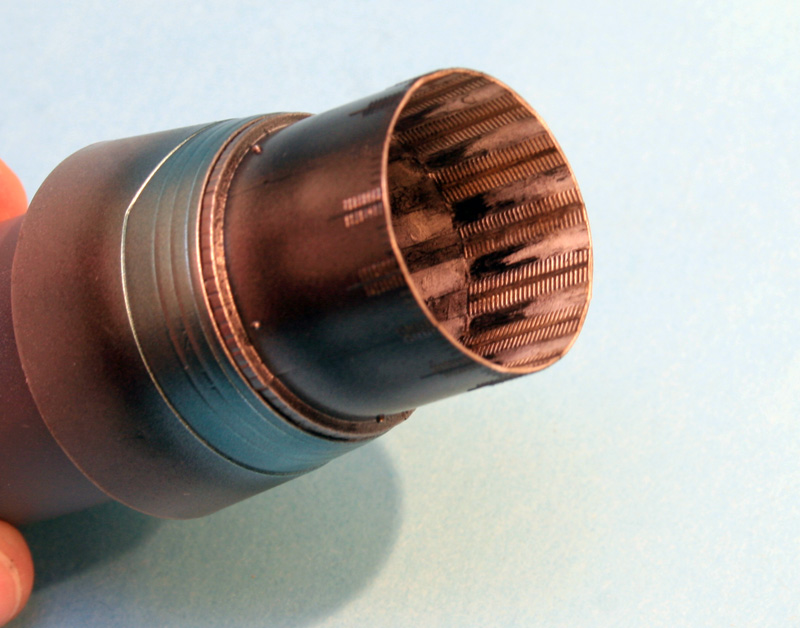
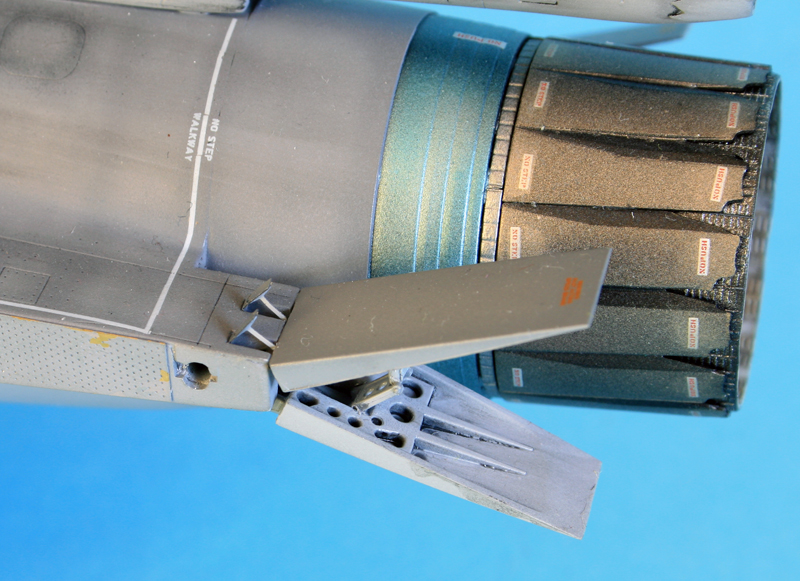
Before priming, I needed the finish the inside of the exhaust. That way it could be fitted to the fuselage and sanded accordingly before priming.
The work inside started with a coat of white, then a pale burnt metal from alclad, then some black suit mig pigment, then some lamp black oil paint and touches of raw umber and yellow ochre.
The outer rim was painted gloss black (X1) then differnet shades of alcald finishing with the blue hot metal bottle.
The whole was sealed with matt varnish before being inserted in the rear fuselage
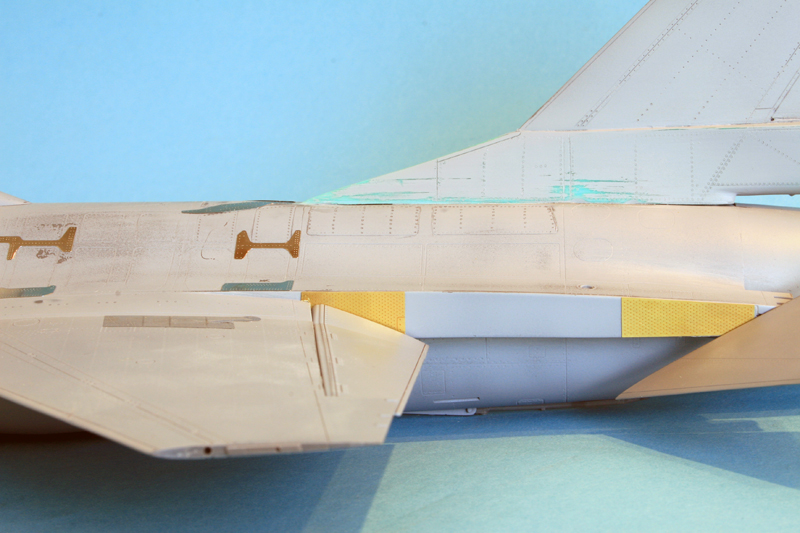
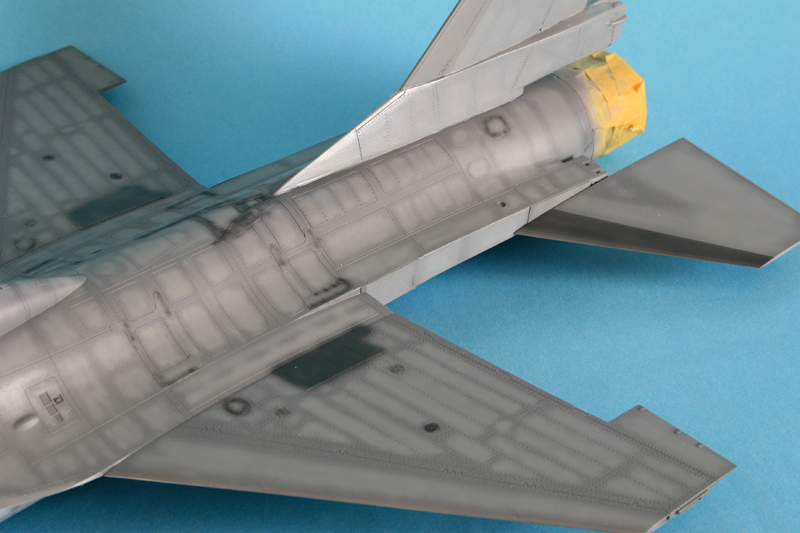
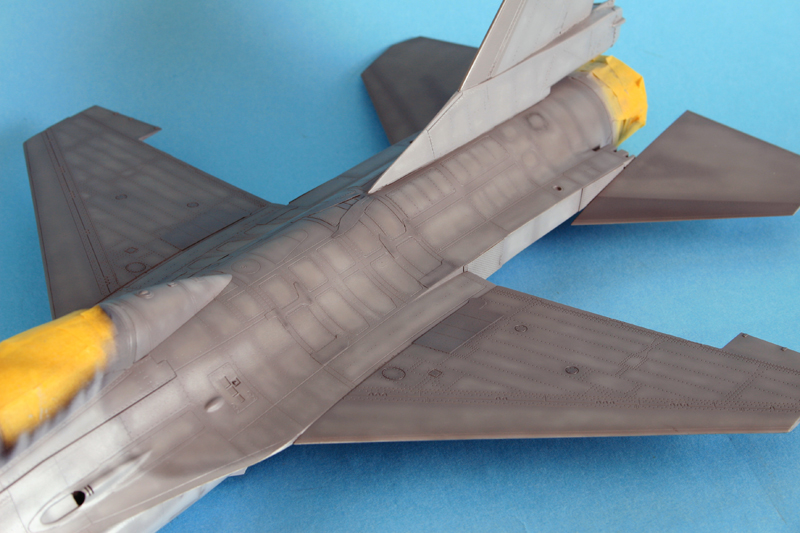
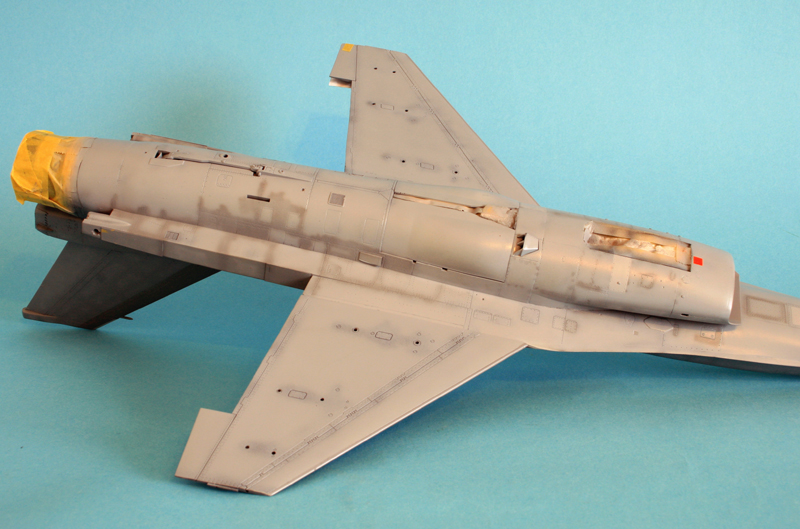
Then the whole assembly (I left the tail for later) was primed with Mr Surfacer 1000. Note the 2 PWMC PIDS pylon. in another life I scratched those and the ones from JP are nice & crisp and well worth it.
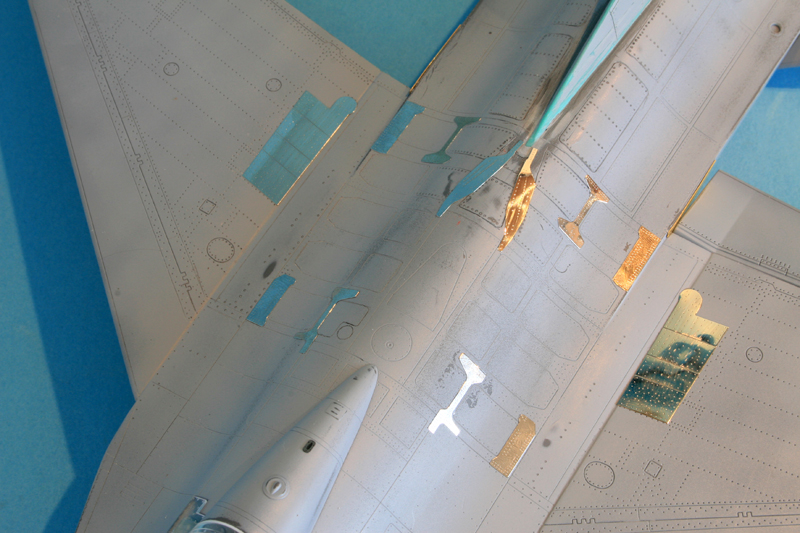
Some detail and structure work?
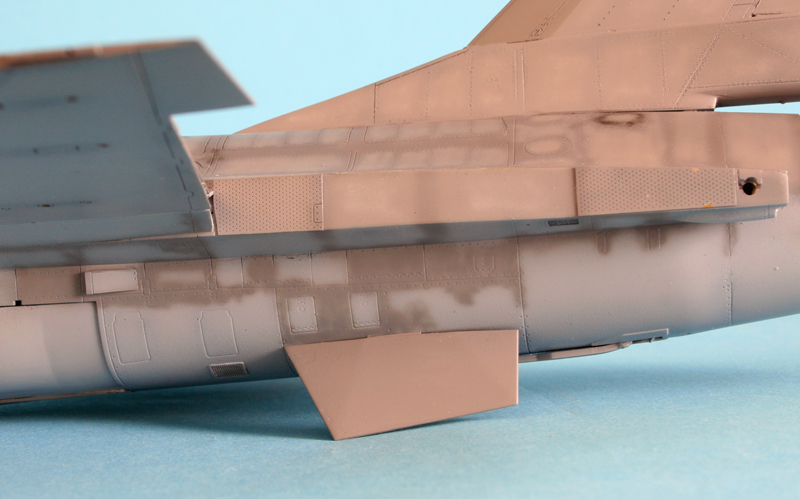
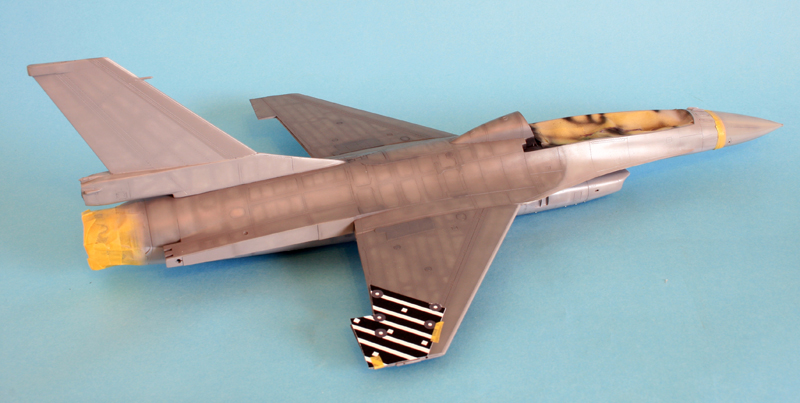
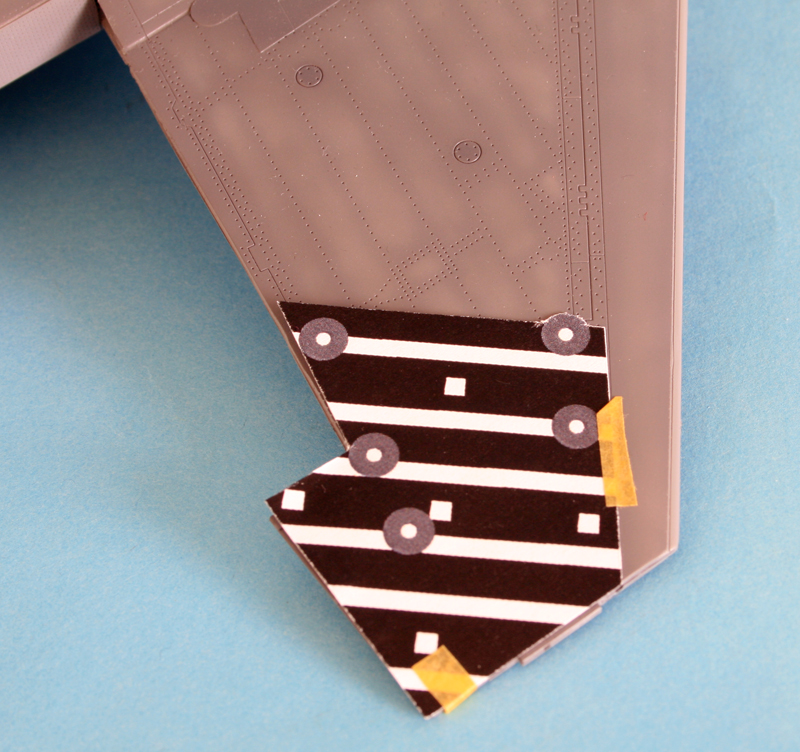
PE from eduard and plates from Crossdelta.
the only problem was with the trumpeter included PE fret whose size doesn't match their plastic :) So some cutting was necessary to make them fit. Especially for the plate around the trailing edge flaps - the upper part that comes above the wing is too high and needs to be cut down.
the only problem was with the trumpeter included PE fret whose size doesn't match their plastic :) So some cutting was necessary to make them fit. Especially for the plate around the trailing edge flaps - the upper part that comes above the wing is too high and needs to be cut down.
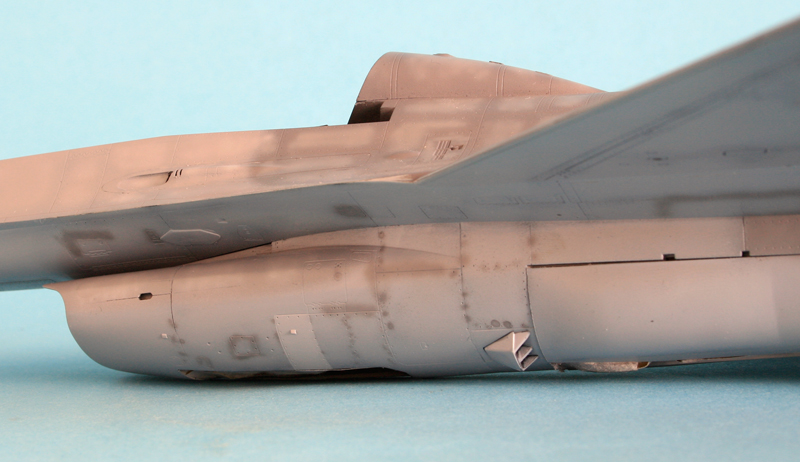
That's dull isn't it?
That's better already
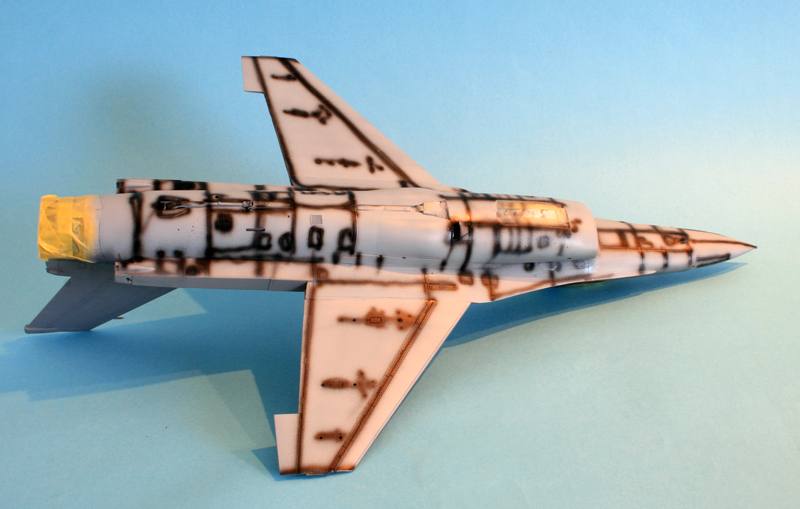
at the same was done on the underside, with H308 & Mr Colour
The middle gray got the same treatment, but more subtle as the surface aren't that much exposed
I designed some wing decal there as I'm checking adjustment with decal printed on plain paper
here's a closup: Haven't decided yet if I'm going to paint it or use decals...
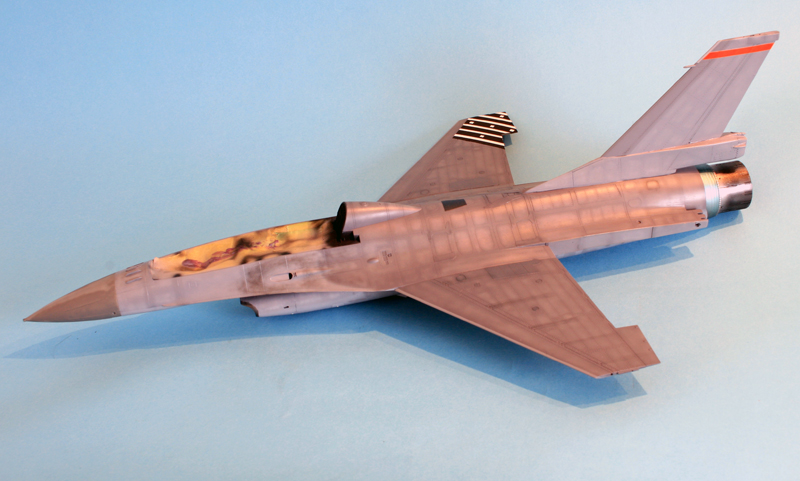
The tail gets the same treatment with an extra darker layer and some clear top edges
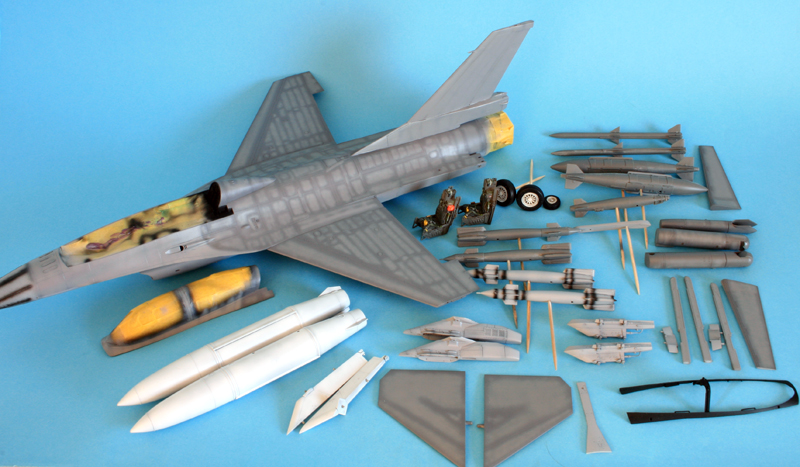
And finally some colours :)
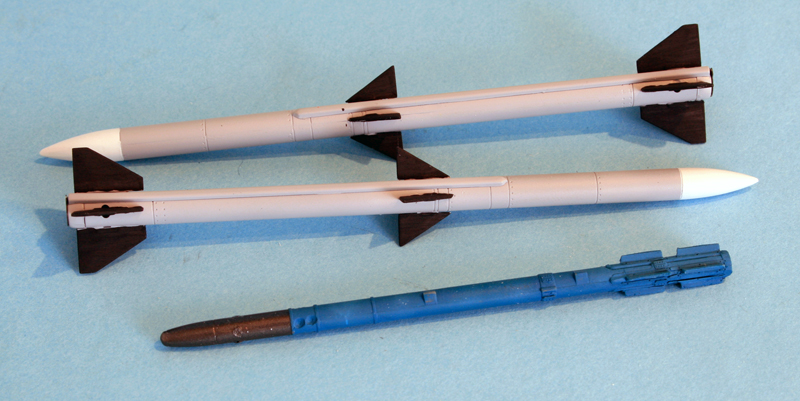
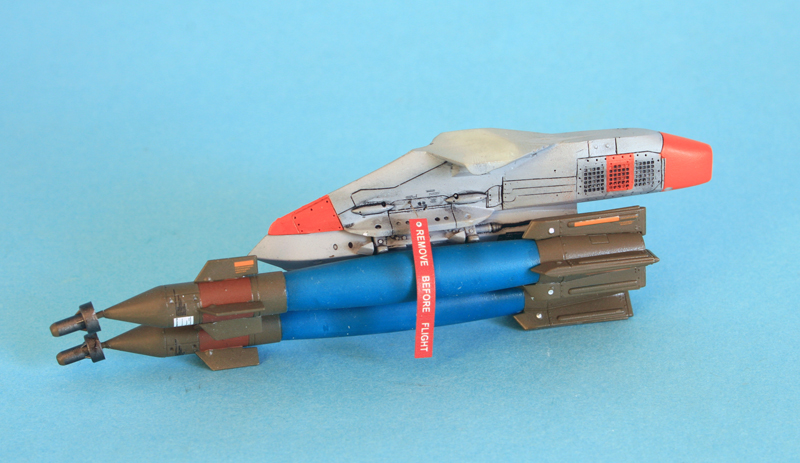
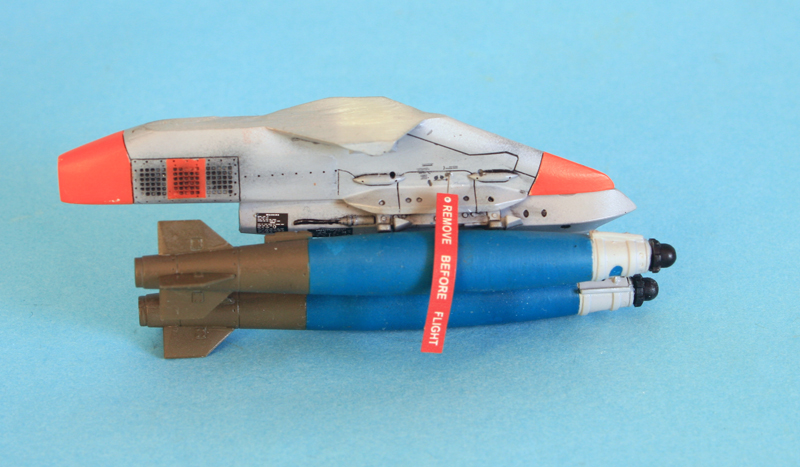
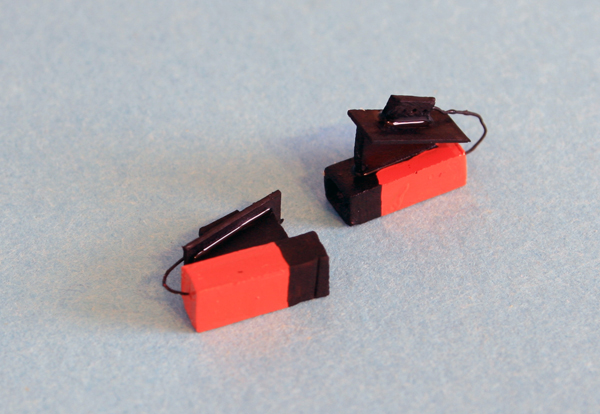
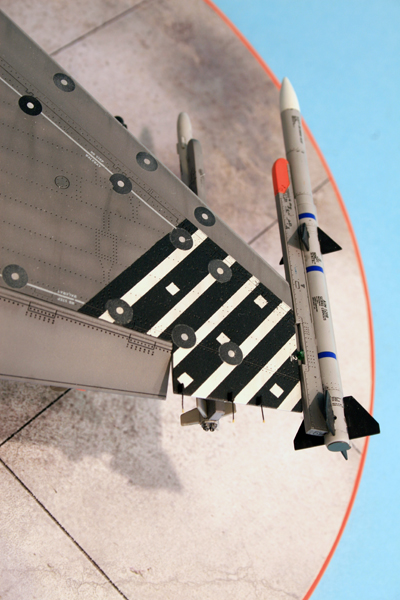
The pylons and missile rails where converted for the specific stuff the orange Jumper carries (mainly hi speed cameras)
The orange is too bright and needs to be toned down a bit. The left stab is a bit different than the right one with an extra dark grey area on the forward edge. And of course the leading edge on both wings and both stabs have been painted light metallic grey.
I have three candidates for the right chin pylon, they received the same tratment as the top surface of the F-16
I finally made up my mind and I painted the wings instead of decalling them:

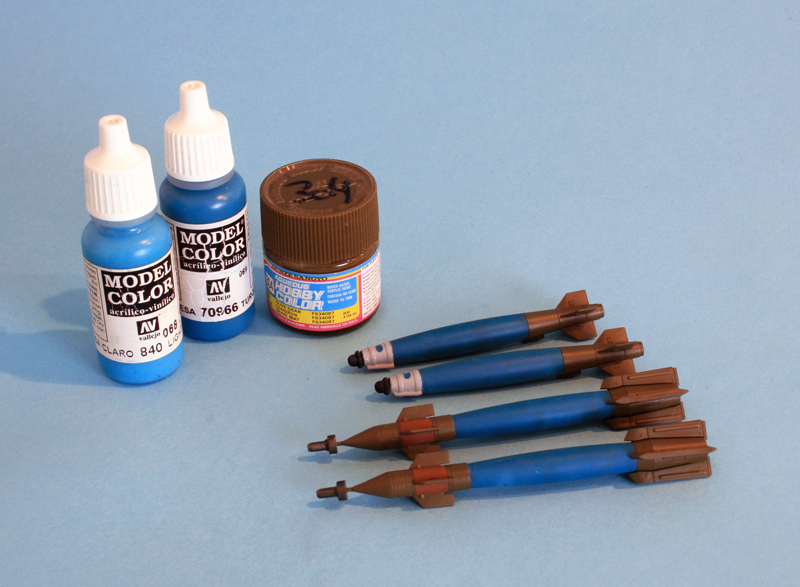
I also worked on the weapons and struggled to find a correct blue for the inert loads. I finally found it but those colours really aren't meant to be sprayed. They clog the airbrush even when diluted with water at 80% :) I know why those guys have an AIR range ! (in the meantime I have discovered their retardant)
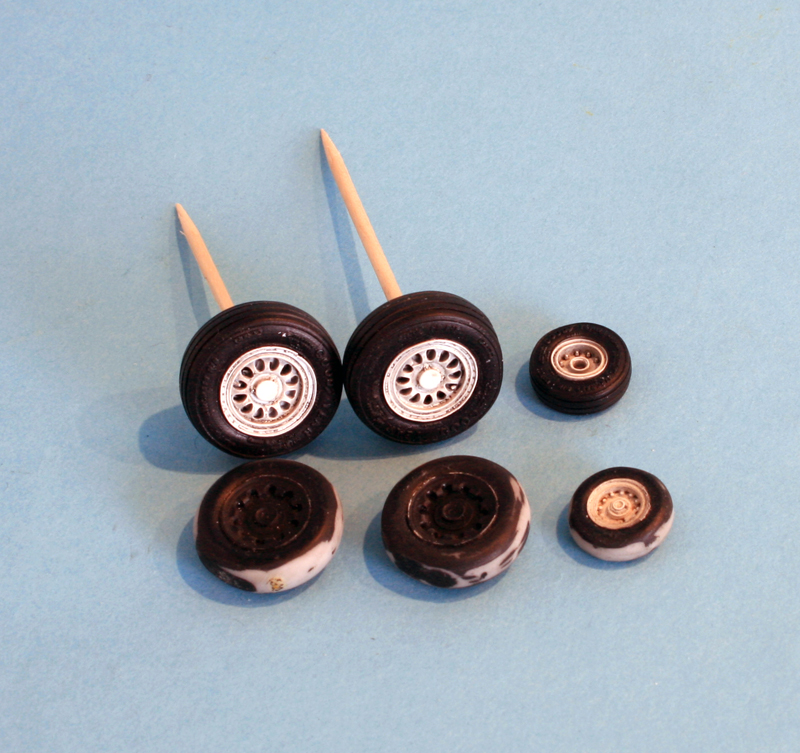
I also tried sanding out the bulges on academy gear doors but it's very easy to go through there. I'm at maximum sanding and I didn't get the bulge fully flattened.
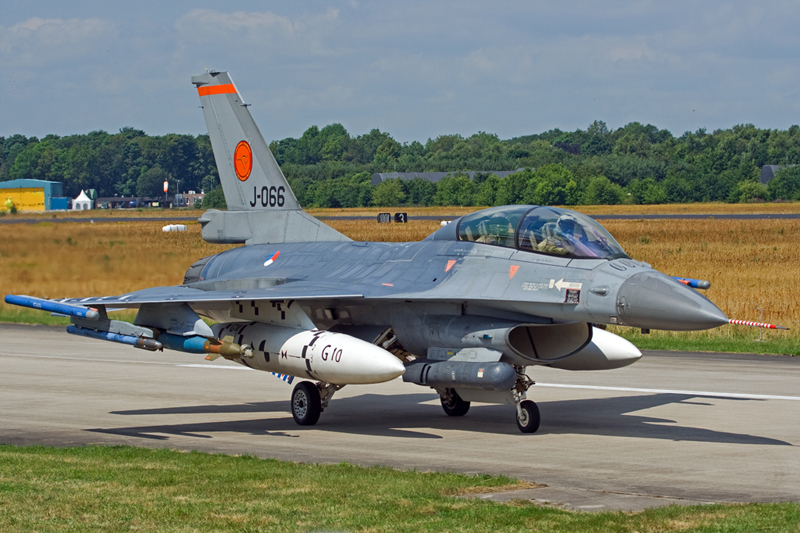
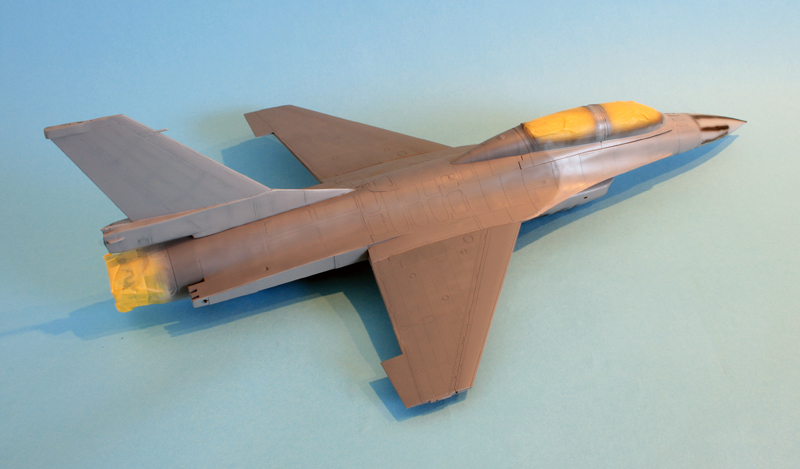
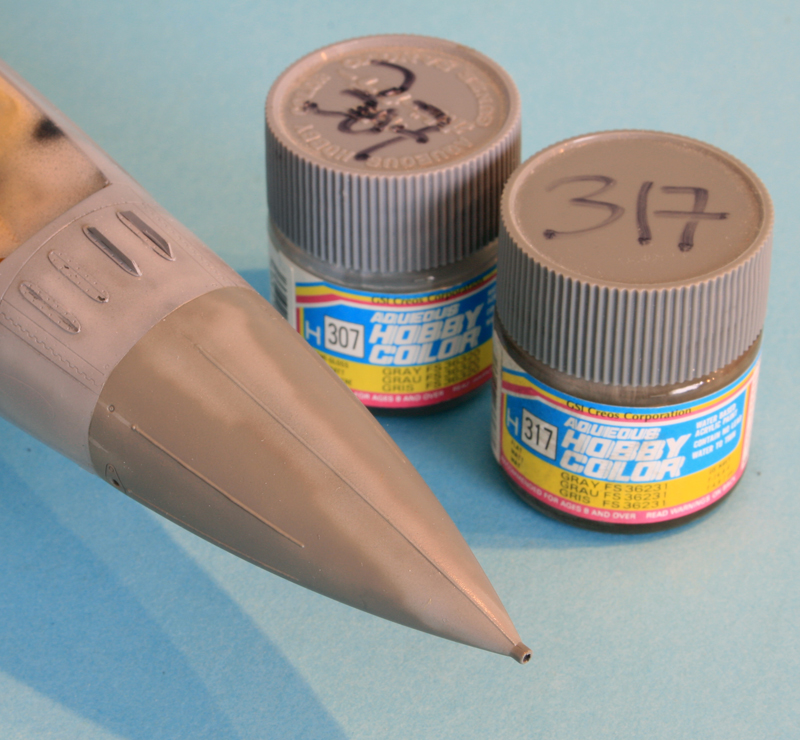
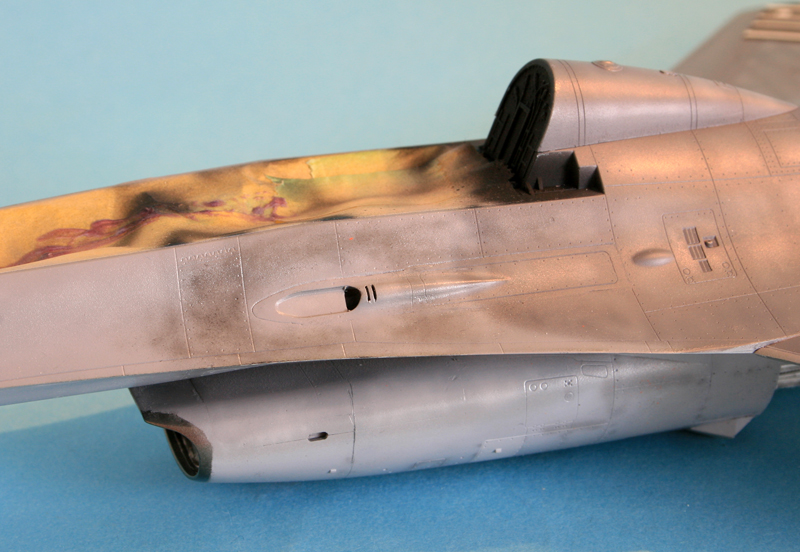
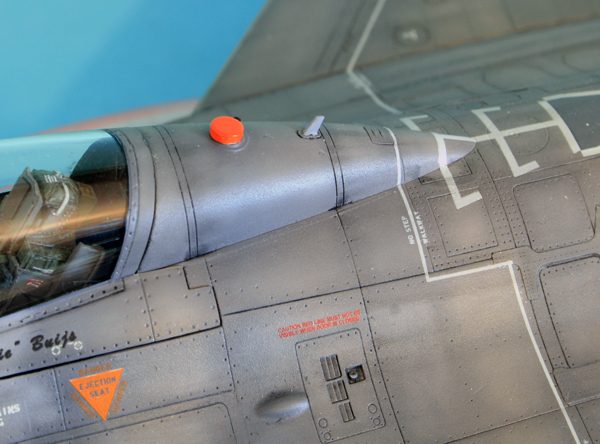
There is a very typical colour difference on the nose, probably from cleaning that area.
I made this with a basic layer of H307 and then a second layer of H317. Some smoke mist here and there:
I made this with a basic layer of H307 and then a second layer of H317. Some smoke mist here and there:
The tail got his orange band, that was easy :)
The underside is also typically weathered for an F-16. Gear doors remains clean but the belly has all sort of streaks, made with Smoke, and alclad pale burnt metal.
And here's the result just before the first gloss coat prior to decalling
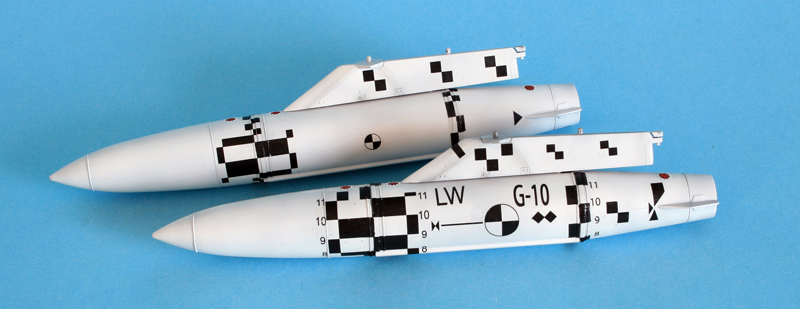
Decal work started with the wing bags and their multitude of homemade decals
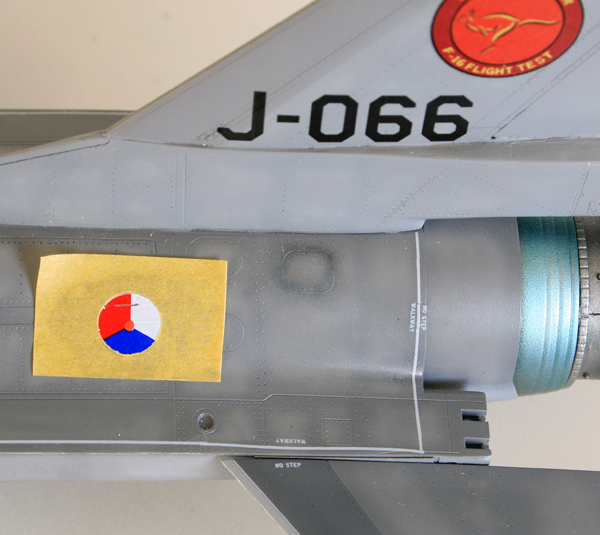
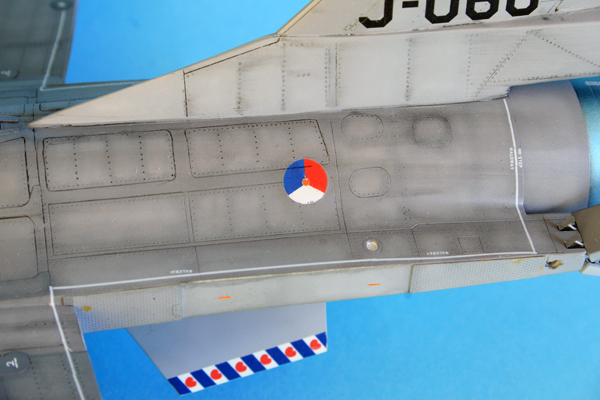
Something wasn't right but I couldn't pinpoint it....
Then it hit me. One of the KLU roundel was not correctly oriented, bummer. First time I ever did a KLU aircraft. Let's say I was lucky on the first 3 placed. Of course that one was set in stone and there was no way I could rotate the decal. Overpainting was the only solution (since I was short of that decals)
Next came the TER with each 2 weapons loaded.
Assembled the speedbrakes. Mix of kit parts and PE fret from eduard. At that point I realised the decals on the exhaust were too contrasted so I applied a mist of alclad pale burnt metal over them.
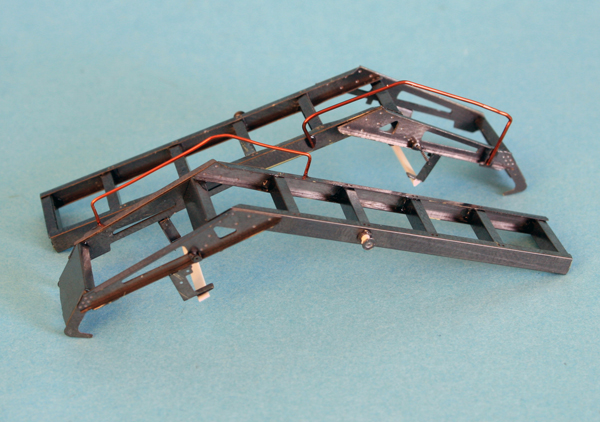
Assembled two eduard PE ladders - those are not used in the KLU I believe. But hey, OJ made quite a few airshows :)
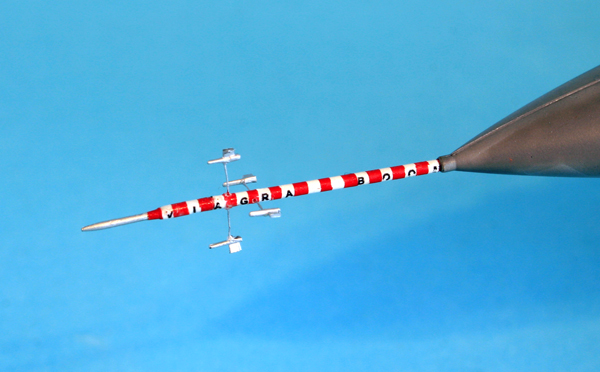
In the meantime I worked a bit more on the aft glareshield, adding specific stuff for the Orange jumpers, like the two tiny cameras on top.
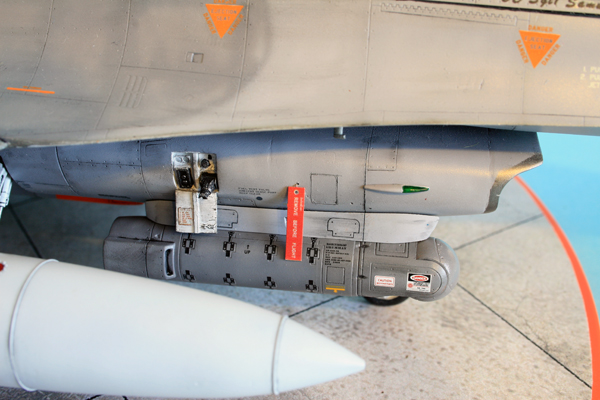
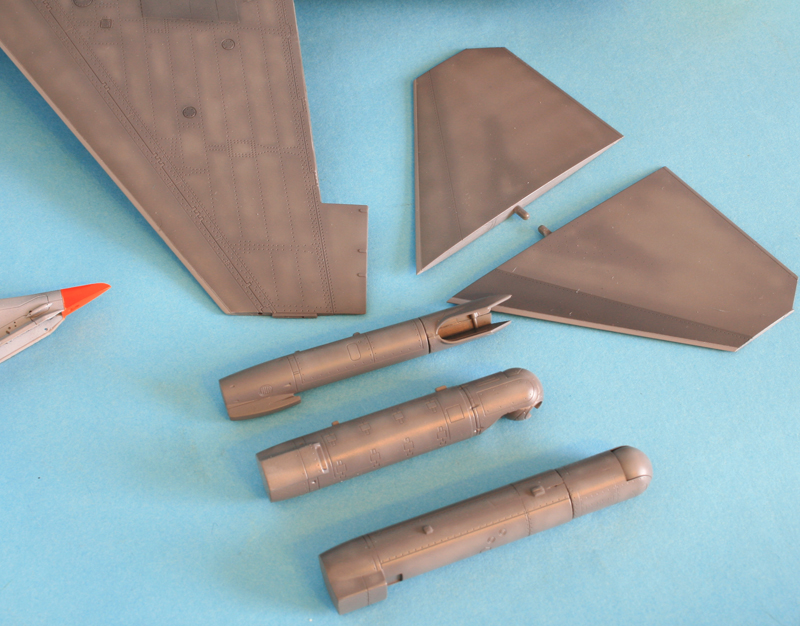
The last thing I needed to do on this is to scratch the Orpheus pod...
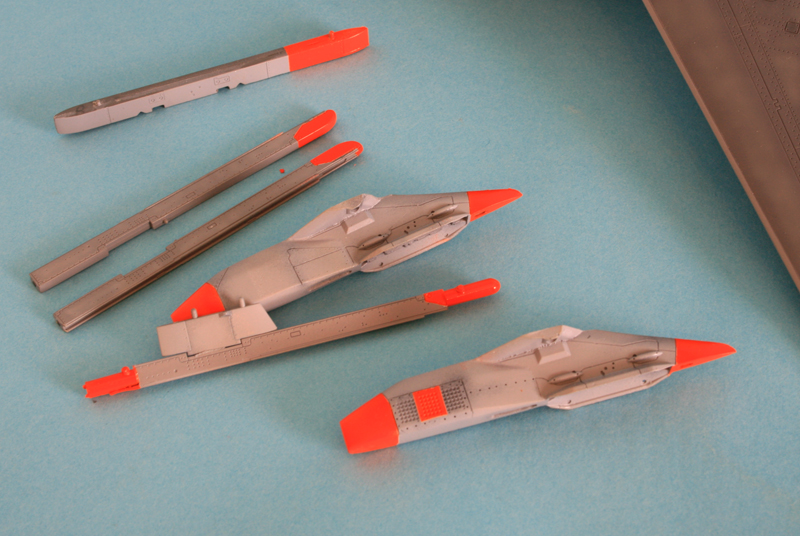
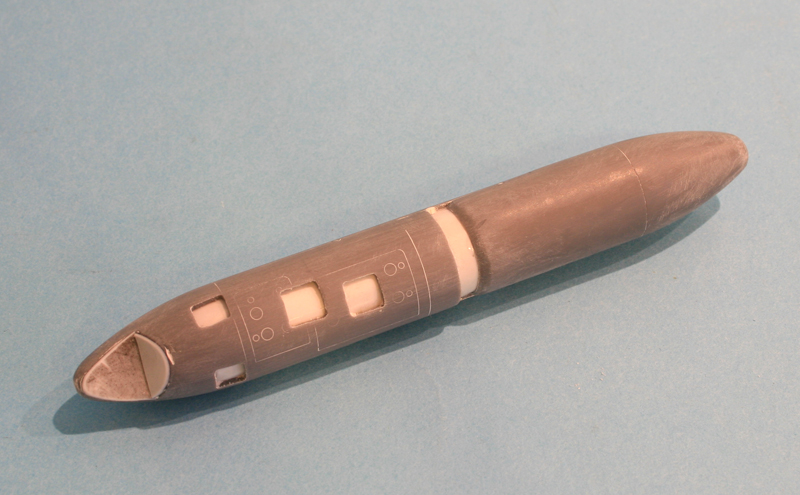
Analysing the box weapons, I found two identical pods that could turn into orpheus . So I cut all 4 parts to length.
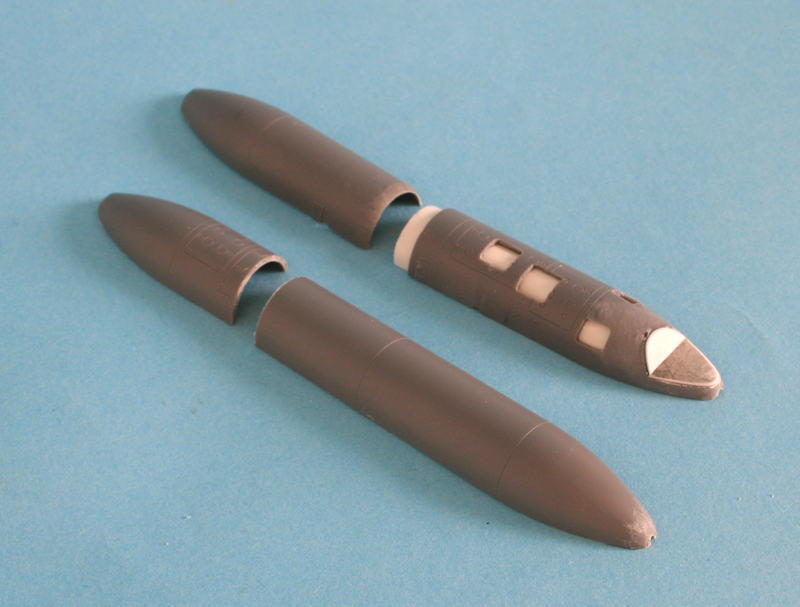
The camera windows are blanked on this modified pod, so they were cut into the bottom parts and covered from the inside with plasticard. The top 2 parts will join against each other, but the bottom 2 parts won't as there is a recess on the real pod. Again, plasticard was used to replicate that.
The bottom nose was also cut and flattened with plasticard. I think I went too deep on the horizontal there, but that's the way it will be.
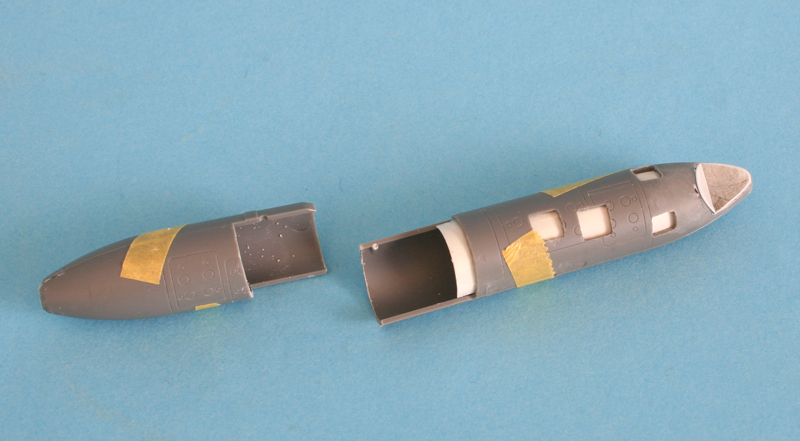
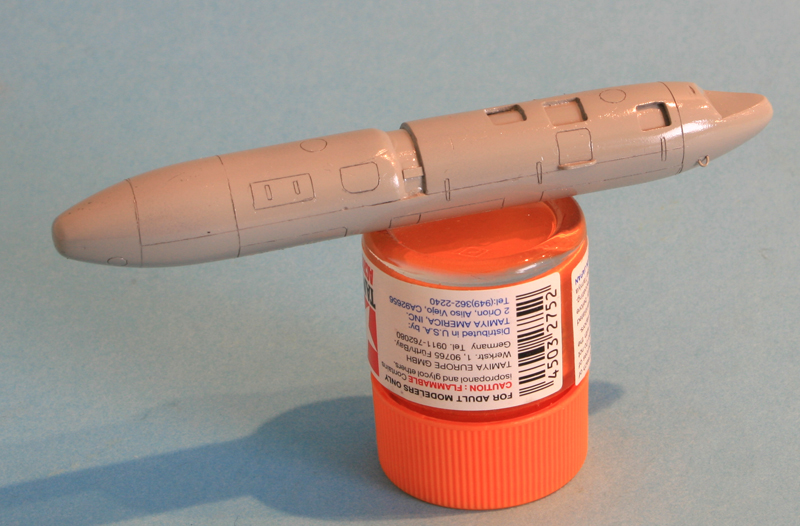
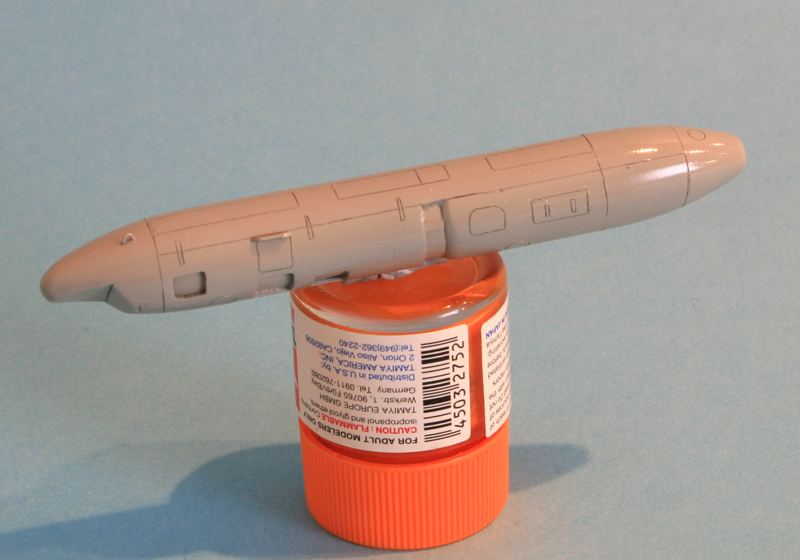
The pod was then assembled and the pointy end sanded to a better shape. The engraving was filled with superglue and the whole pod sanded, regraved and primed. Details were added as well here and there
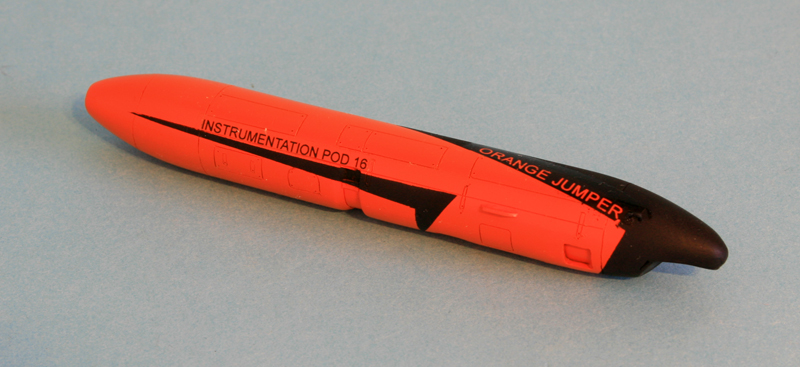
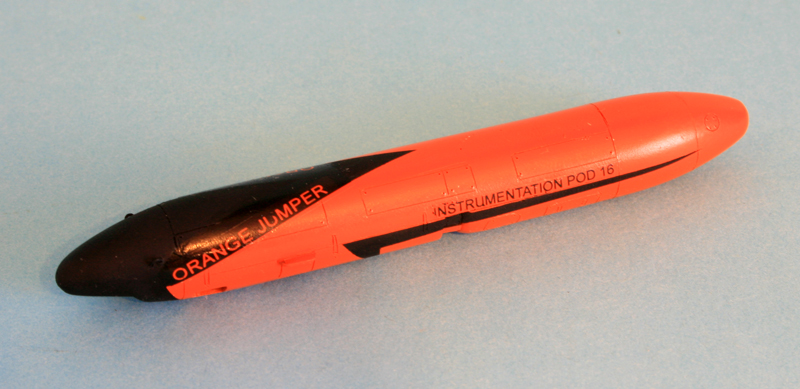
Now that this pod is done, the hardest thin g of the conversion is behind me :)
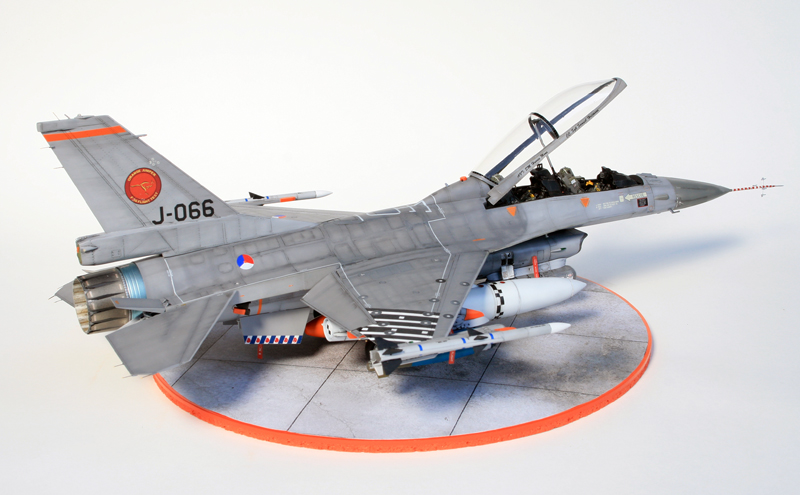
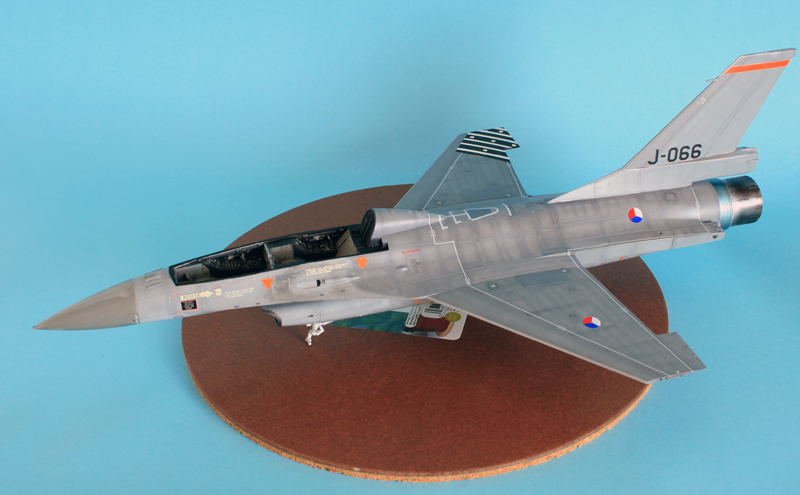
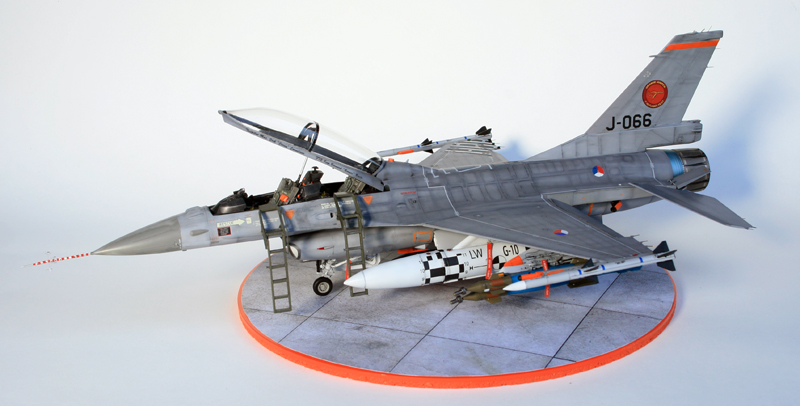
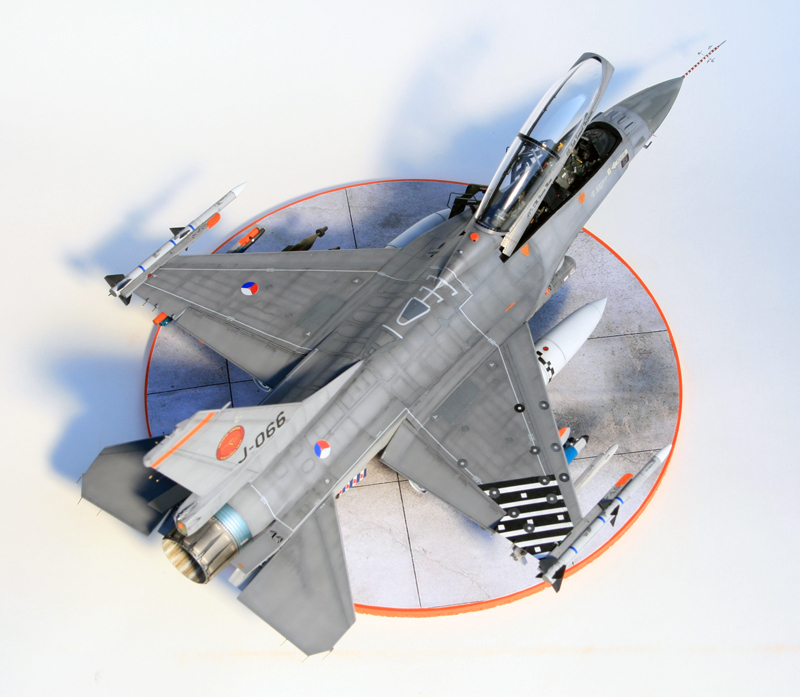
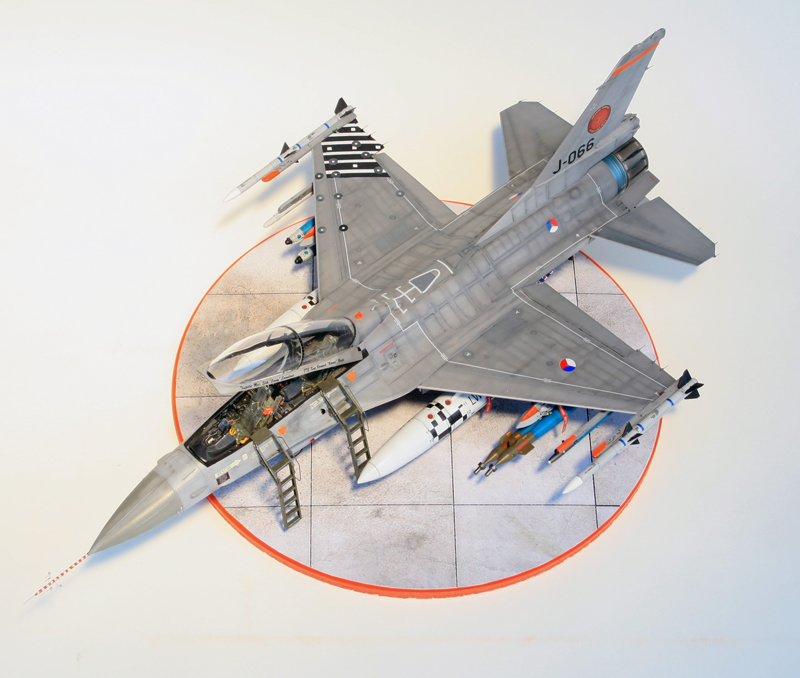
I'm thus calling this one done.
Probably one of the most attractive F-16 I ever made :)
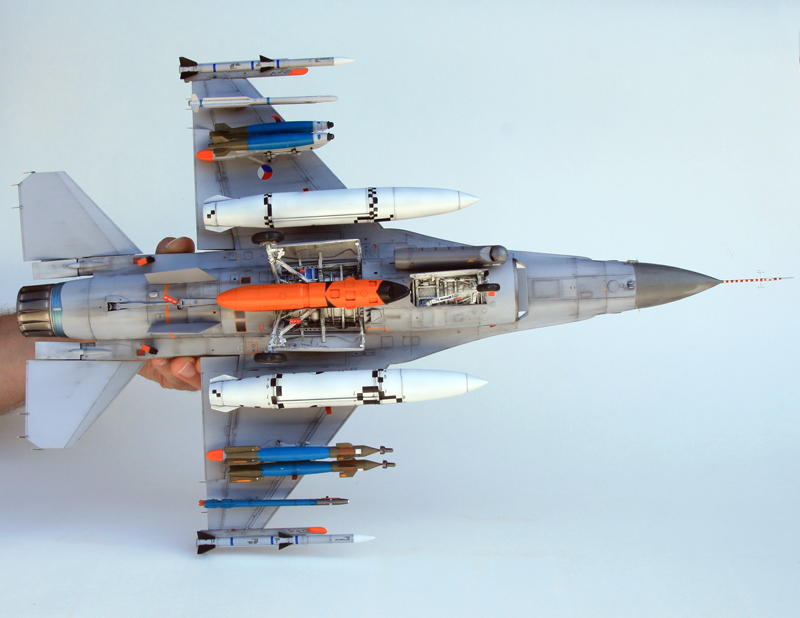
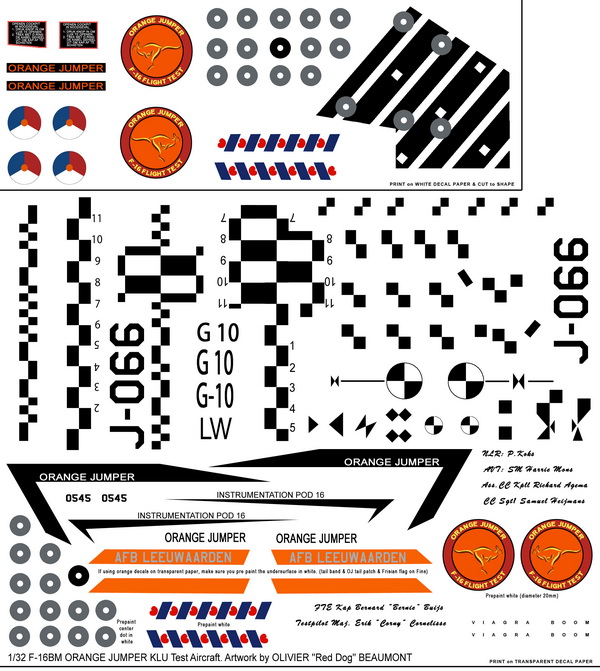
here is the hi res PDF artwork for the decals. Just printing the PDF realsize on an A4 will give you the correct sizing for 1/32.
Model completed September 2011.