To this ..
Then sanding, cleaning, engraving, priming.
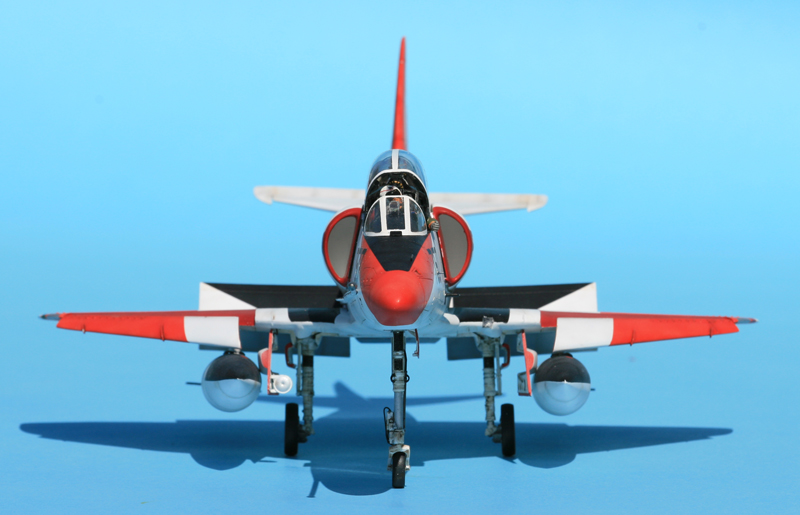
I'll dispose of the original pit and use the BB resin pit instead, which I already use in my OA-4M in 1/32. But this time, I'll open the wing brakes fully, I'll probably also put two pilots in and the canopy raised a bit to give them some air.
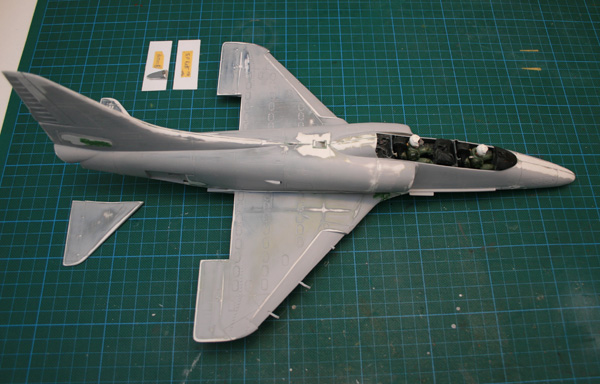
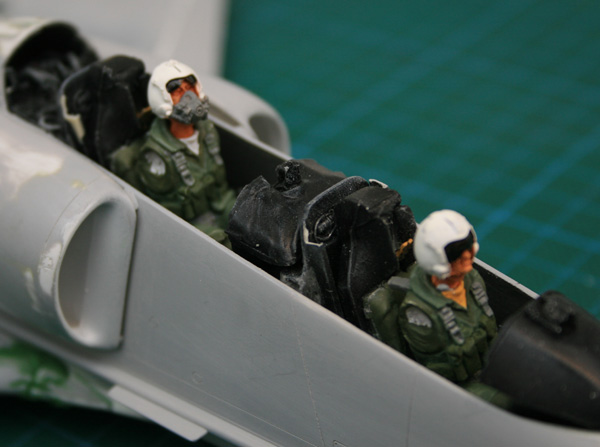
The Skyhwakw is now reassembled, the BlackBox pit is in and I sat two PJproduction 1/32 Navy pilots which had to be fitted inside the very small pit.
I tried to fit also some great pilots from Master details, but these american are huge and there's no way I could make them fit into the tiny pit of the TA4J.
Even the PJ were a real challenge to make fit.
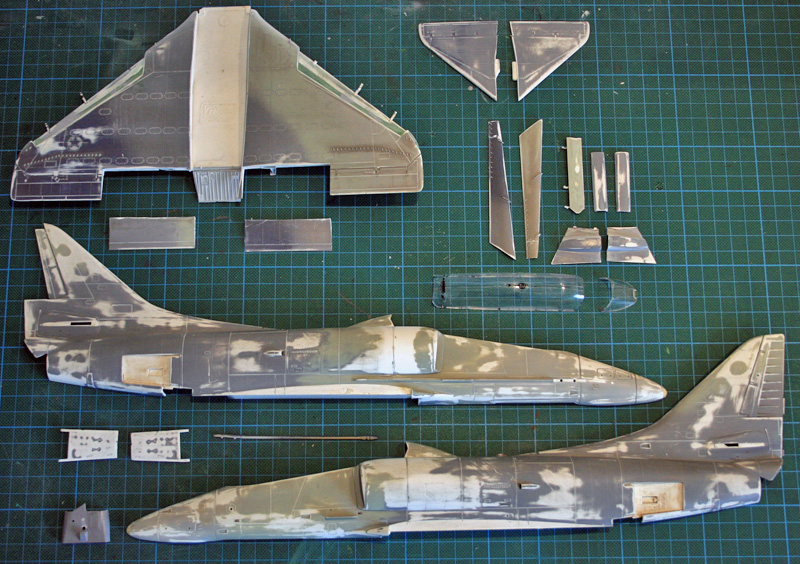
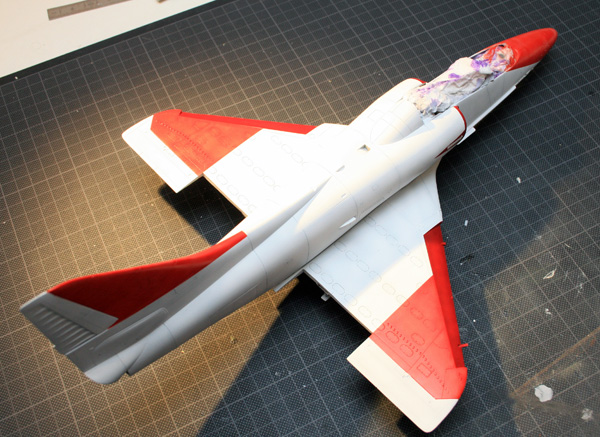
Painting started with the now usual pre shading done in dark grey rather than black. Then the overall model was sprayed flat white.
Next step is the hi vis orange/red (H23 + a touch of X6) and the colour fading is done first with the initial mix + white, and will be blended with again the initial mix and Mr Colour thinner that makes the acrylic paint a bit transparent.
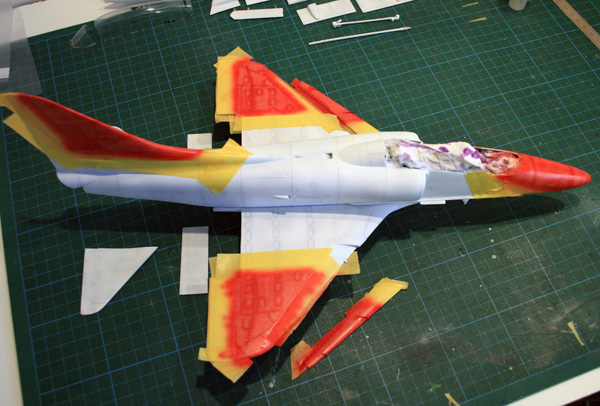
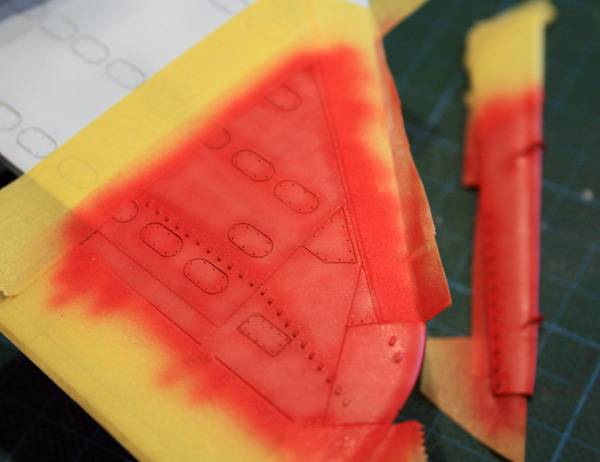
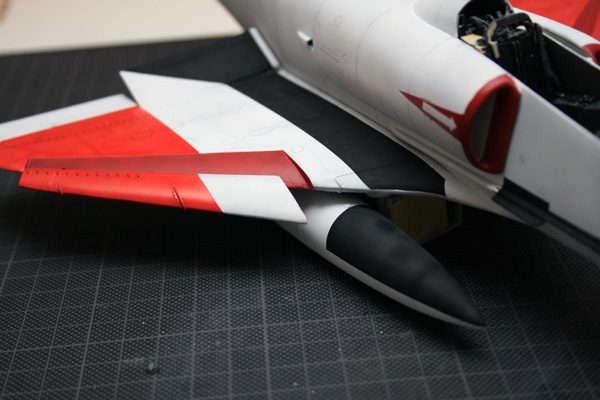
The hi vis red was blended back with the original red. The dark red will be for the inner surfaces for the slats, flaps, spoilers and intakes. It's starting to look like a trainer aircraft :)
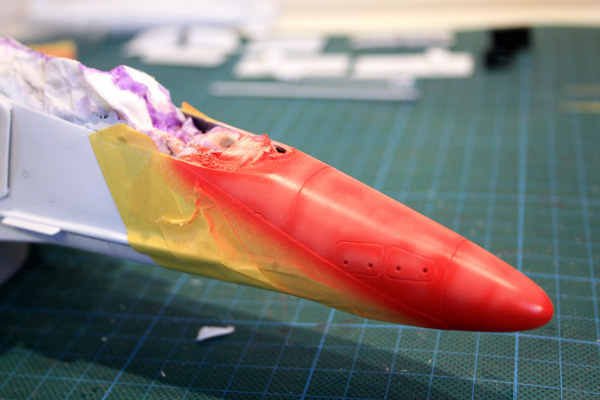
I don't have decals for the air intake, so I painted them. IMHO, that's the trickier part for any skyhawk painting.
I don't have decals for the air intake, so I painted them. IMHO, that's the trickier part for any skyhawk painting.
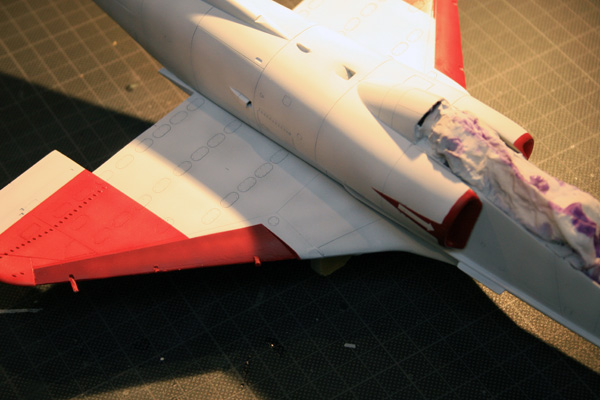
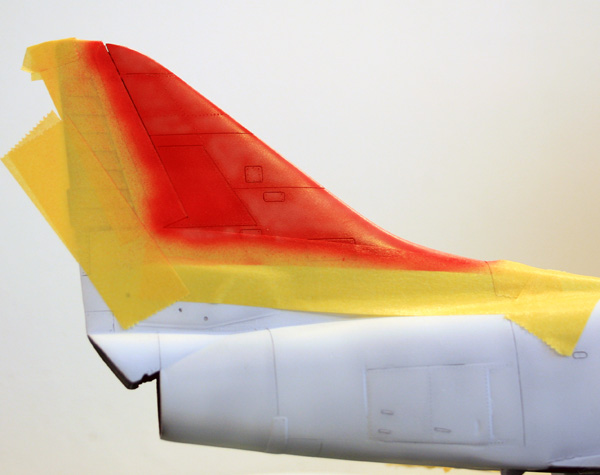
The black is on, lightly faded then blended.

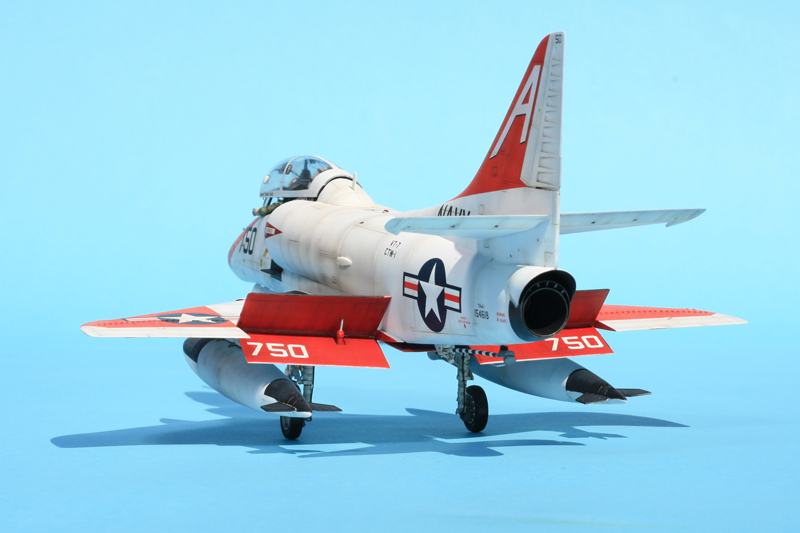
It seems they all have different walkways and anti glare. Which offers a nice variation when doing multiple Skyhawks.
This model is dedicated to a European modeller fellow who gave a spare canopy from one of his model. mine was cracked beyond repair.
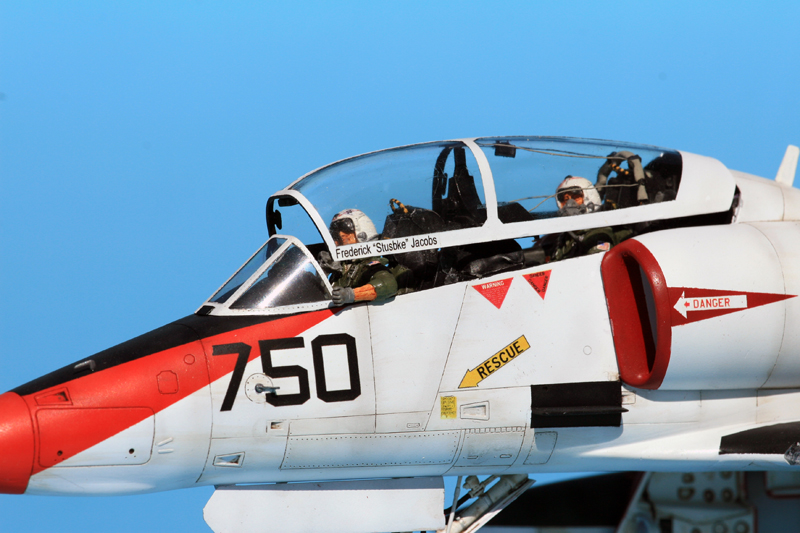
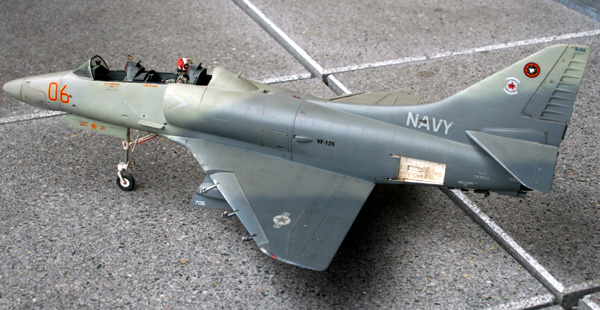
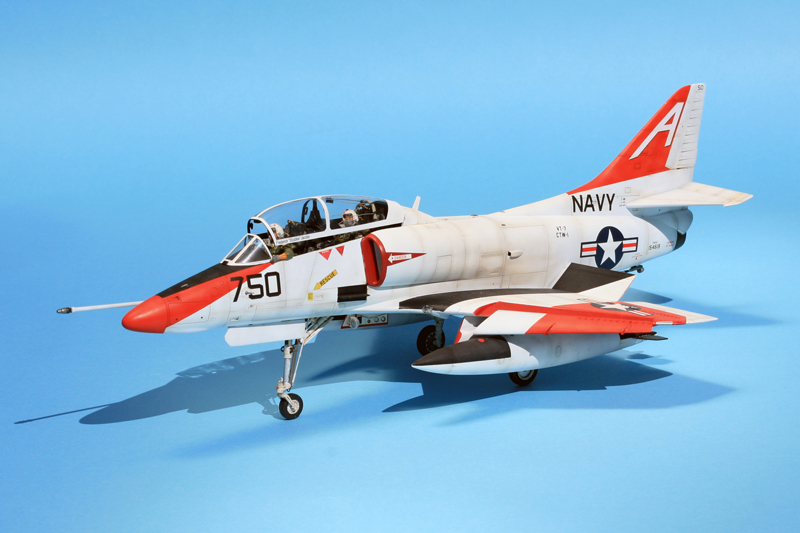
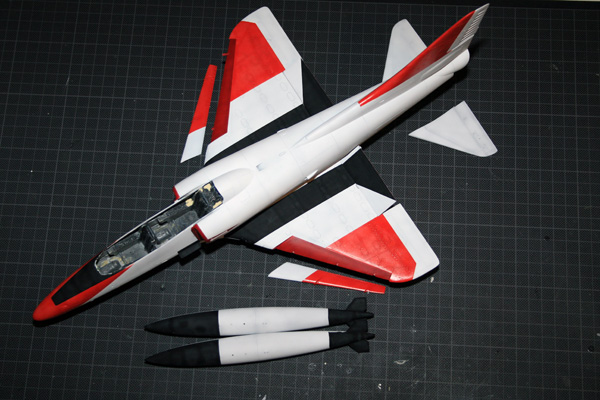
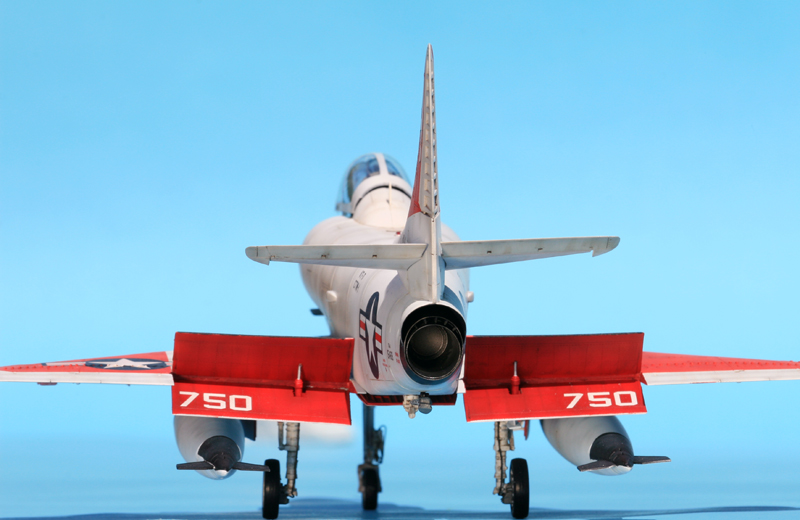
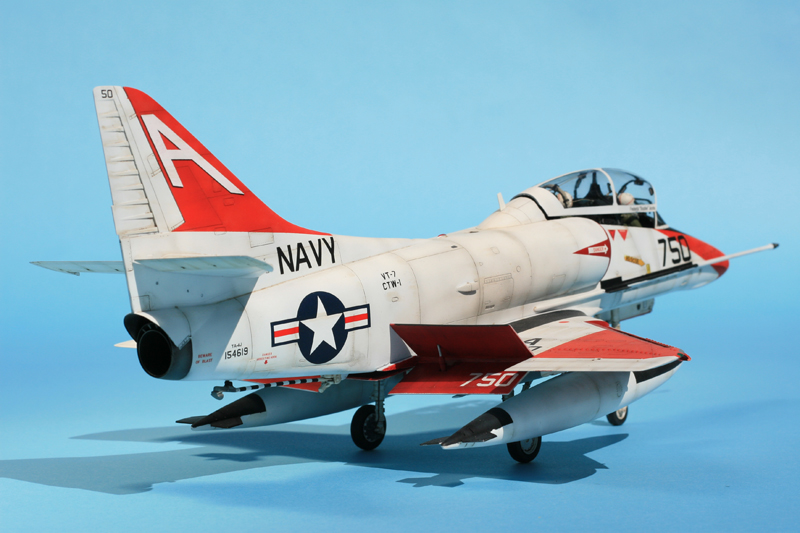
The finitions went as usual, Decals, gloss coat, Smoke, weathering with oil, smoke again then a flat coat. Pilots needed a lot of adjustment to fit the tiny cockpit, the IFR hood was scratchbuilt inside the canopy and the final model is depicting a Ta-4J coming back from a hop, taxiing back to the parking position as often seen with the canopy just opened to get some air to the pilots. They seems to be hoding short of a taxiway intesection. I'll probably make a nice display base for the model as well.
Here's the artwork for the decals I made for this TA-4J. The image below is low res, but the link to the PDF should work fine.
It's far from ideal on a single sheet of transparent decals because of the stars& stripes and white number. But considering the model is white, the background and the lack of white ink in the printer shouldn't be a problem (except for the white internal flaps number)
the stars didn't make it to my model because the blue in my printer was too light, I ended up using the kit's instead.
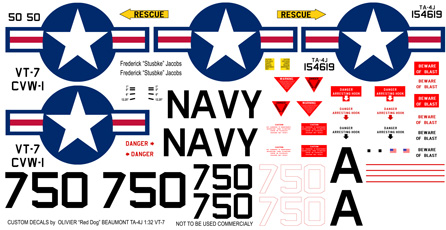
here's the link: http://www.ravico.com/ST/models/TA-4J/TA-4J_master.pdf
Model finished April 2010.