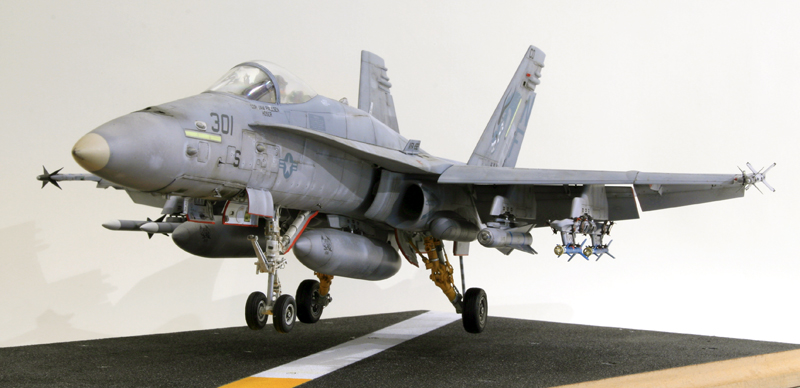
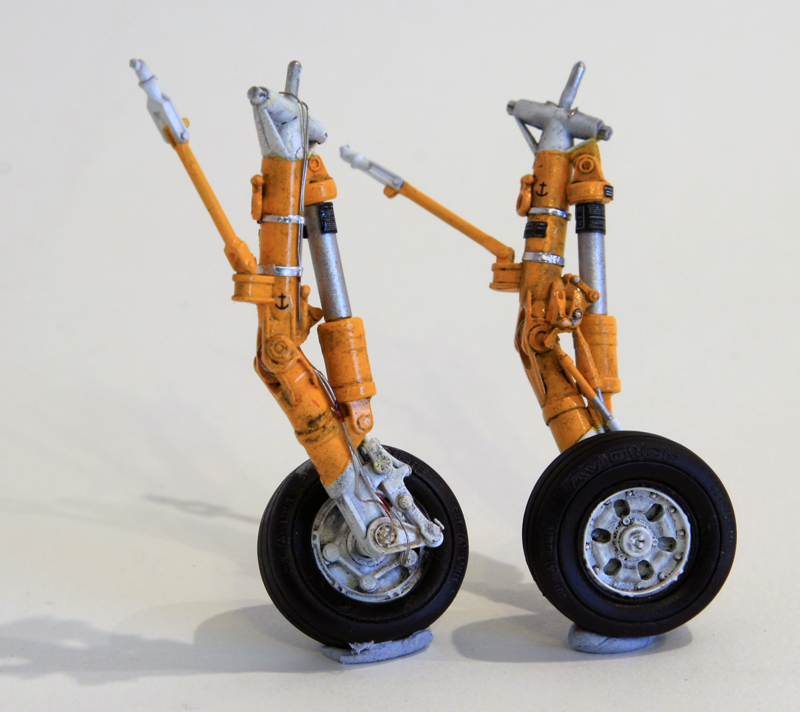
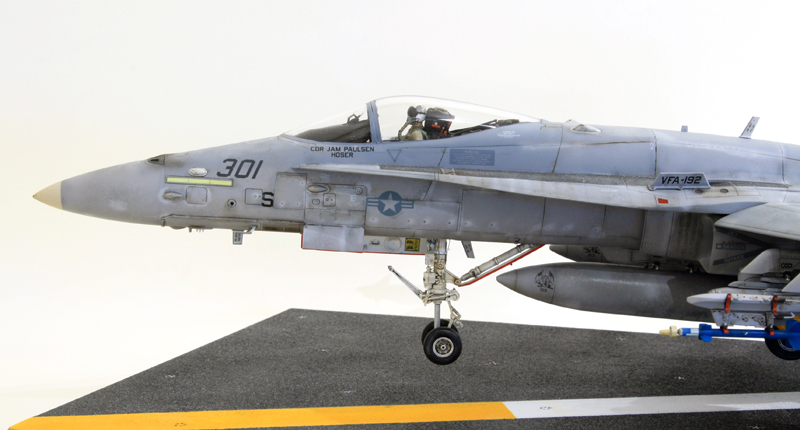
The next project is an ambitious 1/32 one. it all started with the idea of modifying the gear legs of the F/A-18C to display them in flight and to paint them in yellow as is the tradition in the VFA-192.
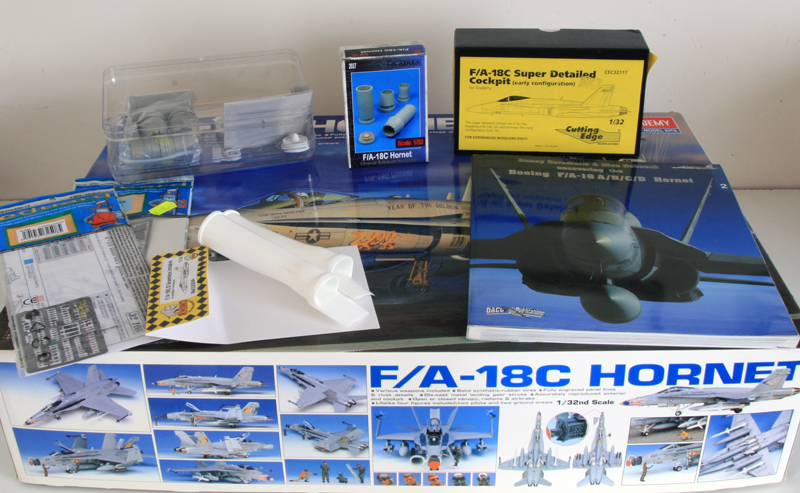
It's the venerable academy F18.
I'll use the Cutting Edge Cockpit, Aires exhaust, eduard placards and external set, Rhino seamless intakes and the daco book.
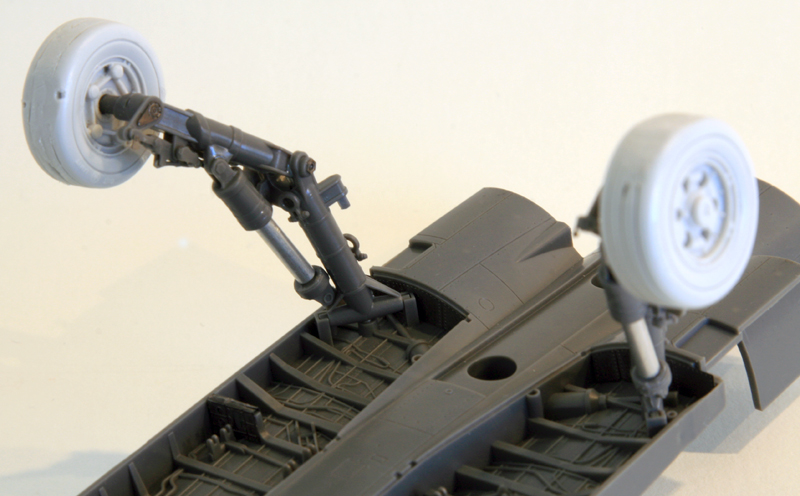
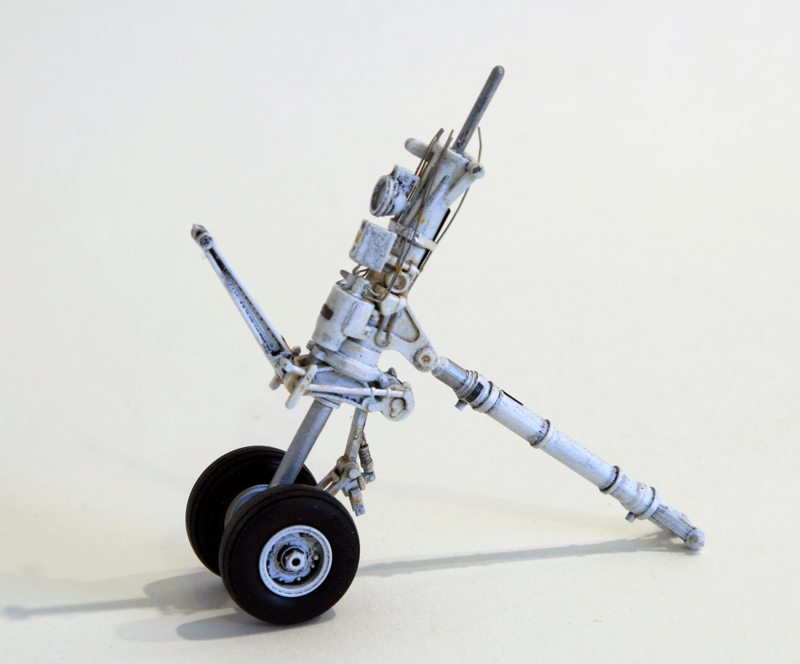
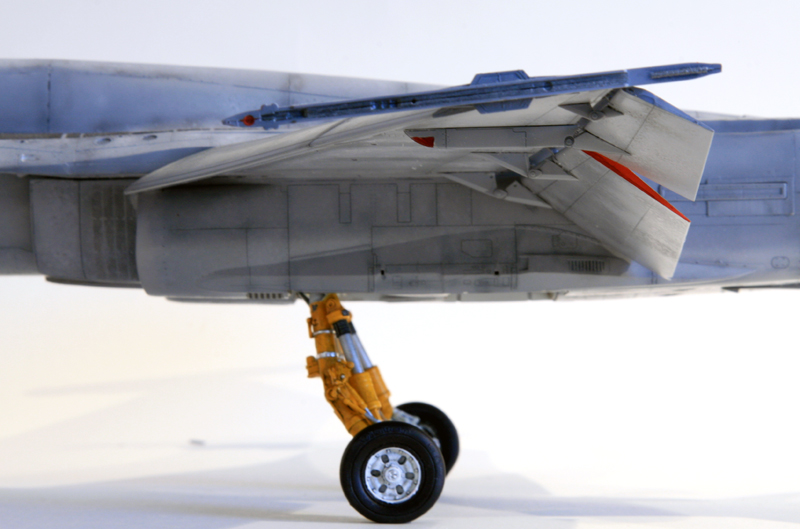
For once I started with the gear as I first needed to ensure that extending the gear for an inflight was possible.
I cut the internal metal rod and repositionned the legs of the main gear in the fully extended position. Then lenghtened the oleo with hollow metal rod supported internally by evergreen tubing. I was so happy to have the correct size tubing for once that i went straight into it without studying pictures correctly and failed to notice that the olea was actually extending both ways (up and down) rather than up only as I did it. I'll probably leave it at that for the time being.
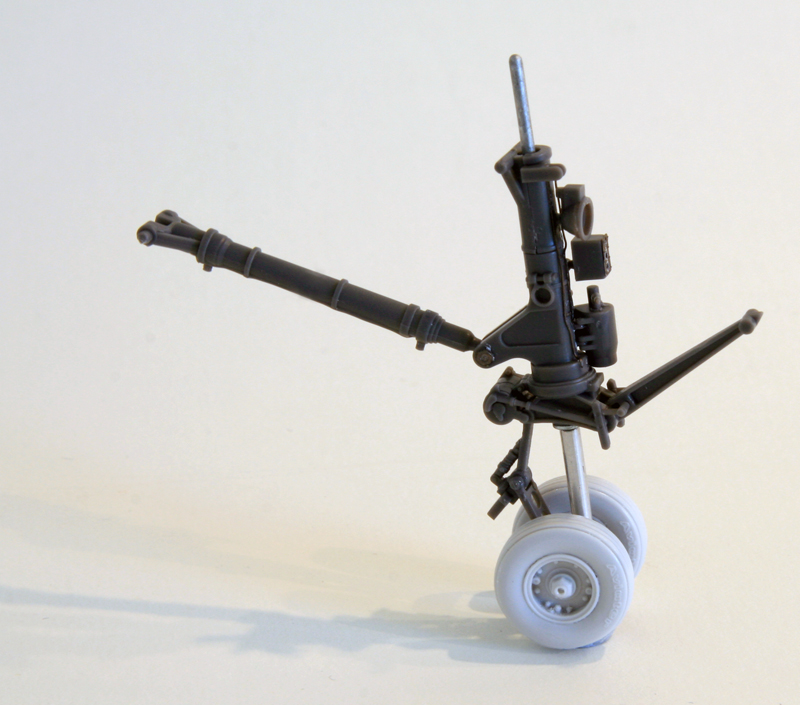
The nose gear seemed easier to convert but the internal metal rod neede to be cut at an akward position. Nothing the proxxon can't address.
The oleo was then extended as well and the torque links placed adequately.
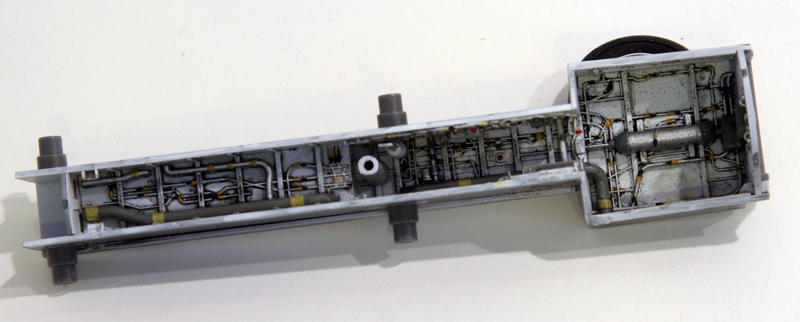
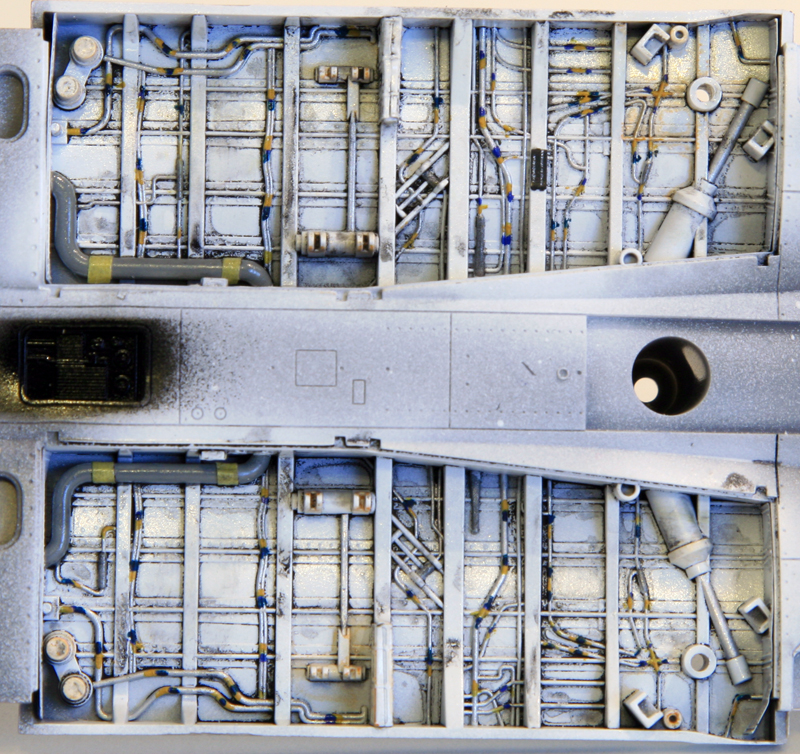
The gearbay are done as well.
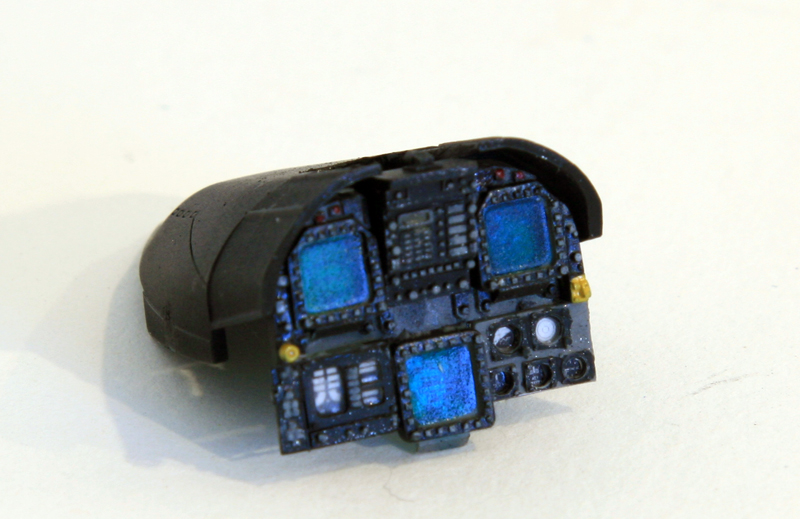
The next step was the cockpit, I'll be using the Cutting Edge early cockpit for this model. No big caveat. Fitting seems pretty straightfoward.
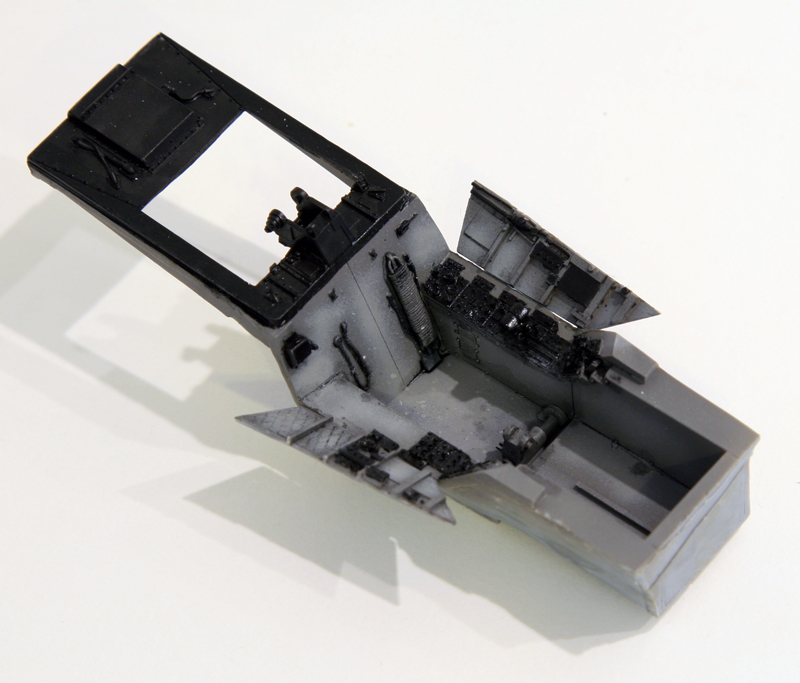
The tub was painted with Gunze H317 and grossly lightened. consoles were painted in black. After a protecting coat, a light wash was applied, then I drybrushed. Finally detail painting was done on the knobs and details.
Since it's an inflight, I needed a pilot seated in there and he needs to be in before the fuselage is closed.
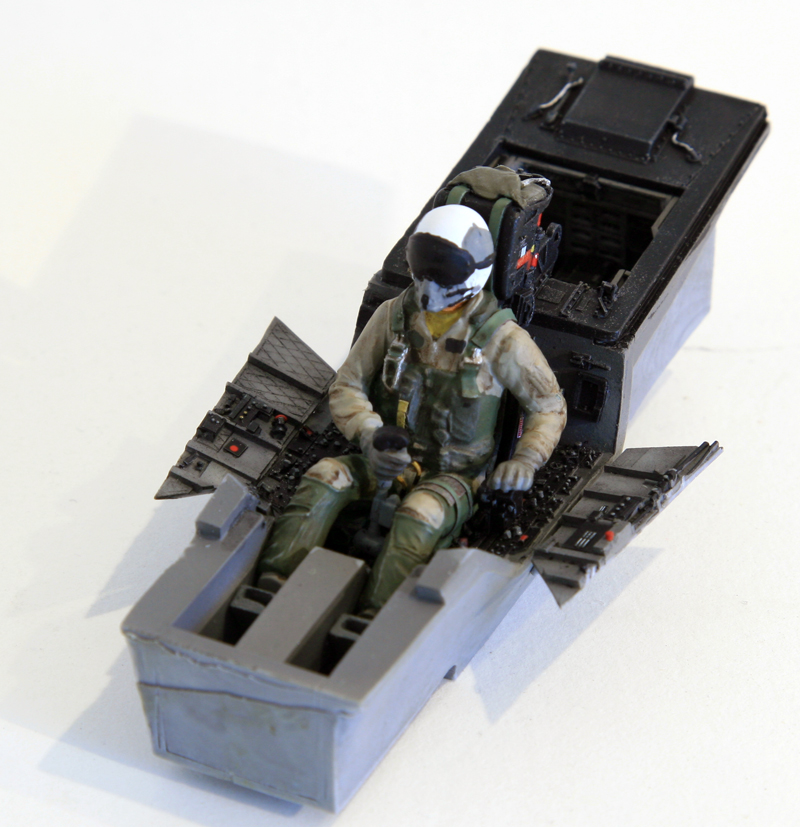
The pilot is from the box with some tiny détails added. I had to change a bit the arms position as I wanted the hands on control as the jet will be split seconds from touching down.
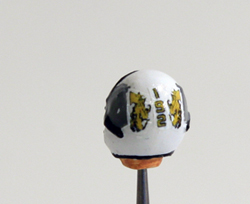
The helmet isn't very well detailled but will do. I 'll add a scratched 02 hose. Too bad i'm out of decals for the patches.
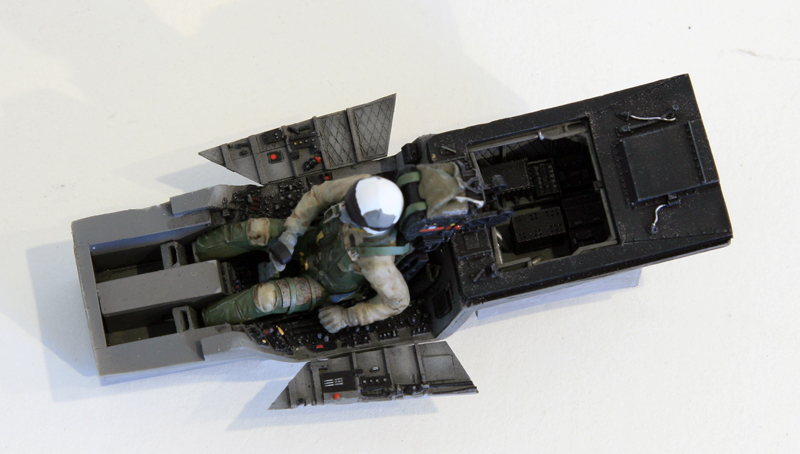
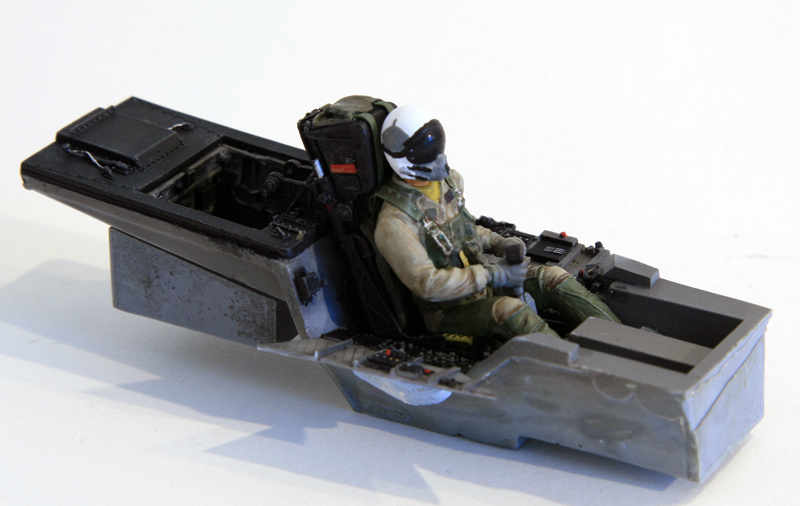
The IP is Cutting edge as well. it's invisible in the picture but decals are applied behind the glass as the aircraft is obvioulsy powered. Still need to work a bit on it there and there.
That white instrument glowing in the IP received a drop of transparent green to tone it down..
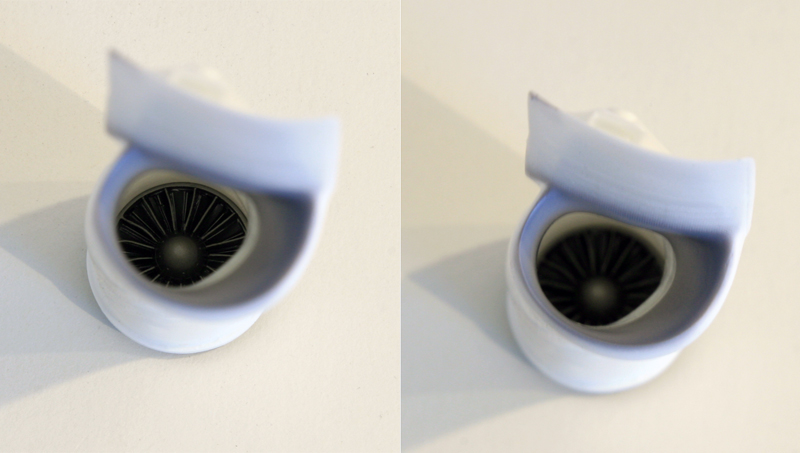
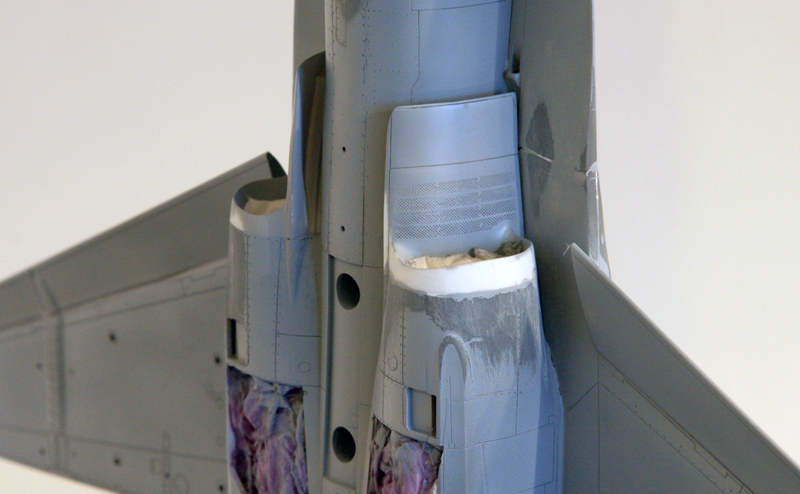
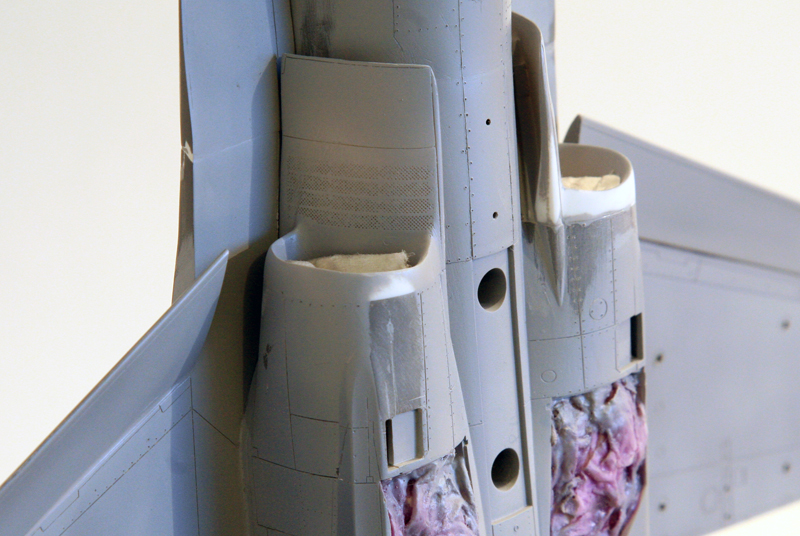
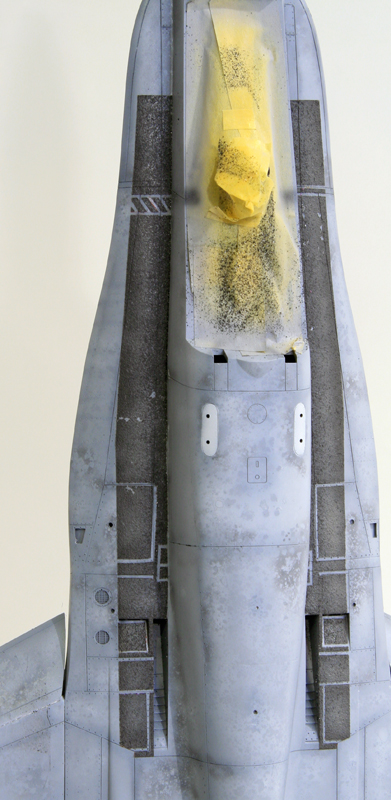
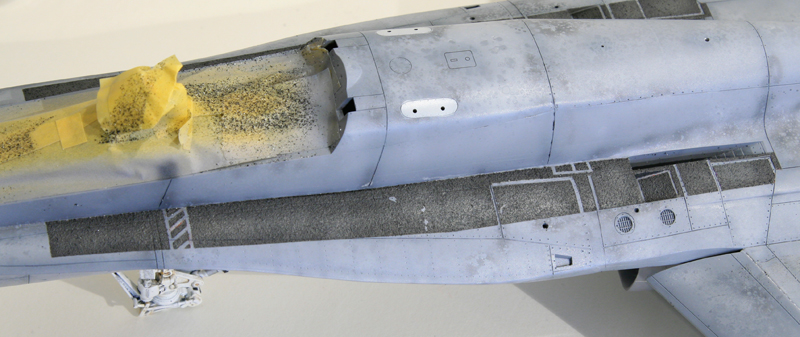
The intakes are seamless from Rhino models, they come in white resin so I won't paint them. I scratched my head for quite a bit as to how to mask the intake for the camouflage colour that wraps into the duct. I eventually did it with plain masking tape.
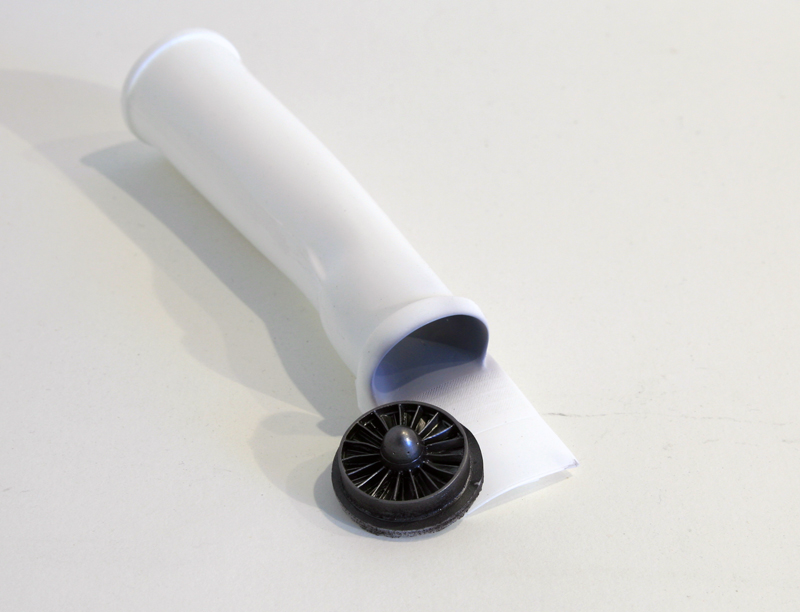
The seamless intakes are way better than the kit's, especially in shape and hopefully will be easier to install as well.
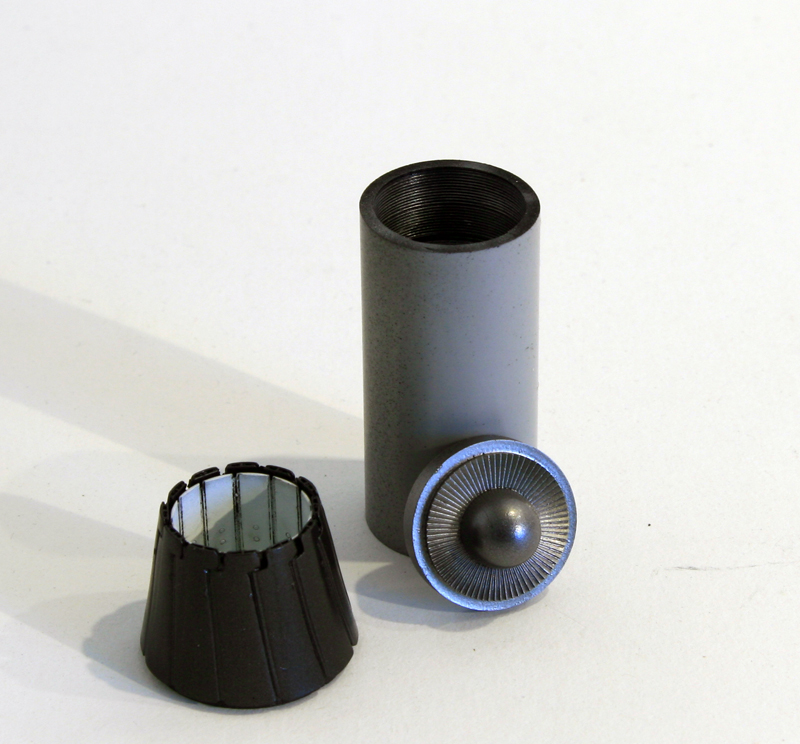
Some basic paint work was started into the Aires exhausts as well. No weathering yet, just plain alclad paint
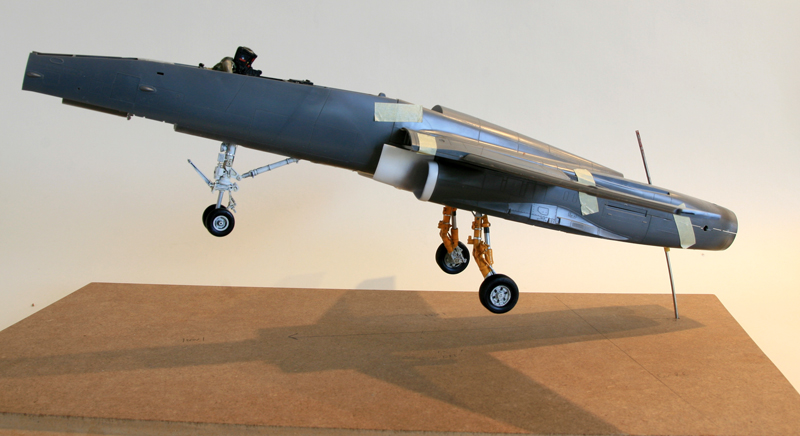
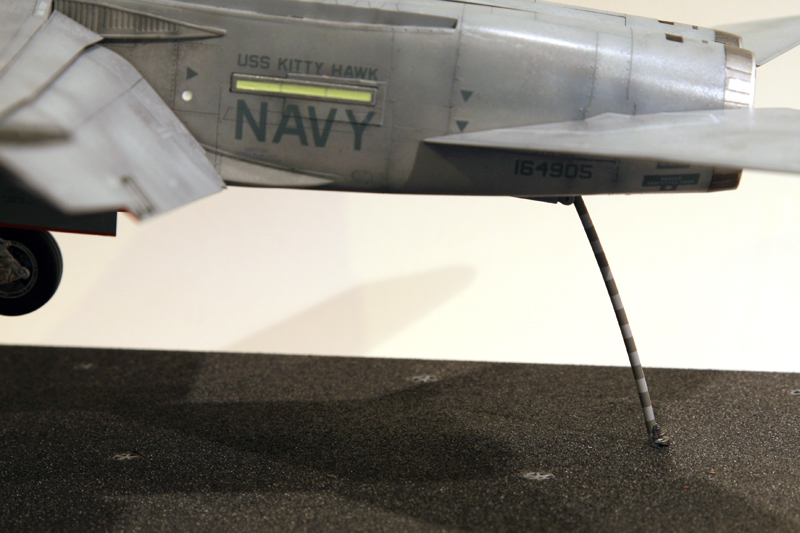
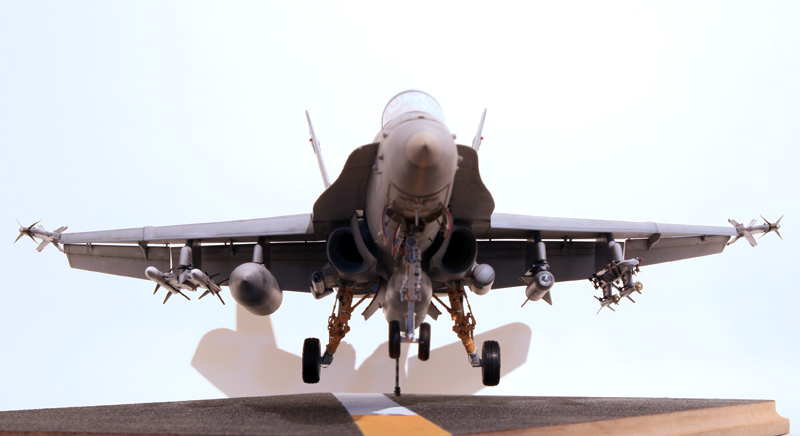
Next is closing the forward fuselage and planning the support rod in the aft fuselage for the inflight display. That's what I'd like to achieve:
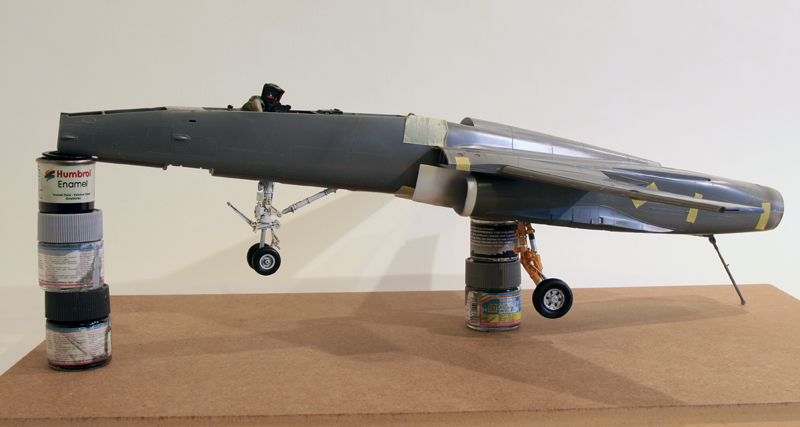
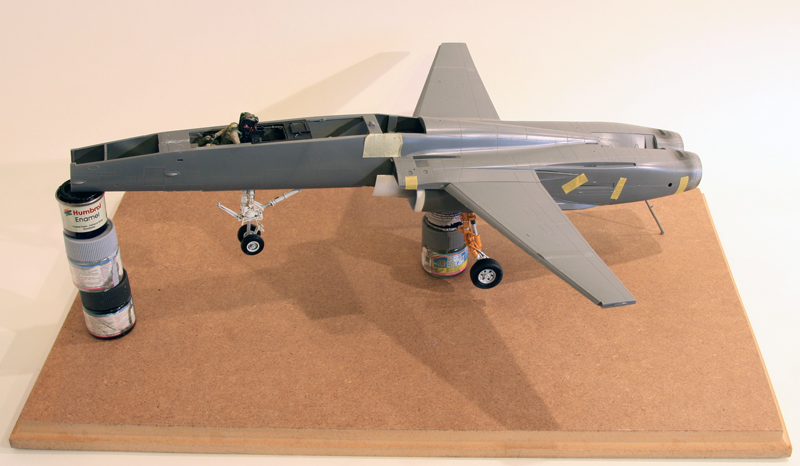
The goal is to be able to make it stand only from the hook, but just in case i am sourcing transparent rod to place between the hook and the mains or maybe even closer to the mains.
I don't want to be too close to the main gear though as I guess the yellow paint will attract the eyes and I don't want then to pinpoint the supporting rod too much... But if all goes well, the hook will be enough.
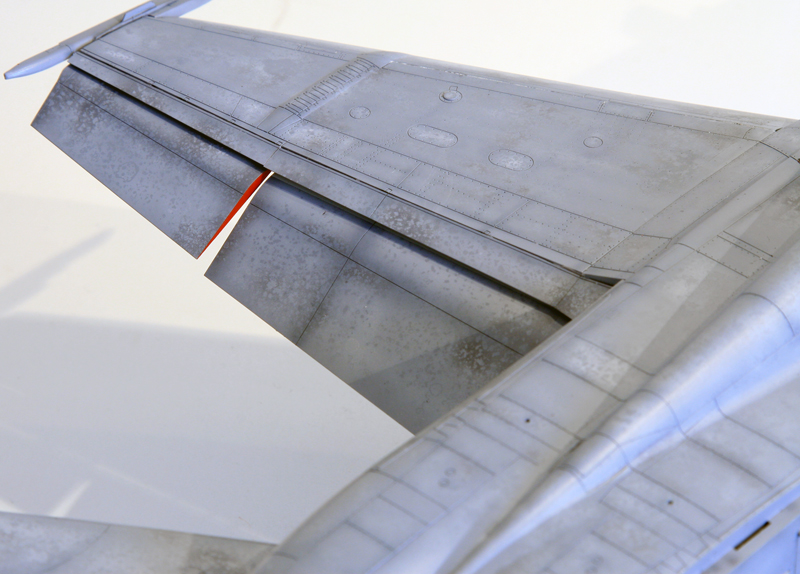
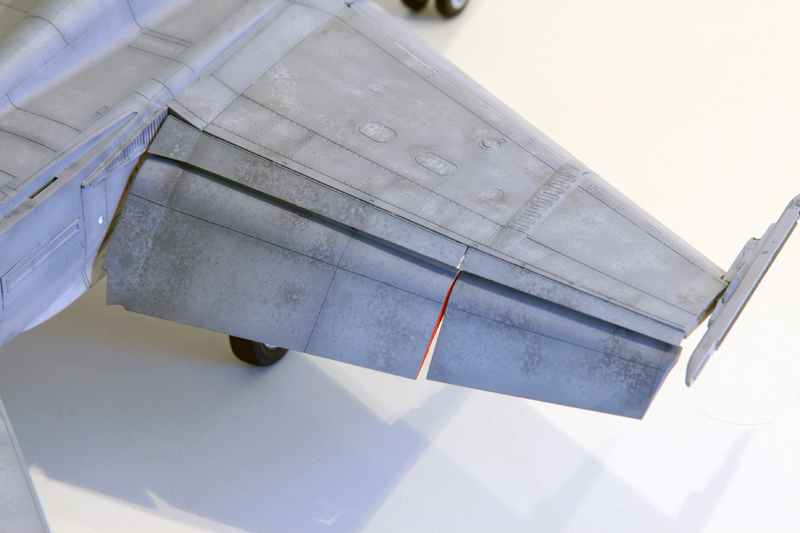
I took some 2mm steel rod, which is about the same diameter as the hook and passed it through the aft fuselage. I went through (at an angle) the aft locating pin and marked the exit point in the airbrake bay.
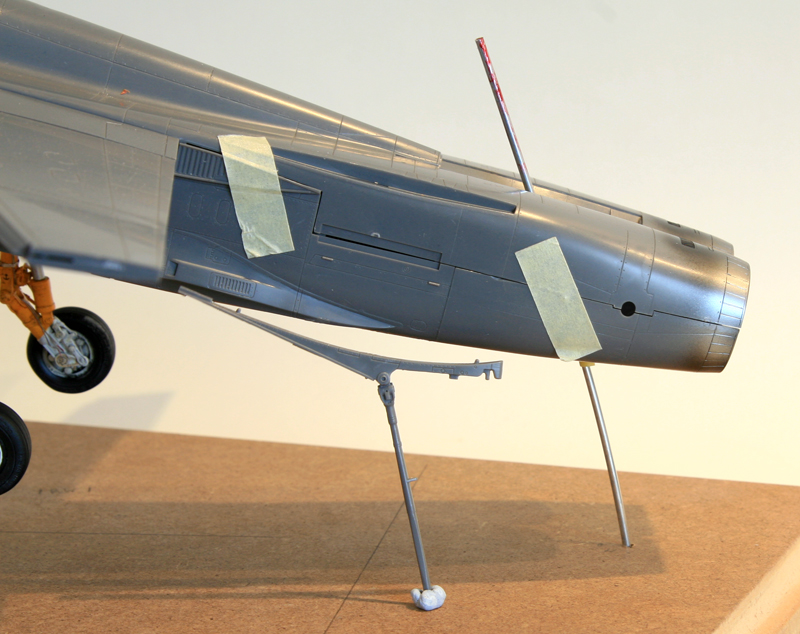
The model hook is displayed for comparison purposes
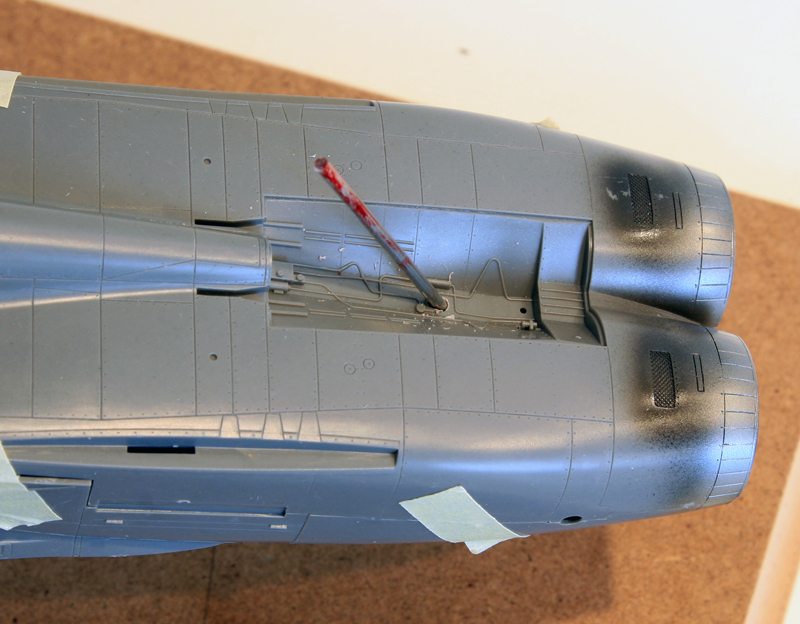
No, that red is not by blood :) I did not get hurt while passing the rod through! It's red paint I used to mark the exit point from inside the fuselage ;)
Passing through the airbrake bay gave me the possibility to force a specific angle and offering a way to secure the rod laterally Inside the fuselage. From there, I think I can easily reinforce the exit point and close the airbrake and nothing will be seen . I can even let the airbrake removeable just in case, we'll come to that later...
Passing through the airbrake bay gave me the possibility to force a specific angle and offering a way to secure the rod laterally Inside the fuselage. From there, I think I can easily reinforce the exit point and close the airbrake and nothing will be seen . I can even let the airbrake removeable just in case, we'll come to that later...
No photoshop tricks :)
The rod does bend but not as much as I expected - that's the reason the AOA is still a bit too high in the above picture. That being said, more weight should be applied as the build progress so I'm still cautious.
It's also higher than what i want, but that will be easily adapted afterwards (better cut long and cut twice than cut too short)
I have a B plan or maybe even a non display plan. I can easily add a center acrylic transparent plain rod right between the gear legs and going straight into the internal fuselage. the two locating pins on the center fuselage provides perfect rod inserts. That way by planning carefully I could backup the hook rod when should the need arise or for longevity. The center bag would be in the way, but I can go through it as well ...
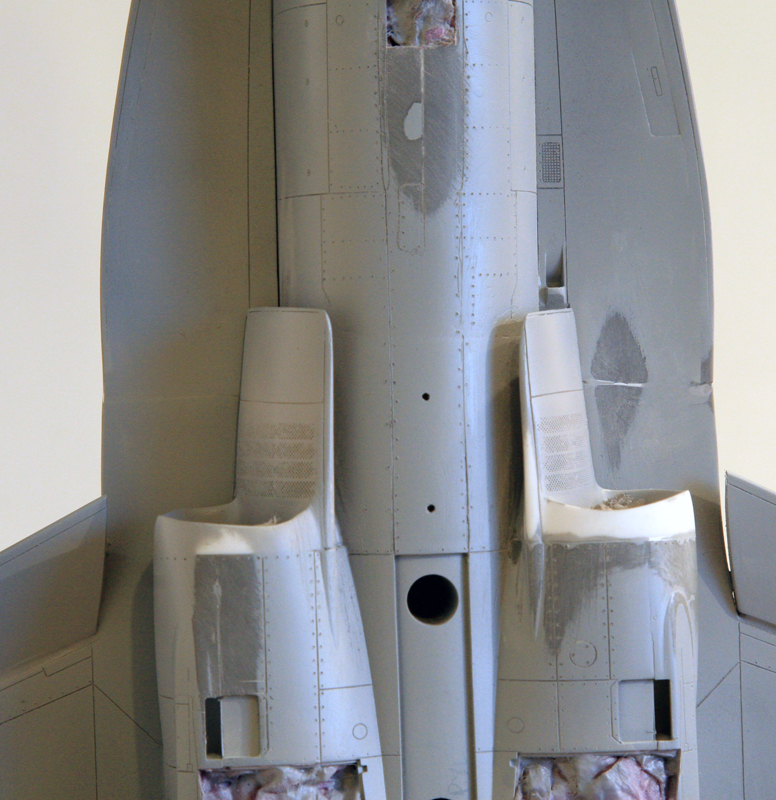
I spent a great deal of time preparing the model for the first coat of primer (Mr Surfacer 1000).
I heard that the kit was great with not too much putty trouble but i had quite a bit. I don't care too much and can work it out but can't remember where i read that?
Or maybe I wasn't careful enough assembling the early steps?
Anyway, most of the fitting issues occured around the intakes (that was expected) but also the junction between the forward and aft fuselage assembly. and fitting the LERX wasn't fun, especially the left one. the hardest thing to do after all was to delete the gap between the wing and and leading edge when the leading edge are down.
I had to cut the bottom of part of the leading edge and sand down the wing forward section to match the leading edge in the down position against the wing.
the trailing edges flaps looks easier although i think that the parts provided by academy (full flaps config as this one is landing are not matching the full flaps position i see on pictures, but i'll address that later on.
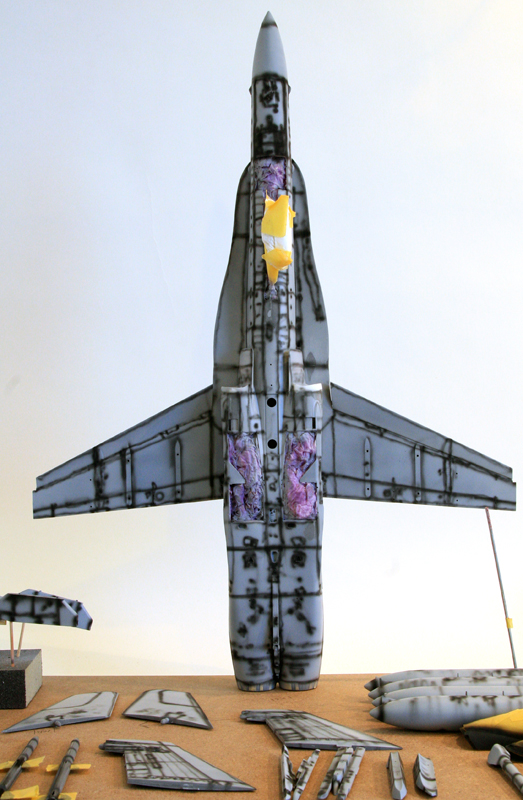
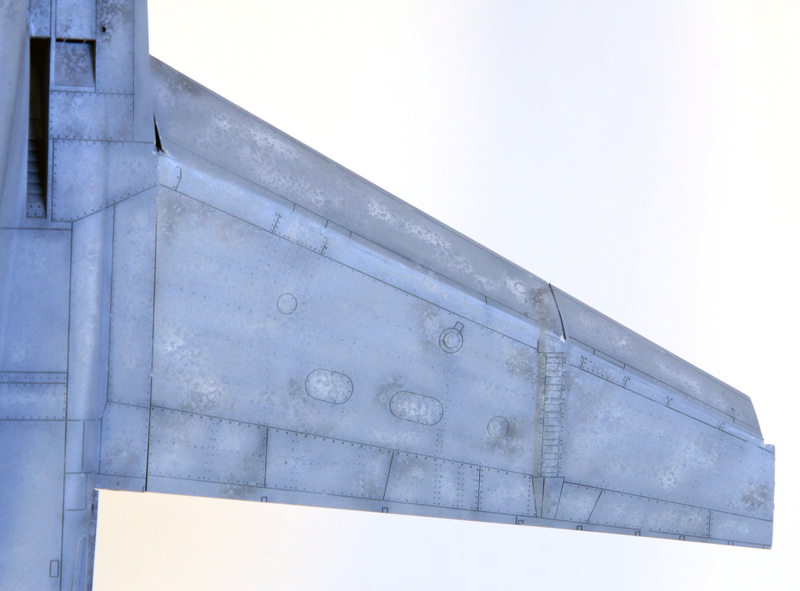
beside the gap filling and sanding, lots of panels lines (and rivets) were rescribed. i also added structure reinforcement around the aft fuselage formation strips and under the nose section as often seen on the F-18.
the model i'm doing dates back from 2000-2001 and i couldn't find proof of the upper wing root structure panels added, so i left them out at the moment
it's getting near paintbooth time, the part I enjoy most - I think I will try the salt technique for the first time on this one
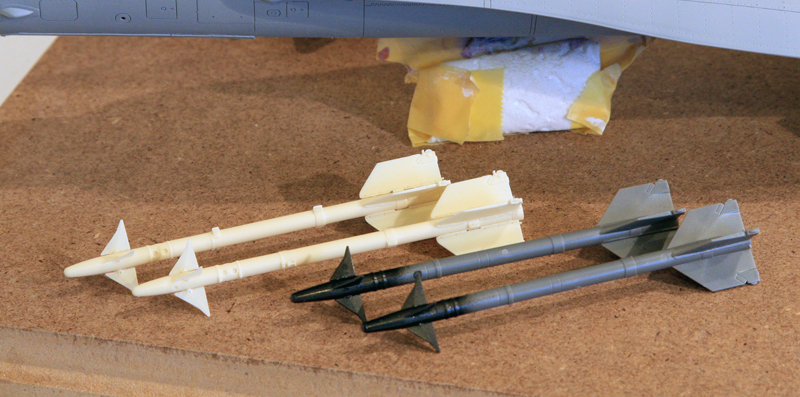
I compared the kit's sidewinder and zacto's and there's no secret, zacto's win all the way so they'll be on the wingtips. the only drawback is that the super thin forward fins on the zacto's sidewinder are bent, but nothing a bit a warm water can't solve. It's also worth mentionning that they are very easy to assemble and get them straight thanks to the way Zacto made them. He really made it easy for us.
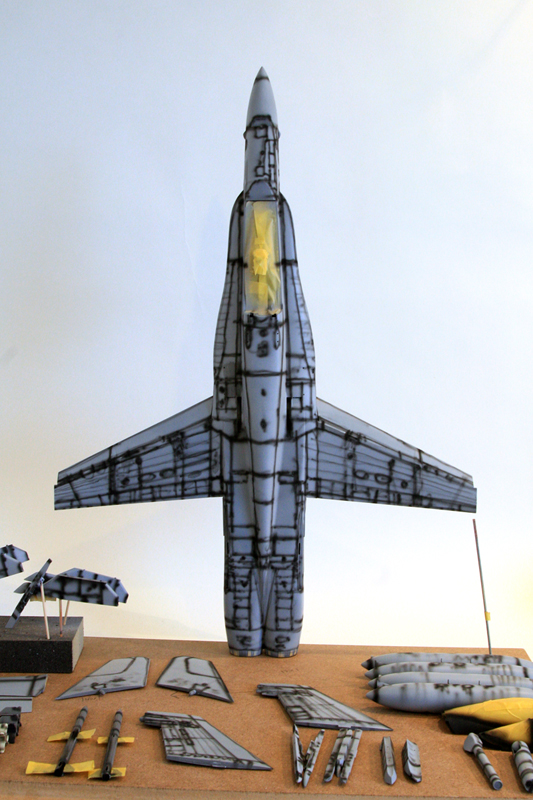
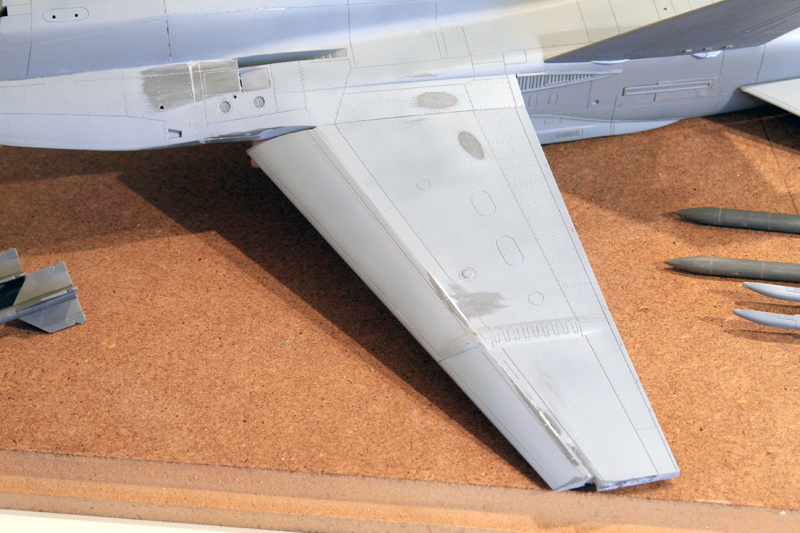
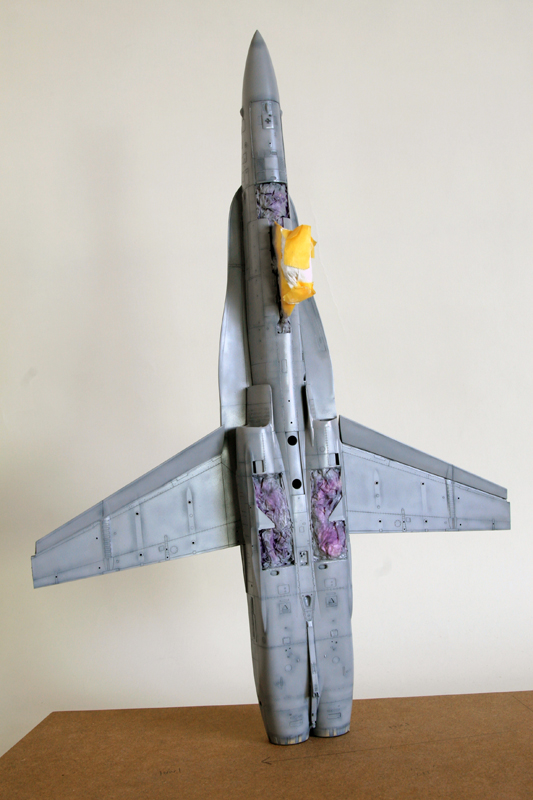
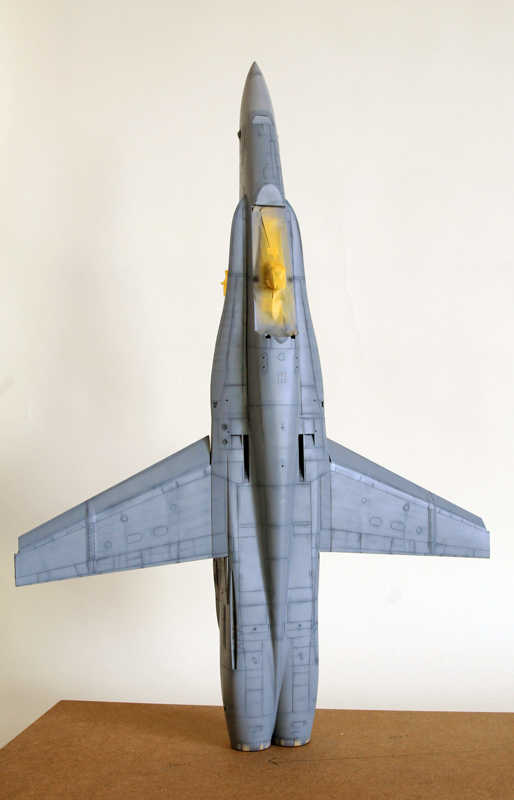
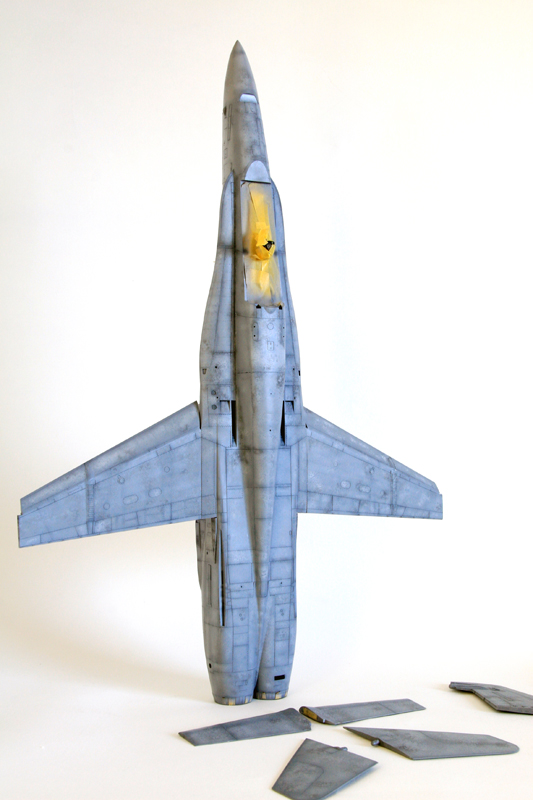
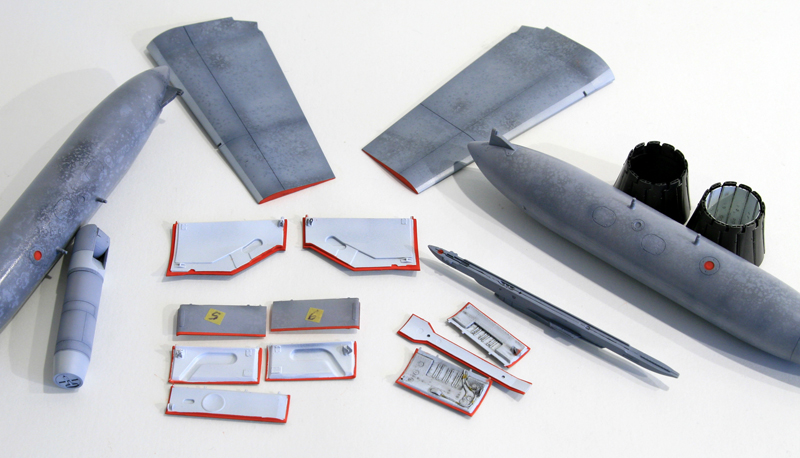
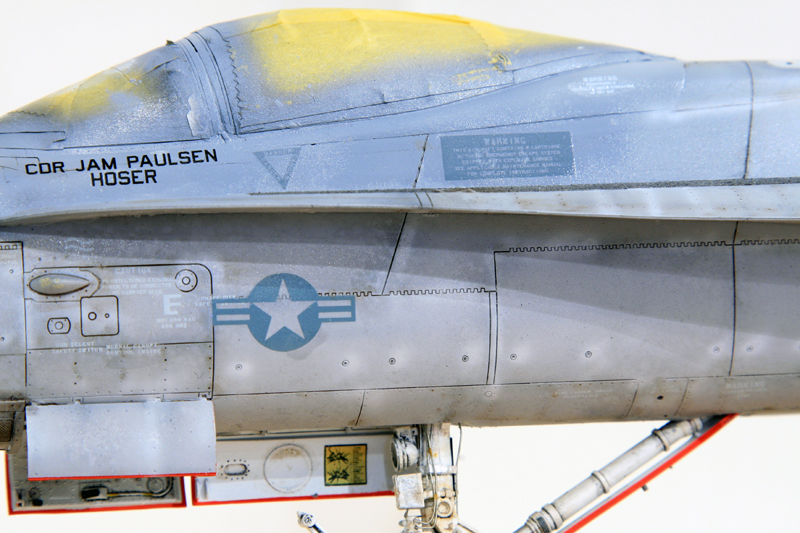
Underside was then sprayed with gunze H308 And top surfaces with H307:
I never tried before and often looked with envy at some of the end result this technique gave
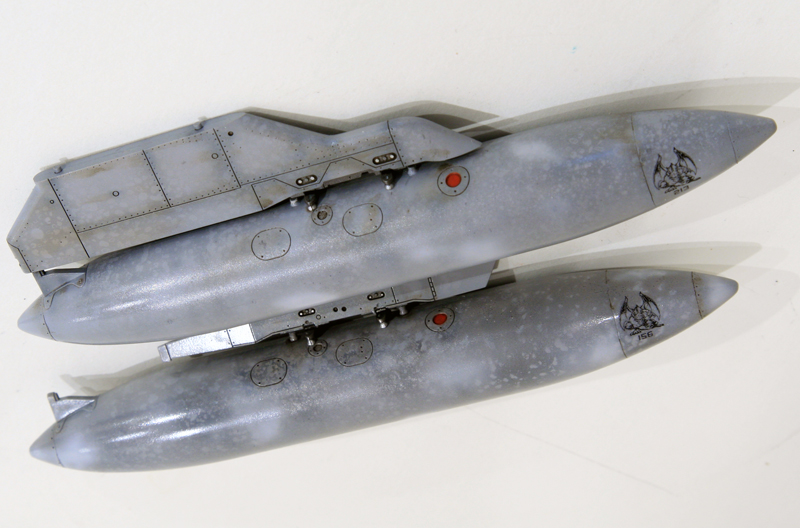
So after much reading on different forum, I gave it a go on the two extra wing bags I assembled and painted for this purpose.
Being impatient (and being on test parts) I accelerated drying the water with a hair dryer on low blow - low heat and then directly sprayed tamiya acrylic smoke. Let it dry for 15 minutes, then rinced the tanks under the tap
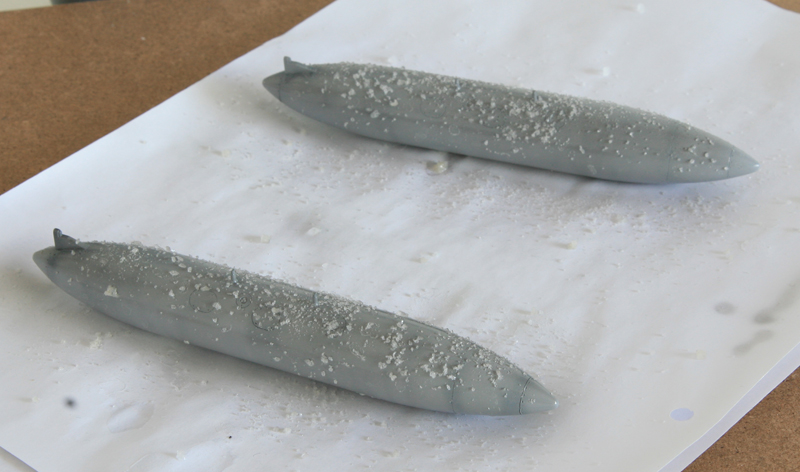
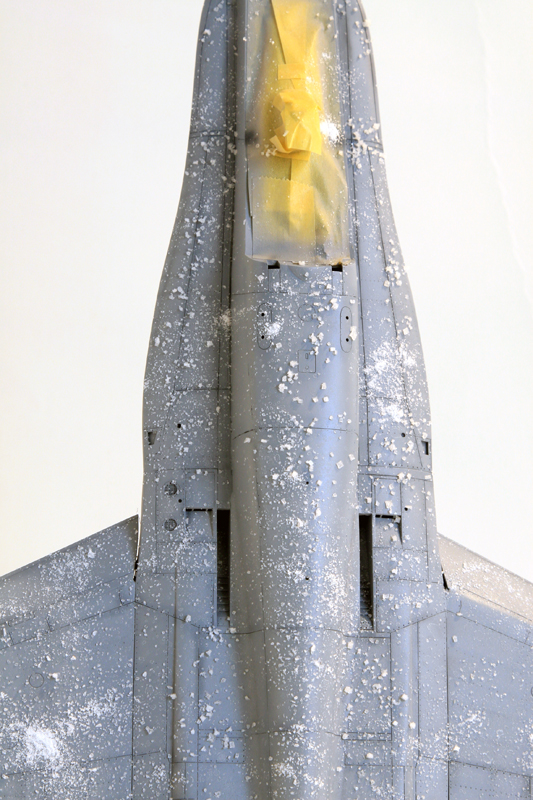
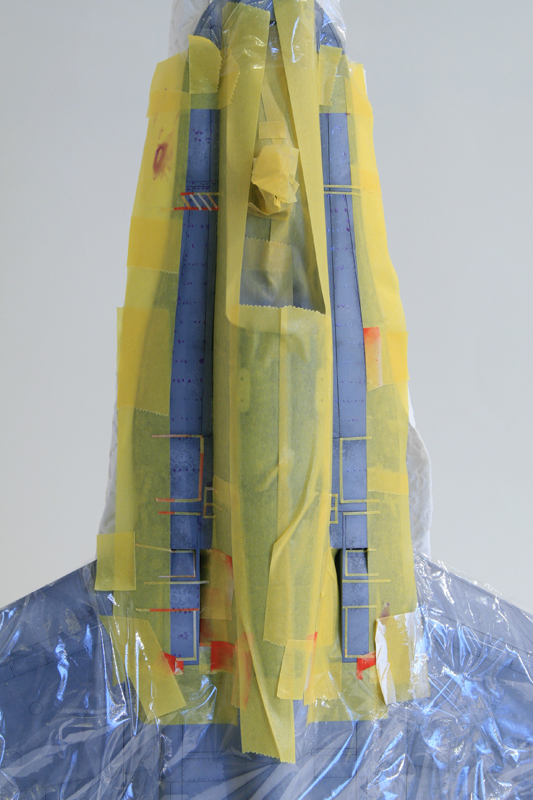
Salt sprayed
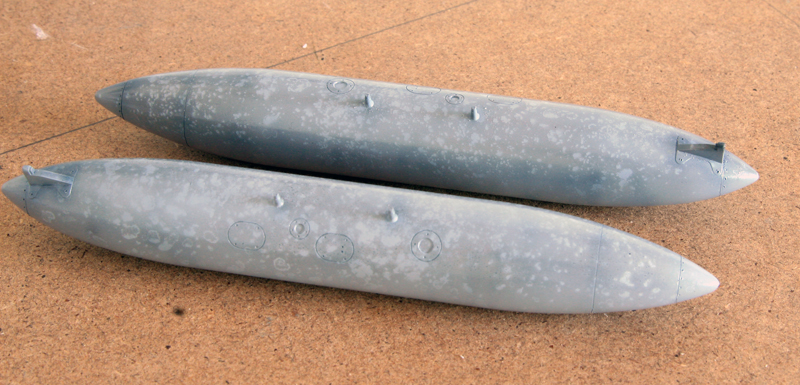
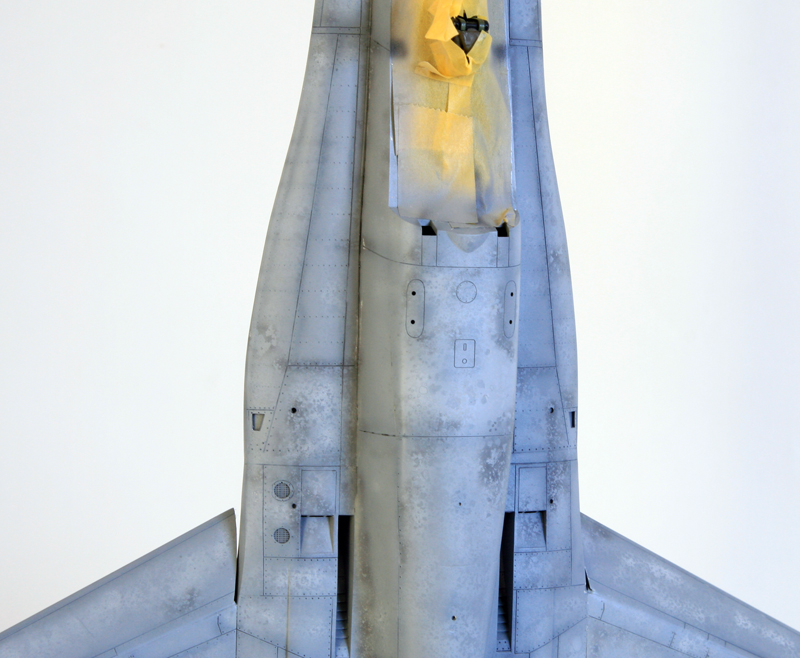
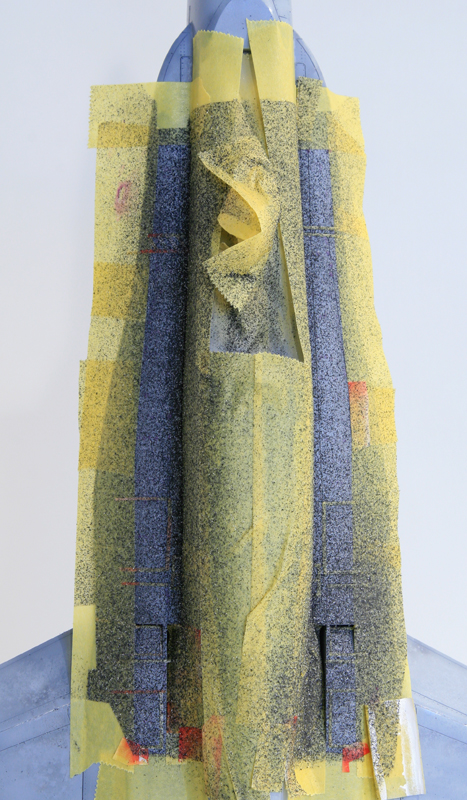
Tamiya Smoke applied
Some pro's and cons:
- It's fast. both wing tanks were done in about 20 minutes - and the fact that they are round didn't help - Apparently the acrylic is pretty resistant and if working within 30 minutes doesn't attack the base colour although the treatment is pretty rough I'd say.
- I thought the salt would be all over the place using the hair dryer but it actually stick pretty well to the plastic parts
- I started using a windex spray can but too much water comes out of it, I needed to find a thinner spray. I ended up stealing a cosmetic bottle from my wife - yes I cleaned toroughly :)
- I started with a darker shade of smoke but more subtle effect can be attained with base colour + black or more appropriately base color + white which is what I'll try on the top surface of the hornet.
- I think I also need thinner salt as the grinder I have is rather coarse.
- The temptation to overdo it is real as you don't see the effect straight away. That will need to be repeated over and over while working just to not forget :)
- the above is too coarse and too dark and i'll probably mist it a bit with base colour+white to blend it all together
I guess my salt consumption is going to sky rocket in the coming days :)
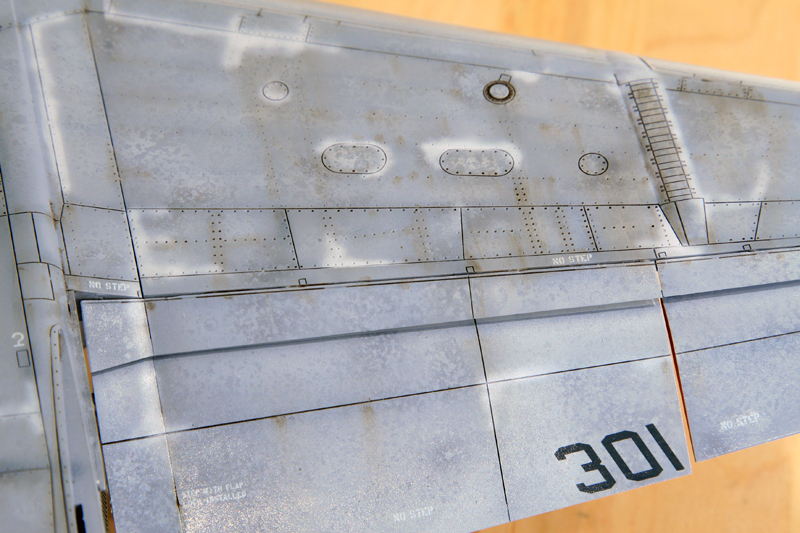
I salted the parts ramdomly, then painted only the Inside of the panels with the lighter shade and I think better result is achieved if the colours are not sprayed on all panels, it gives a better effect when areas are left unpainted.
Of course, re doing the same technique with different shades would help.
As you see I'm still trying to refine the technique on easy parts before trying on the assembled model :)
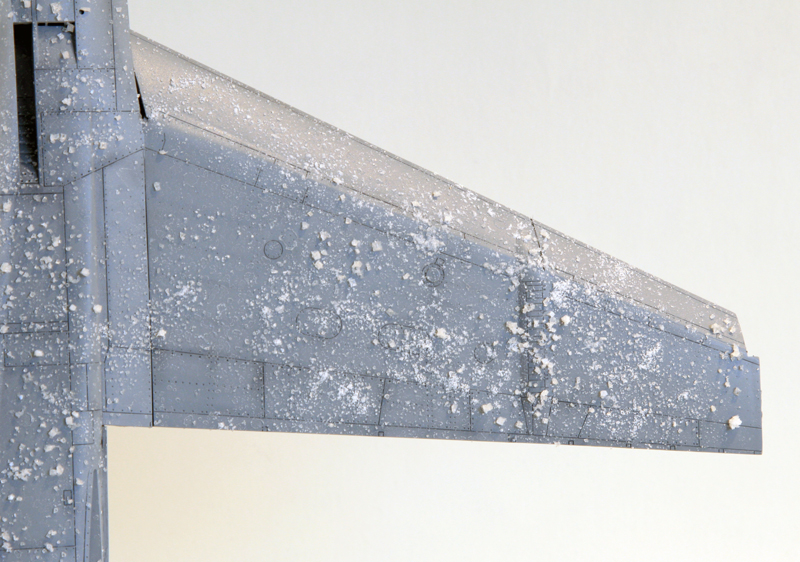
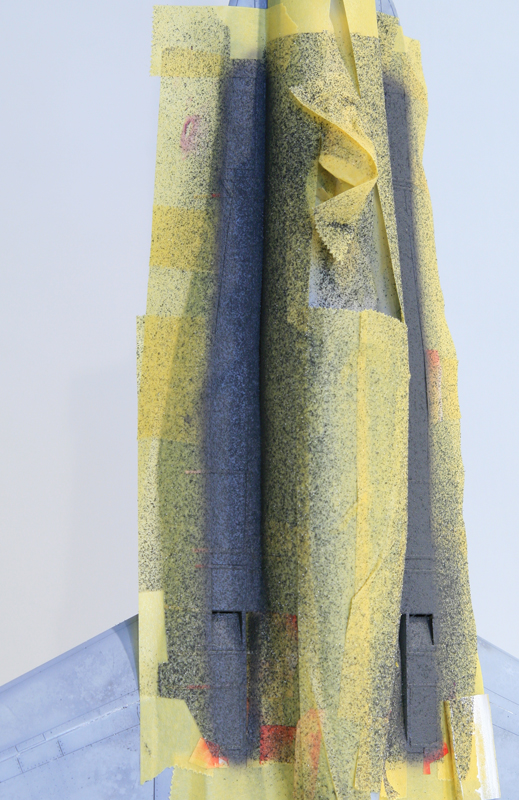
I made an extra pass with smoke, each time varying the salt spreads.
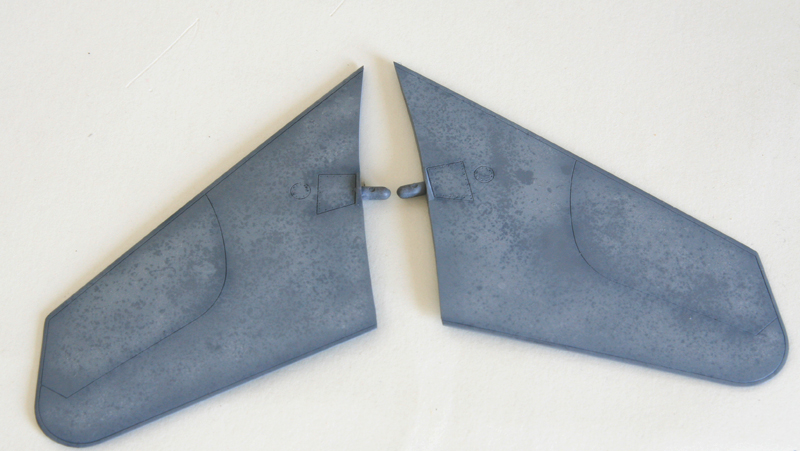
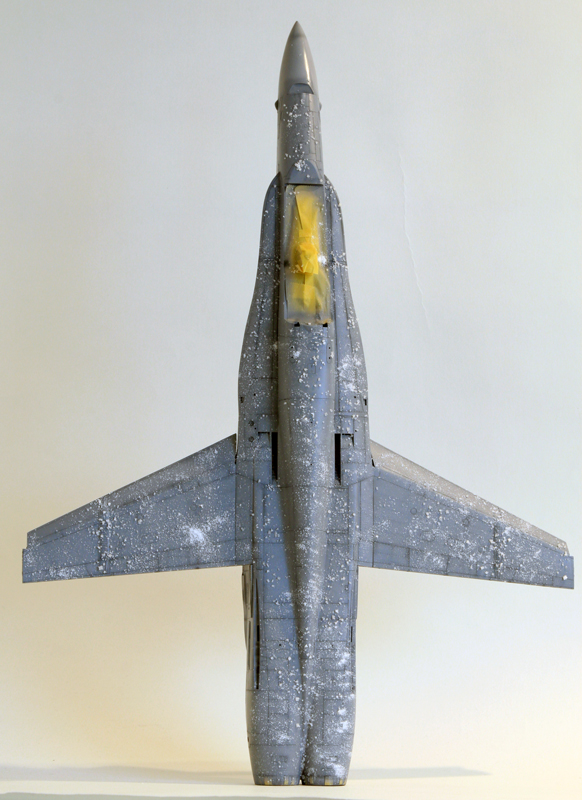
The bottom went through the same treatment with base colour (H308) + white, then smoke
Smoke is the real difficulty as you really dont see what you're doing until you remove the salt, to be exerciced with caution.
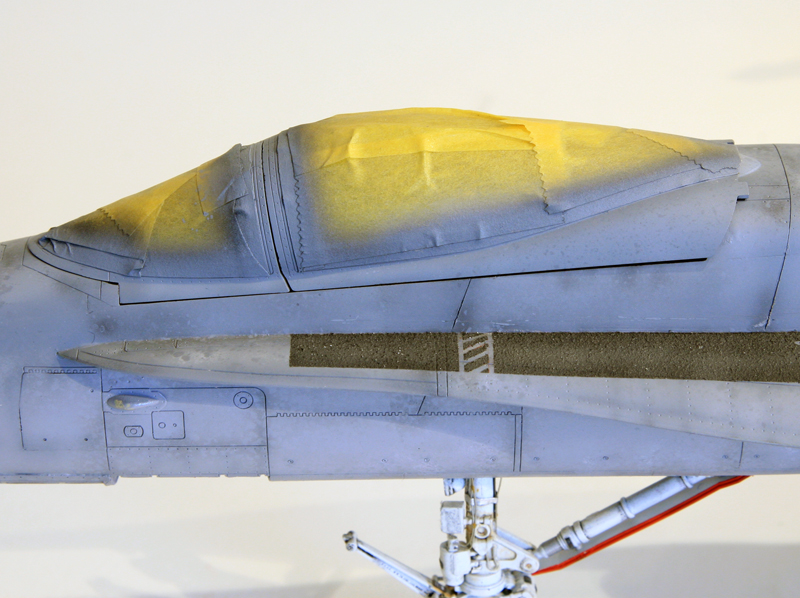
I considered the decals but they don't blend nicely with the worn paint of the F-18, so i went sourcing Grey Rust Oleum paint and started masking the model.
Rust Oleum is a texture paint can available in different colours, ideal for walkway and carrier deck painting. The full model needs to be protected , the can is very high pressure and it goes all over the place. I used a bit of maskol too in case I could recover some rivets and scrape the walkways after painting.
Then it's rust oleum painting time. Two light coats sprayed from 30-40 cm high
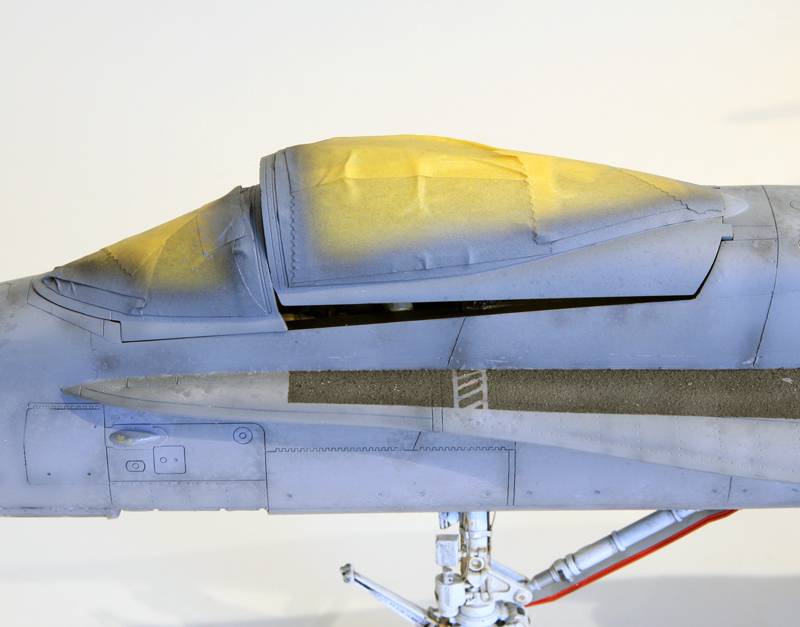
I painted the walkways with dark grey H301 and lightened the Inside of the panels with H301 + whiteand removed maskings. No way i could find the maskol anymore :)
The 45° inges are too angled, the 30° not enough, so bend them and harden then again with a drop of glue. Ultimately I was able to get both main flaps on the angle I wanted.
The ailerons are down along the flaps but to simulate the tiny correction of the pilot split seconds before landing on the deck, one of them is a bit higher than it's flap, the other is lower.
Checking the angle of the slats and flaps
Doors were painted with red lips where needed, prior to installing them the flaps got red sides as well
I then detected another bothersome problem on the academy F-18. I'm not sure if it was a consequence of my earlier action on the model but the canopy can't be displayed closed, it's too long.
But anyway, before closing the canopy I needed to finish my custom artwork for the pilot helmet :)
Let's now make sure everything in there is ready before closing the canopy:

helmet... check
pilot looking left ... checkhands on control ... check
hud in place... check
oxygen hose firmy glued in place (unlike last time) ... check
hell hole .. crew chief forgot to cover it
canopy actuator ... check
canopy lever ... check closed
compass ... in place
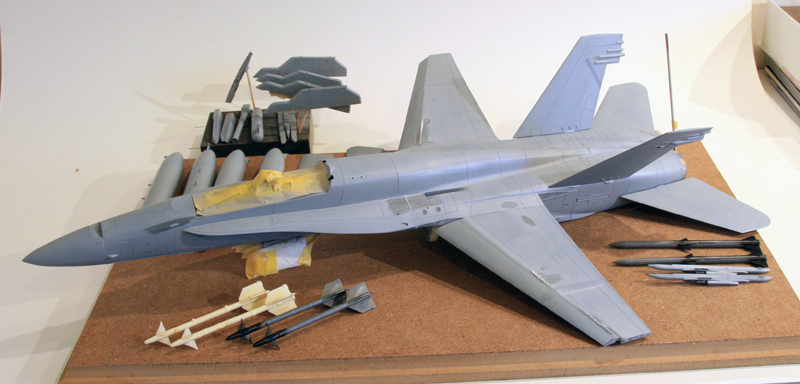
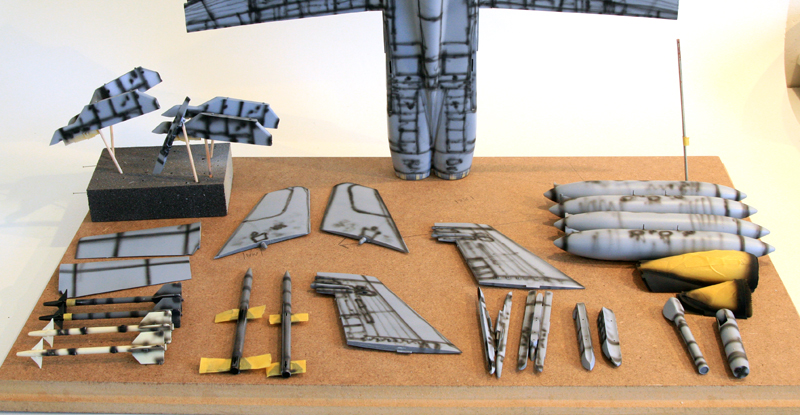
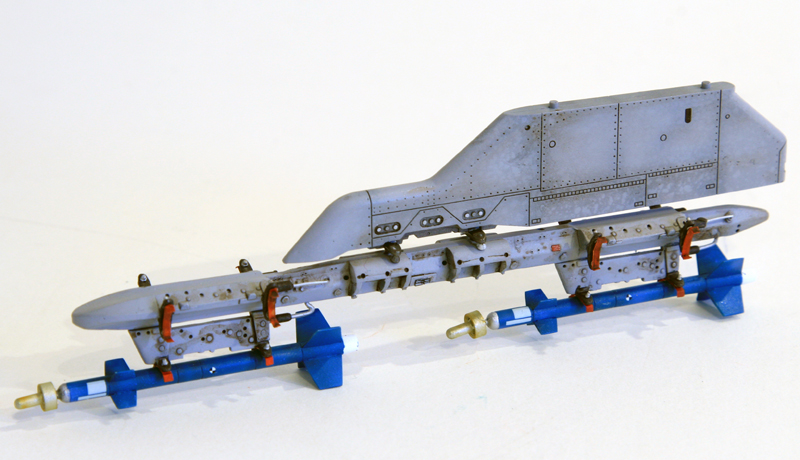
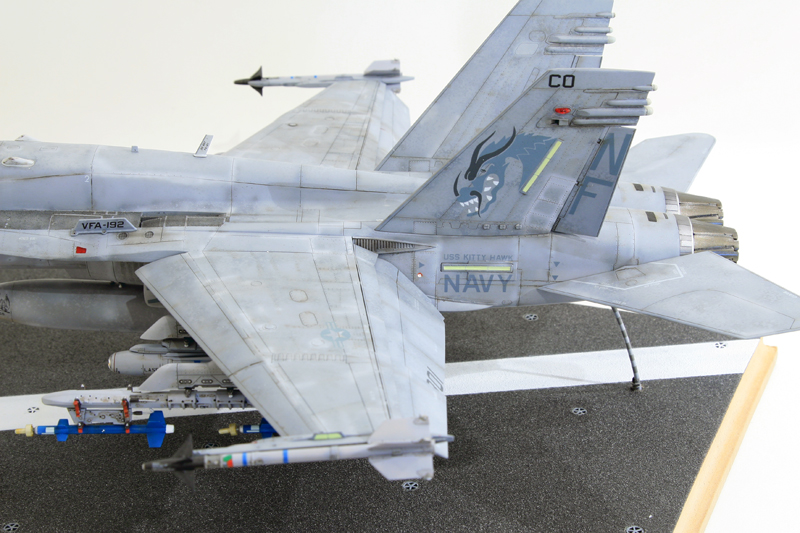
Some weapons work. I'm not 100% decided which load i'll use, probably an asymetric config with 2 bags and the IMER with 1 LRDG on the primary station.
I'll be flexible for the rest. the Zacto's sidewinder are awesome.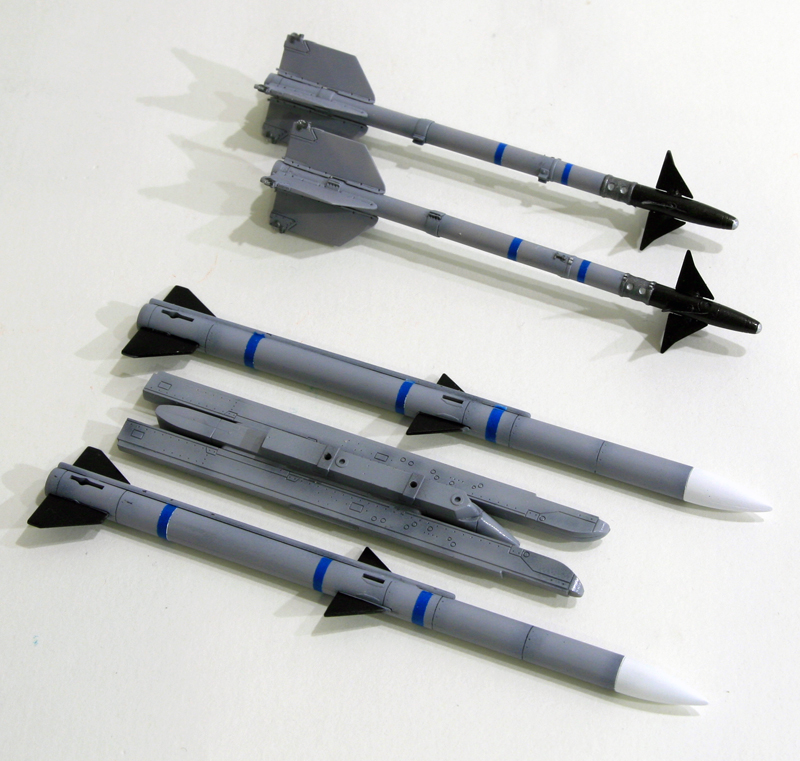
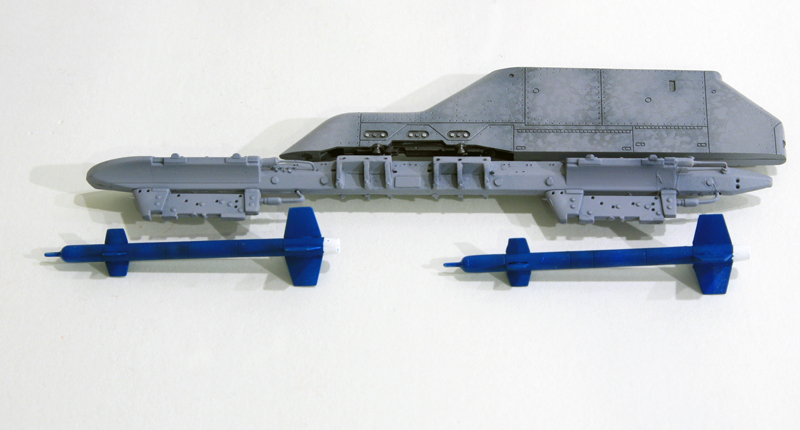
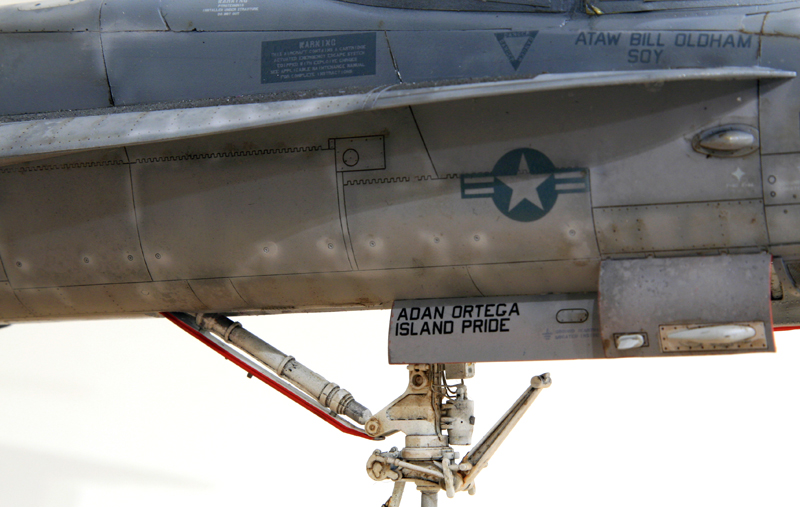
Inert laser maverick, chin load and the hook support, the whole model will be supported by that small rod!
After a full day spent decalling the hornet (kit's decals are a bit on the thick side) I needed a break and worked on the carrier deck section.
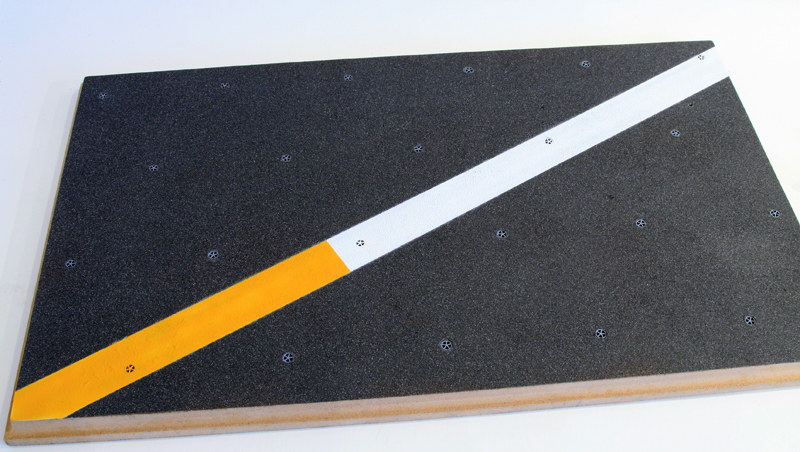
The base is MDF wood 18mm thick. I started drawing 90mm radius circles for the location of the tie down and bore 6mm holes in the wood.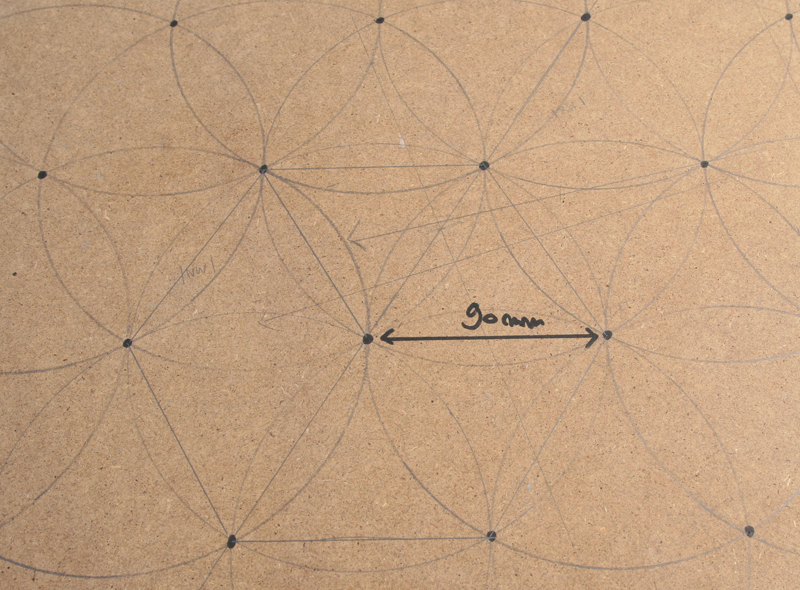
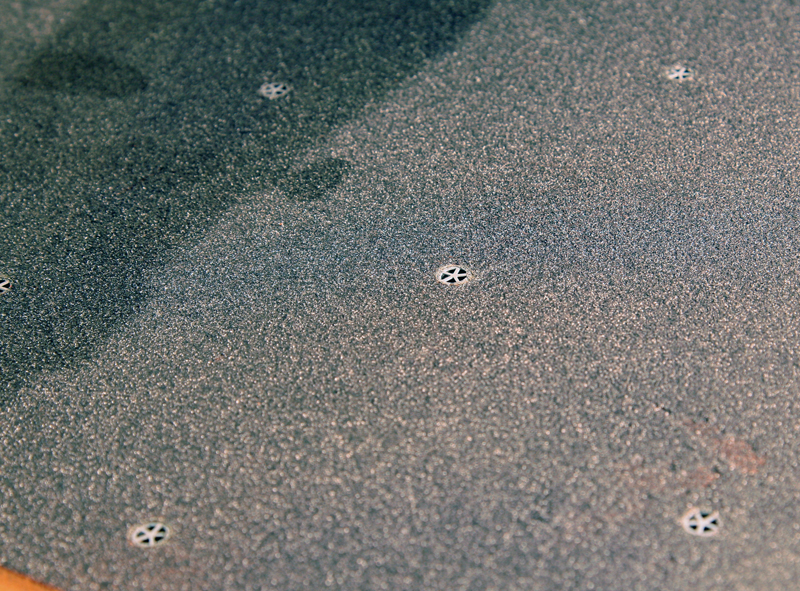
The deck received a couple of rust oleum coat to simulate the anti slipping revetment.
First time I try that and I'm happy with the texture result.The tie downs were then painted and glued in place. They are PE tie down from J's work.
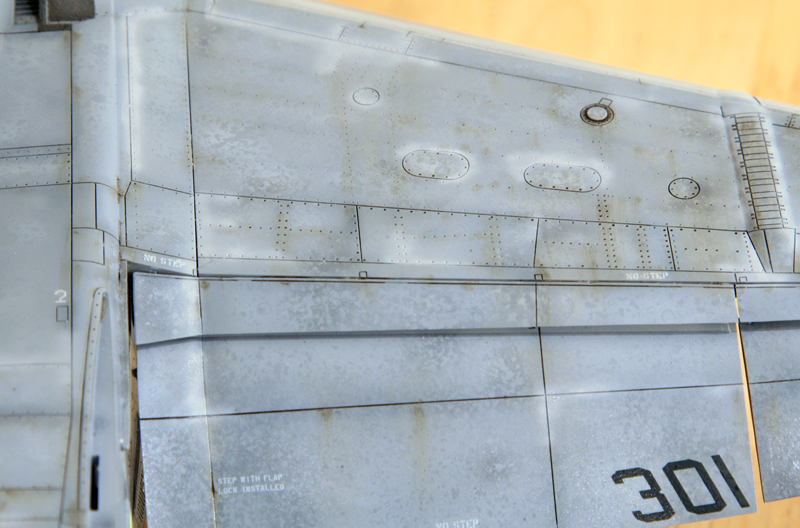
Back to the model before spraying the centerline. Time to get that 0.15mm airbrush needle out of storage:The model has been decalled, gloss coated and washed. Now I'm painting the anti corrosion touchups.
Once done, it will be faded back a bit into base colour.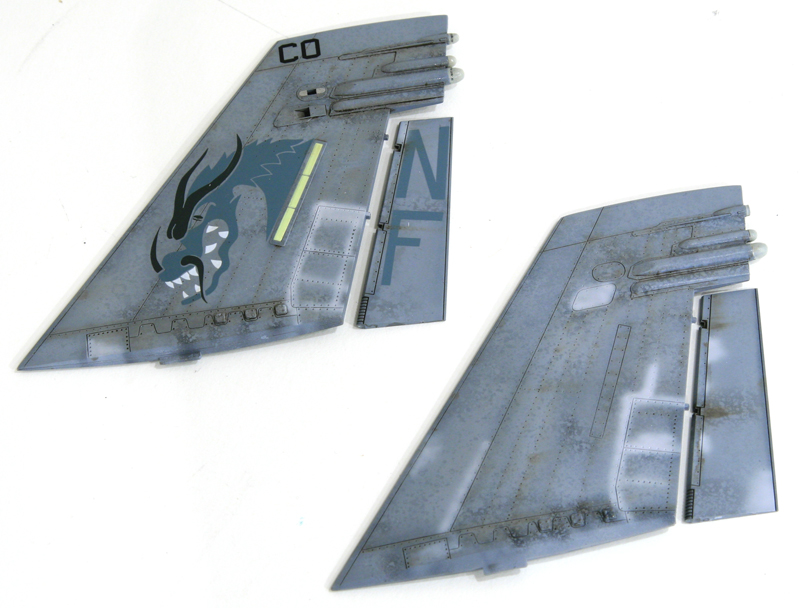

The wing bag and centerline received the same treatment, the decals are homemade
Same kind of work on the top wings
And faded back with base colour
The deck ceterline was painted: 30mm wide, about 1 meter in real life
Next is fading a bit that line and painting tire marks. Of course I'll need to solve the wire issue, I'd like to have one wire placed a bit forward of the hook.
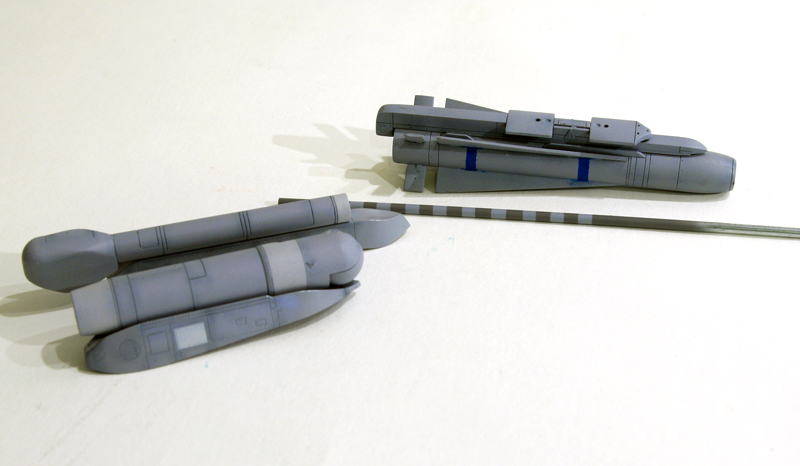
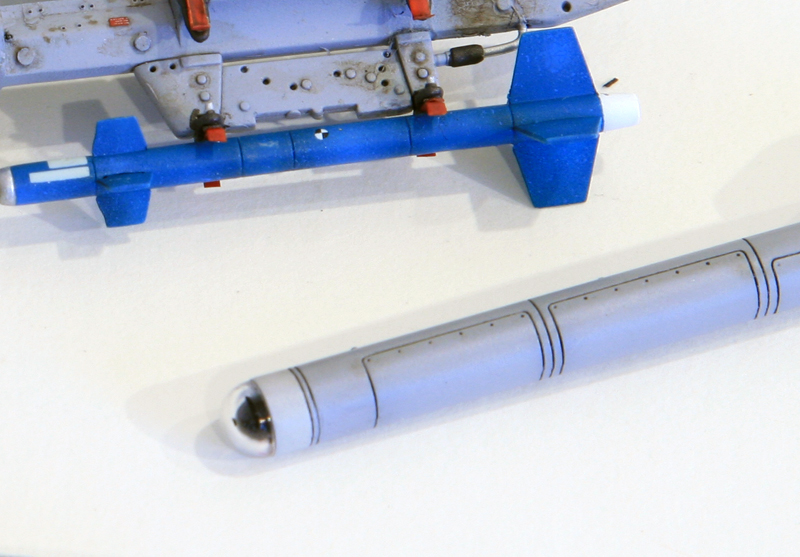
Weapons are finally done, my highlight is the modified IMER and the two blue LRDG. I hesitated putting only one but in that case, it has to be the rearmost one and I wanted to have one in front so I decided to put two.
The AN-ASQ-173 and AGM65 have been updated with some internal tubing and lense to simulate the opticals. much better so. it's easily done and really makes a difference.
Simply bore a hole in the front of the weapon/sensor before gluing the lens.Glue another lens (or round the end) to a tube matching the hole, paint them (in the case of the AN/ASQ173 in black with an optic in gloss black.)
insert the tube into the hole and then only glue the final lens.
With the tails installed, the resin exhaust and all stores the Hornet is quite heavy for that 2mm supporting rod :) but she's holding ok.
Model completed in November 2013