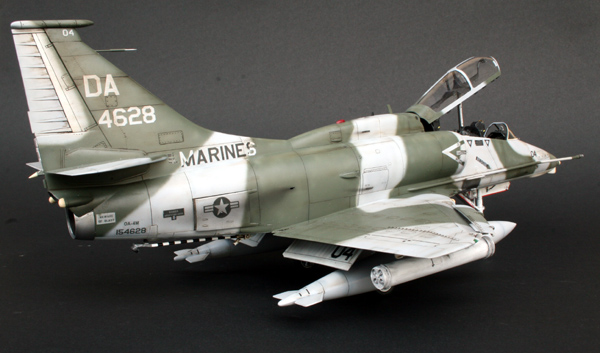
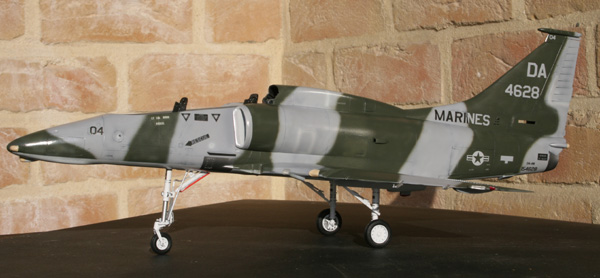
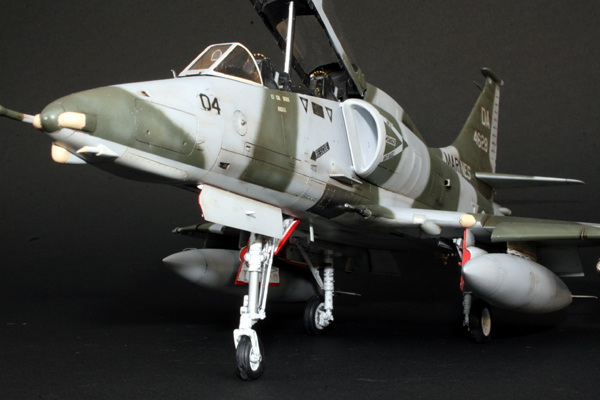
The OA-4M will be bandit 04 from the H&MS 32 with an interesting paint scheme of green and grey.
Now I'll need to get a correct picture of the OA4M offices to see where are the differences with the TA4J so I can do some scrath detailling.
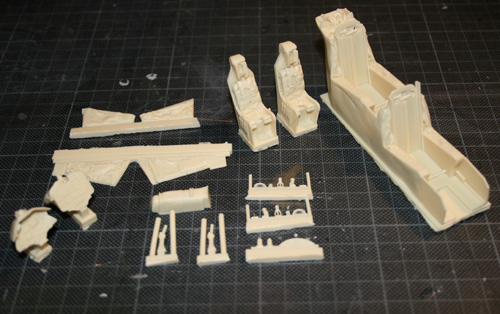
I started by preparing the resin cockpit and doing some surgery on the fuselages to fit the cockpit correctly and the A-4M resin parts. At this time, I'm not sure yet if I'll use the resin for the nose and tail conversion. I might keep those around for a future skyhawk and use the hasegawa plastic bits instead.
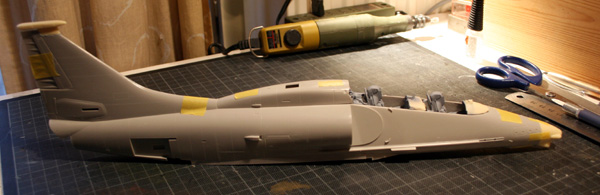
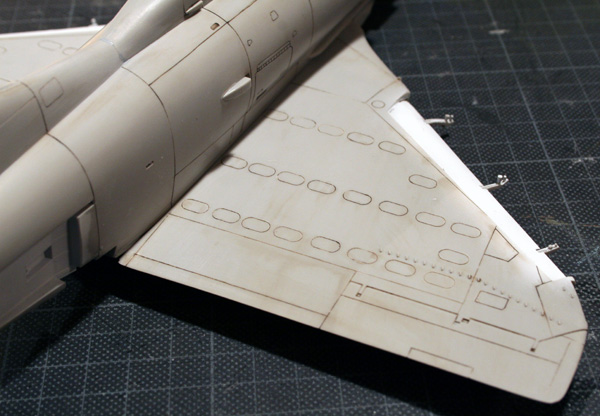
I'll separate the lower flaps from the main wing as I want to have the lower flaps down on the bird.
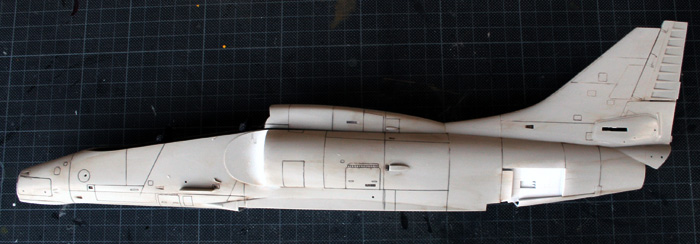
I also started rescribing panels lines. I will add some rivets later on, after having sanded all the additional parts sucha s nose cone, hump, tail etc etc...
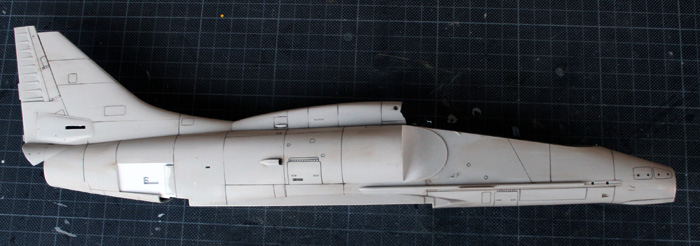
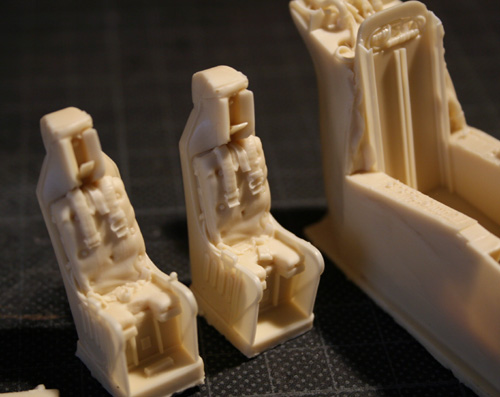
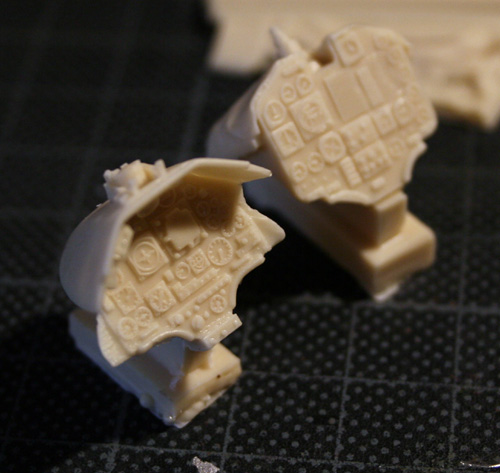
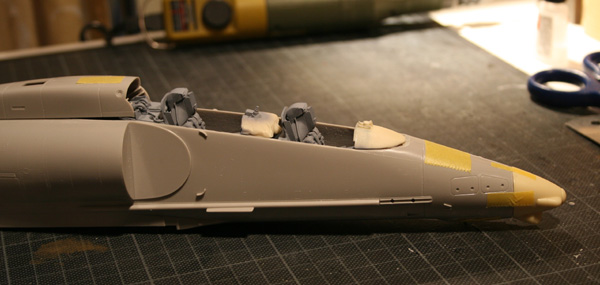
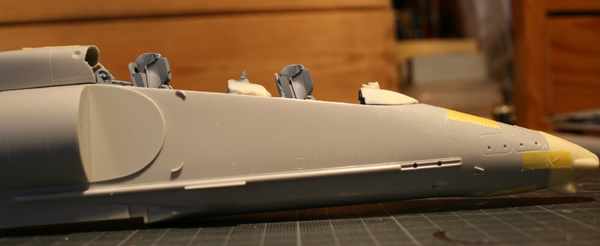
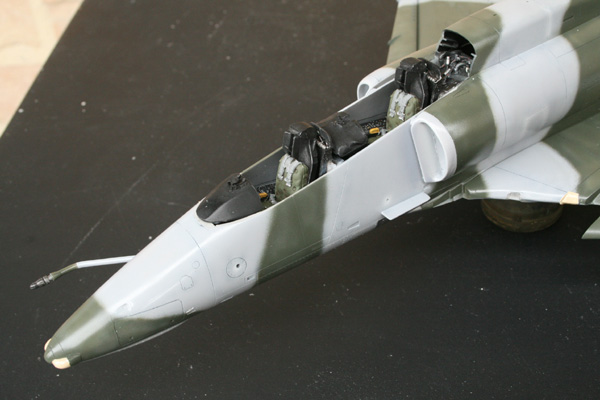
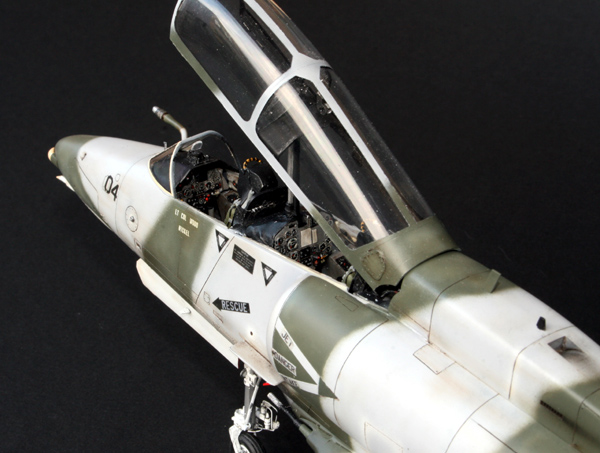
I then worked on the cockpit. Obviously, the seats aren't finished but I am now getting ready to close the fuselage.
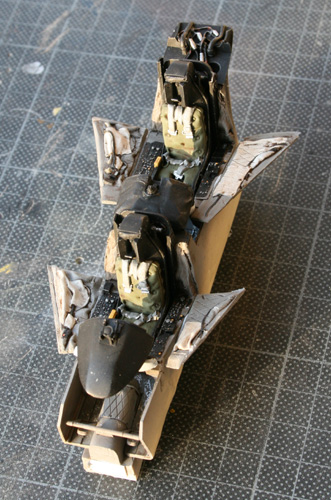
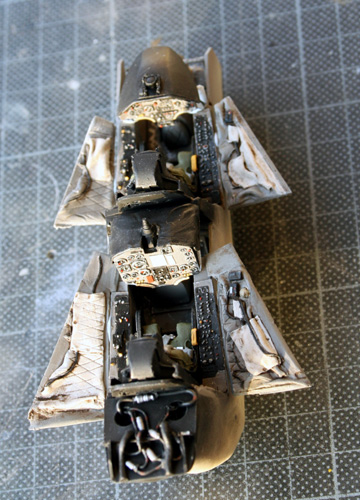
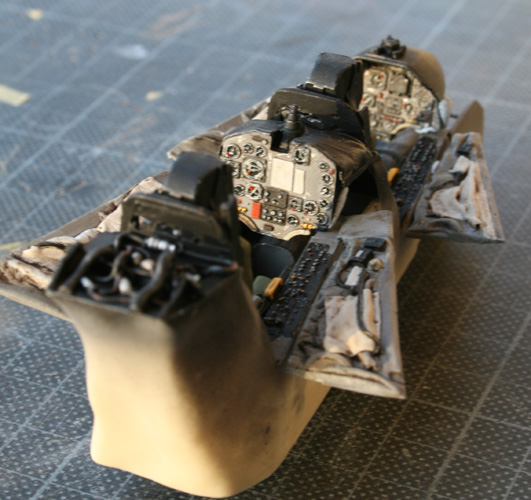
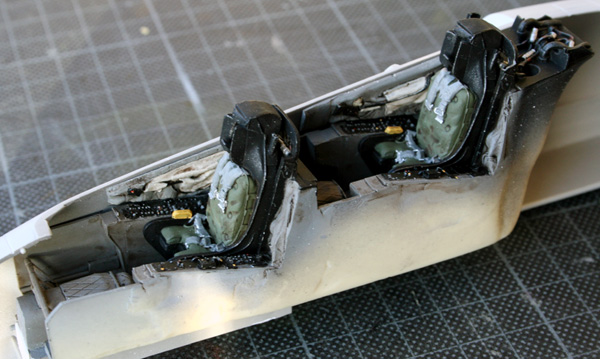
I must say, the Black Box TA-4J pit is great. I found the fit to be very good and even the OA-4M back hump fits perfectly with the backside of the tub - although that part is pretty different than the TA-4J.
The side walls needs to be carefully trimmed down to have a good fit and the left side are somewhat harder to fit than the right side. No big deal.
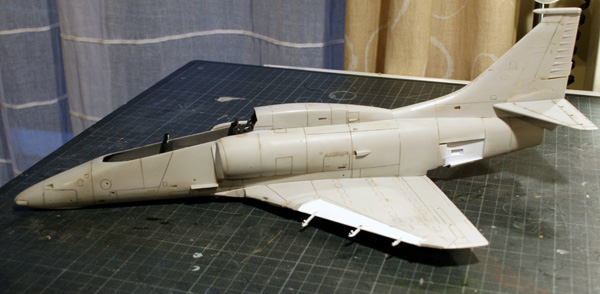
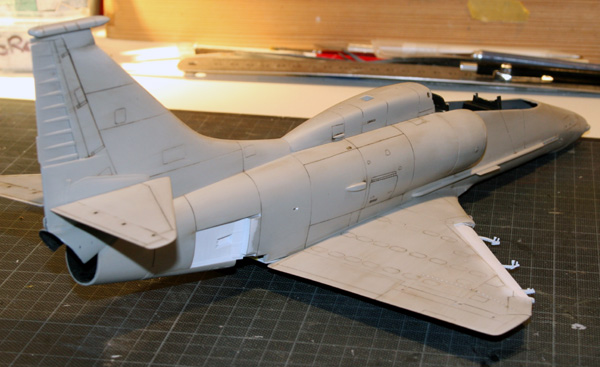
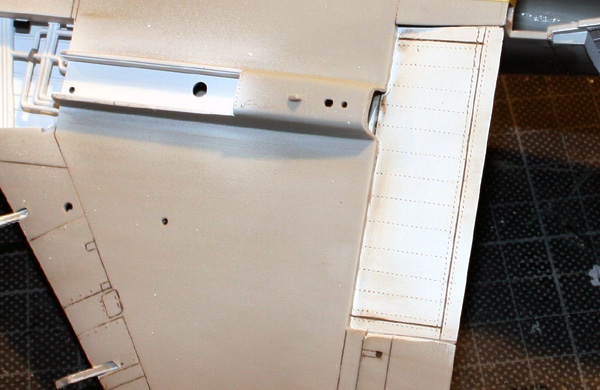
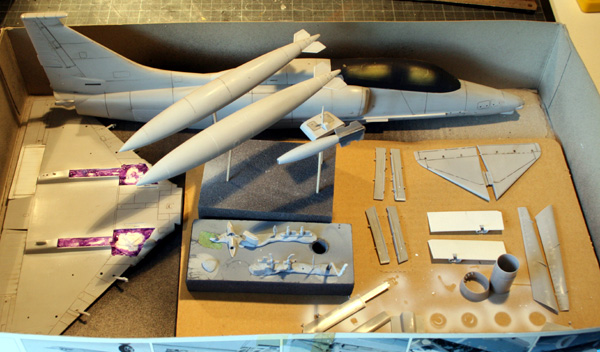
The next sessionwas spent finishing the scribing job and adjusting different parts on the fuselage (intakes, nose, tail antenna) The wings are also assembled and almost ready. I plan on doing some rivets, but probably after the primer.
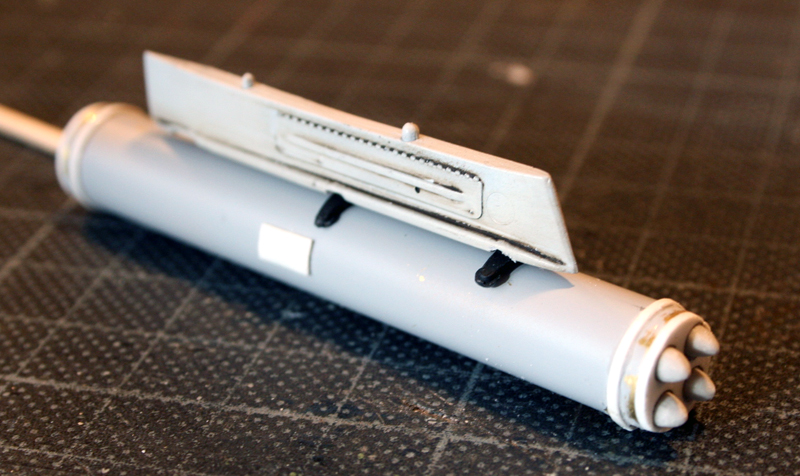
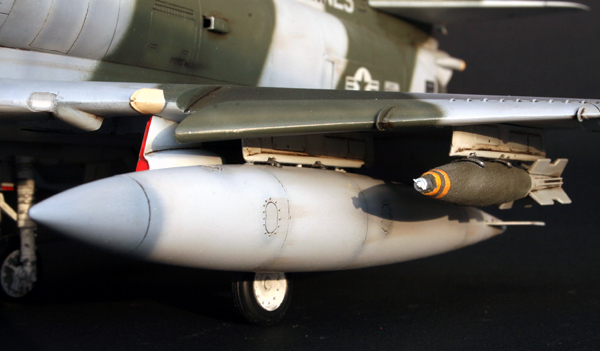
The underwing stores will be a snakeye (from the F-18 academy) and a LAU-10 rocket pod (scratchbuild) and two wing tanks. Centerline will remain empty. I planned on doing a MER with 25lbs exercice bombs but those are impossible to find and I don't feel like scratching 6 of them.
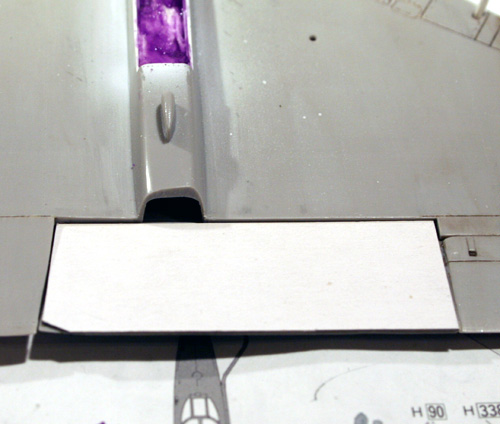
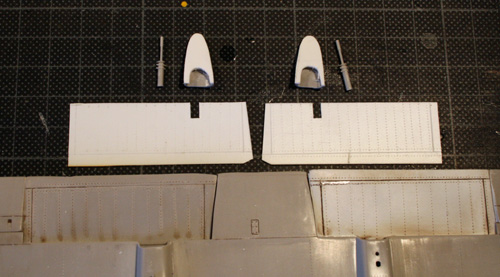
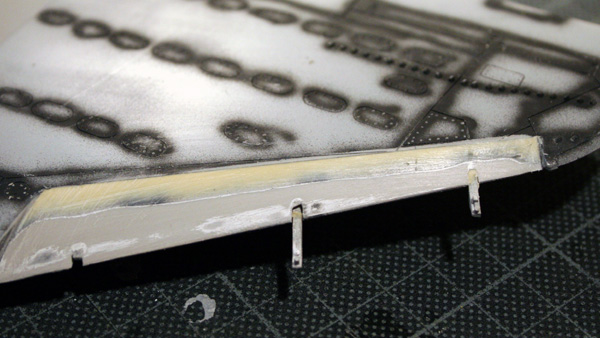
Probably not the best way to do it but here is my try on the flaps:
With the wings assembled and the lower flaps sanded down, I first started with creating a paper template. Then from there, I cut two identical plastic card parts. Those were then sanded to make the chord line thinner:
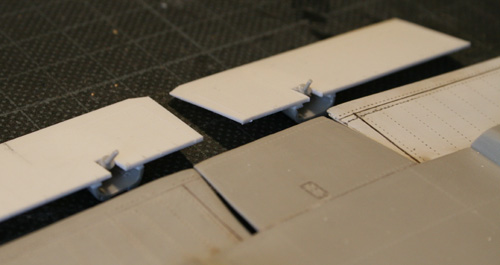
The actuators bulges were cut from the wing and I also glued them on plasticard then sanded to shape.
Obviously, the actuators will need to be sanded down, so the new angle fits.
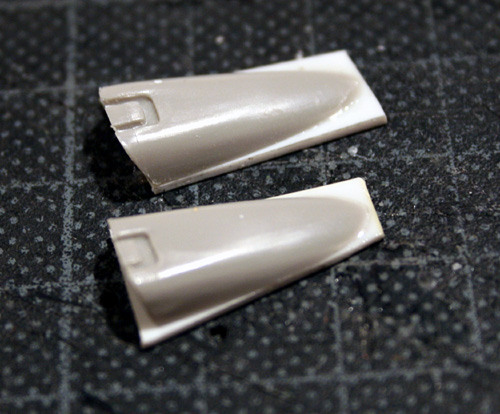
Then both sides of the lower flaps are engraved and detailled. A notch was made to let go the hydraulic rod. This comes from a F-104 engine cut to shape.
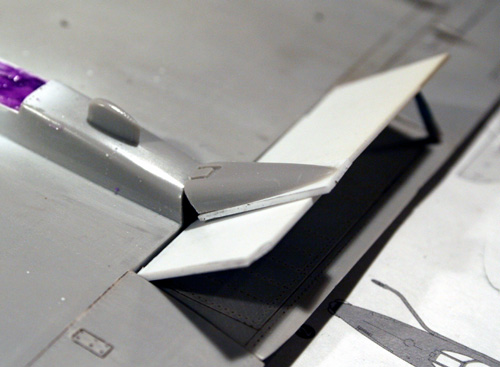
The flaps assembled and ready:

A final dryfit:
Not sure at 100% but I think the inner flaps on the aircraft I'm doing seems to be grey, so no red i'm afraid...
I put some finishing touches before the painting starts.
The airbrakes will be just a notch open (that saves me the hassle of the sanding if I were to close them fully), so I simply secured them in place with Bluetack.
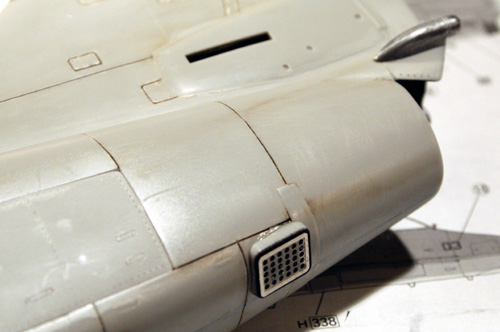
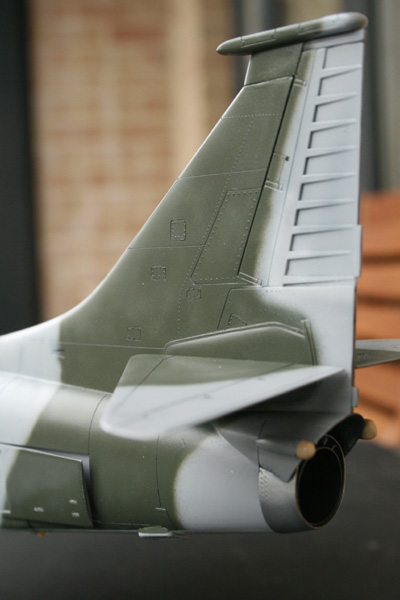
The antenna on the tail are supplied in white metal. One is bigger than the other, better check the pictures to avoid doing a stupid mistake.
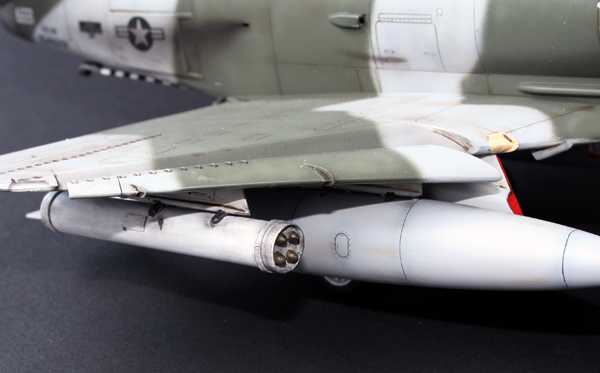
The OA-4M seems to have retained the third chaff&flares dispensers that is not featured on the A-4M. On the other hand, it does not have the parachute container below the nozzle.
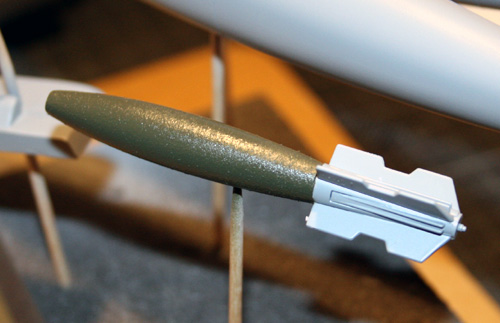
For the first time I tried to create the fire resistant coating on USN & Marines bombs. I tried different mix of putty and glue but finally opted for Tamiya Putty diluted with Mr Color Thinner. The result is not 100% satisfactory. I wanted to have a rougher effect. I might try with plastic bits mixed with liquid glue, later...
Finally the model and subassemblies are ready for primer, I painted the canopy Black first so the inside shows black. that's easier than painting the inner canopy frame afterward .
I debated for long to assemble the wings to the fuselage before painting. I decided to try keeping them separated at least until I paint the undeside colors. It seems a good fit anyway and shouldn't pose too many problems - At worst, I 'll have to sand a little through the underside colours...
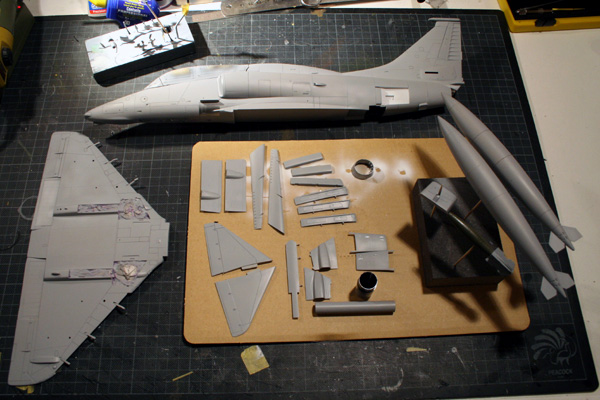
As usual I prime my models with Mr Surfacer 1000 then it's checking time for any spot that needs more sanding, cyano filling or panel lines correction.
Once I was happy with the result, I finished by pre shading the panel lines in black... I do really need to master that technique better.
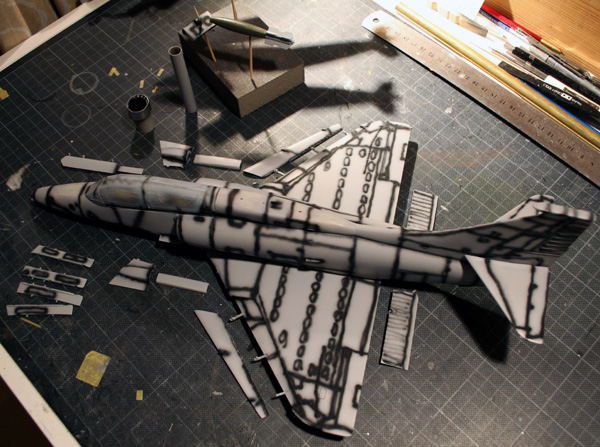
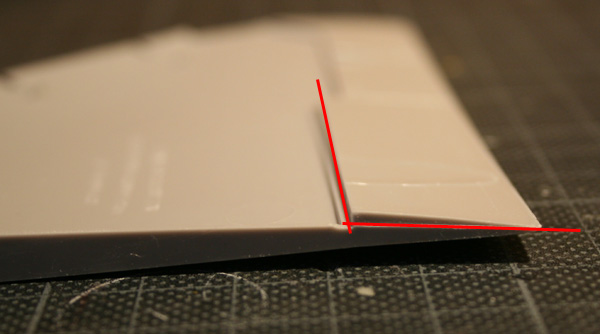
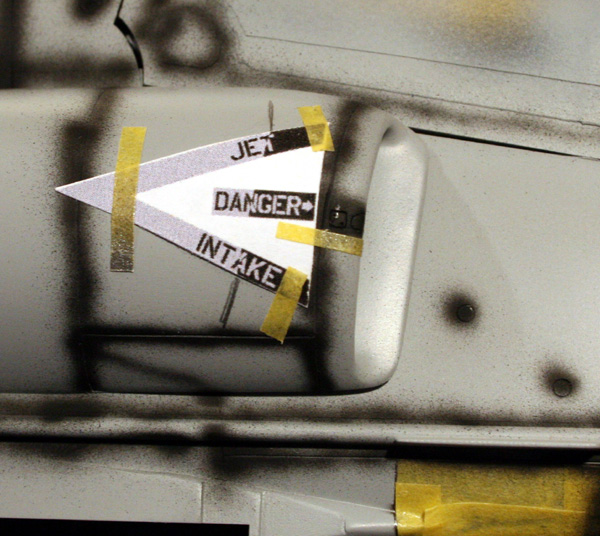
I thus printed my homemade decals on paper pand cut them to shape before taping them to their place on the model. That allows me to draw a precise demarcation line between the future grey and the green coats. I will also need to have that demarcation line as thin as possible.

So I filled the stair effect with putty to correct the problem:
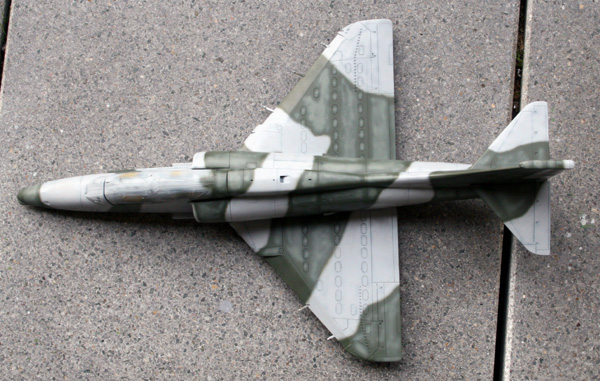
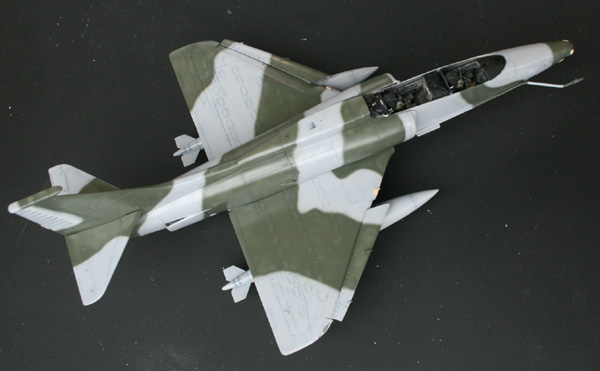
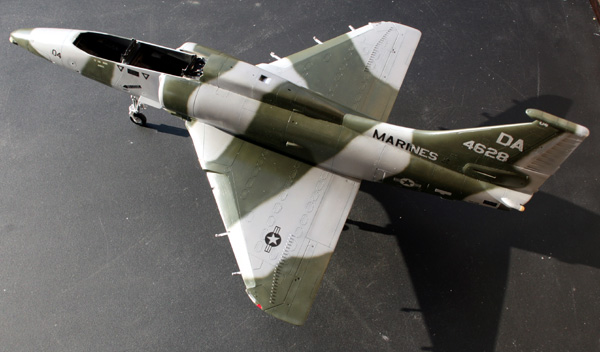
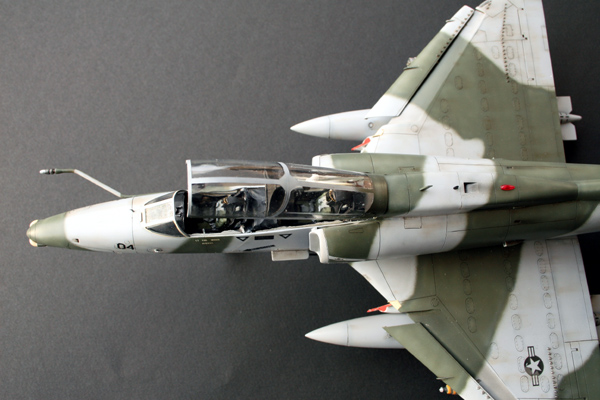
I also spent some time to paint the upper fuselage with the green/grey paint scheme.
The green is H309, grey is H308.
I was not happy with the preshading left after the green was applied so I lightened the green with white and sprayed the inside of the panels, especially on top where the paint should suffer most from discoloration.
The green is H309, grey is H308.
I was not happy with the preshading left after the green was applied so I lightened the green with white and sprayed the inside of the panels, especially on top where the paint should suffer most from discoloration.
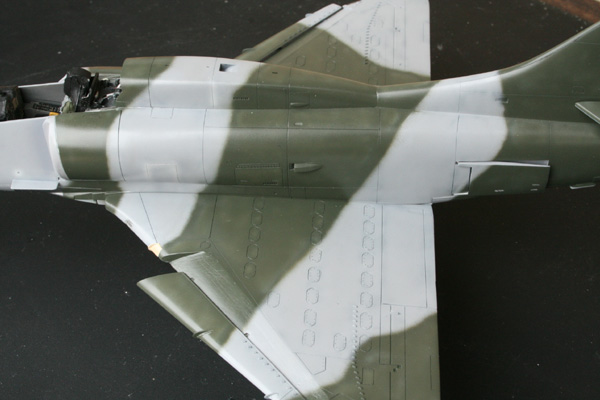
Well, this is what it gaves after a few hours and a gloss coat, ready for decalling.
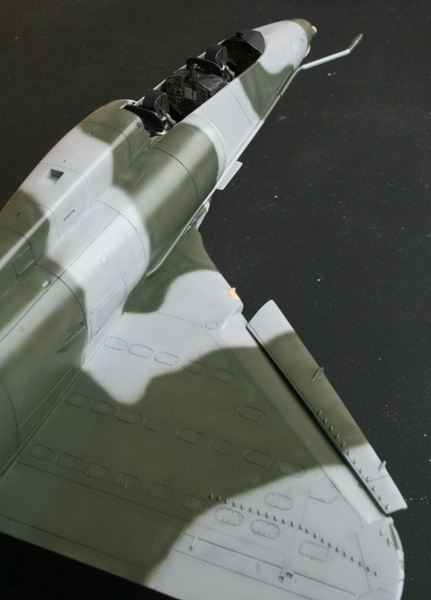
The technique I used was passed to me from a fellow modeller. Once the inside of the panels have been lightened with base colour and white, the base colour heavily thinned with Mr Color thinner is spayed on the green part of the camo. The Mr Colour thinner is not an acrylic thinner, while the Gunze Colours are acrylic.
the above mix has the particularity to make the final coat quite transparent, a little bit like the Tamiya smoke. That's a perfect overspray for attenuating the above effect.
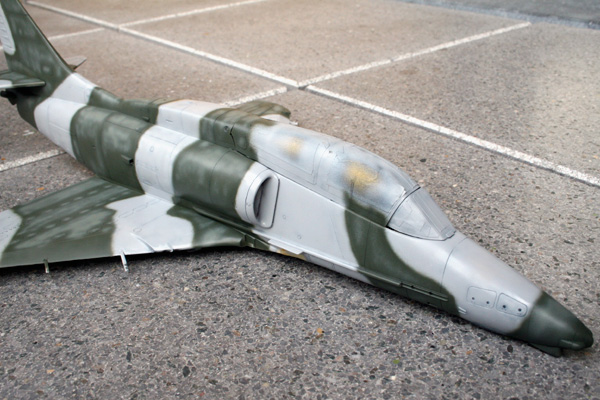
This is a bluetack dryfit of the subassemblies to have an idea of what the finished model should look like. Underside is painted H338 and I retained H308 for the wing tanks.
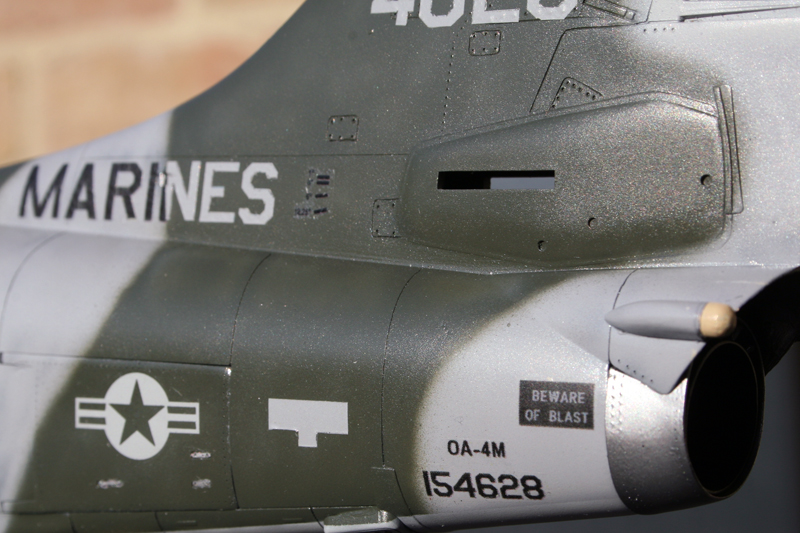
Some details shots:
It's the first time I try that and I'm pleased with the effect.
The JATO attach points on the speedbrakes and the exhaust are alclad. The antenna tips are usually radome tan H318. I finally decided to paint the inside of the speedbrakes the same grey as the fuselage grey (H308) had to fight myself a lot to refrain from placing a touch of red in there
It's decal time.
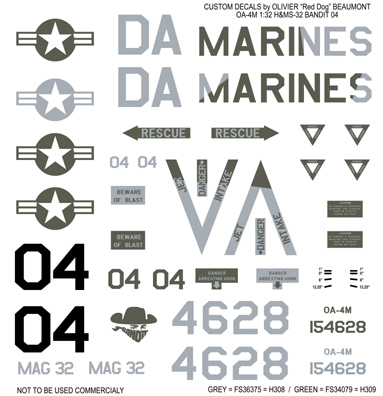
As the aircraft paint is exotic, I need to design my own custom decals for this model. The artwork is rather simple except the two colours text, but the main problem comes from the fact that the light grey decals are too light and don't quite standout well when placed on the green paint. They are too transparent.
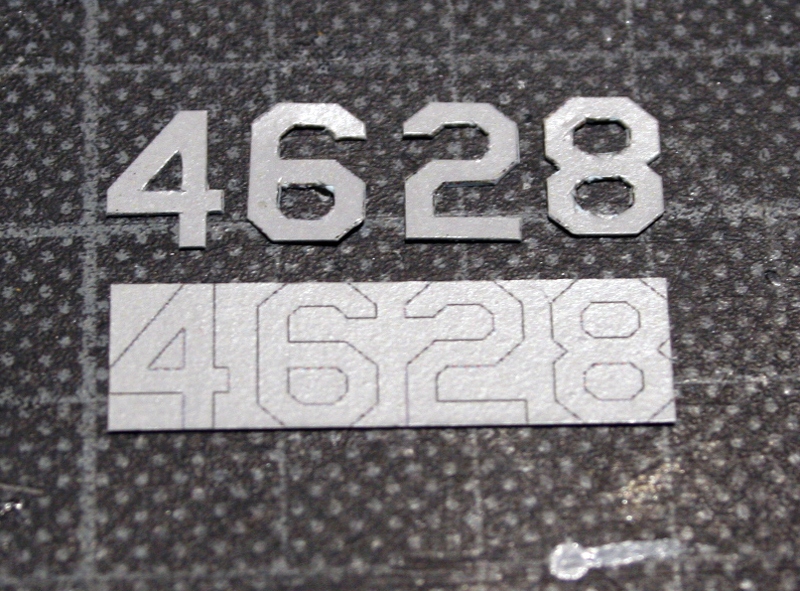
I finally ended up spraying the clear decal sheet in H308, then print the outlines of the artwork in black only so I could cut them out from the sheet and have satisfactory grey decals.
By not applying a gloss coat after the black print, I can easily erase the black after the cut is done. The green part of the decals are from my original artwork that you can see above.
Tedious work, especially for the very tiny decals almost impossible to cut out. Sometime, I had to find compromises...

The rocket pod was built from scratch:
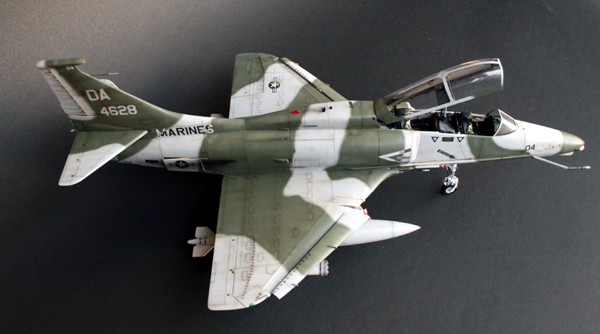
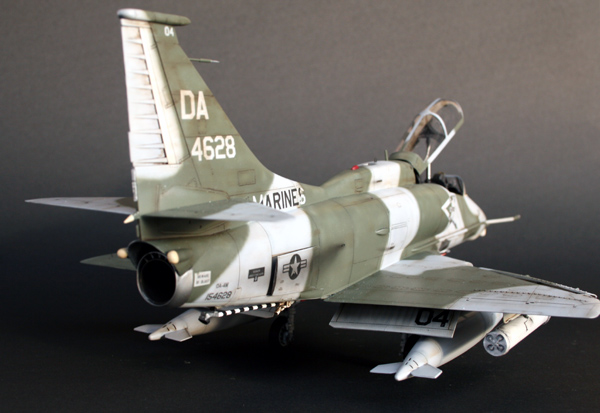
After decalling, a coat of gloss varnish was applied to protect the decals, then the model was weathered with raw umber oil washes and a final coat of matt varnish was sprayed. The model is finished:

The custom artwork is available for download:
Model finished in March 2007.